
 0 ITEMS IN CART
CSA BOX CONTENTS WEEK OF SEPT 30TH
10/02/19 — Scott
 CSA Box Contents Week of Sept 30th
Large Box
Bok Choy, Baby
Cucumber
Eggplant
Greens, Collards
Greens, Mustard
Herb, Parsley, Flat
Melon, Farmers Choice
Okra
Onion, Multiplying
Potato, Sweet
Radish
Turnips
ARUGULA & PURPLE DAIKON RADISH POTATO SALAD
10/03/19 — Ada Broussard
Recipe by Isaac Winburne and Heydon Hatcher
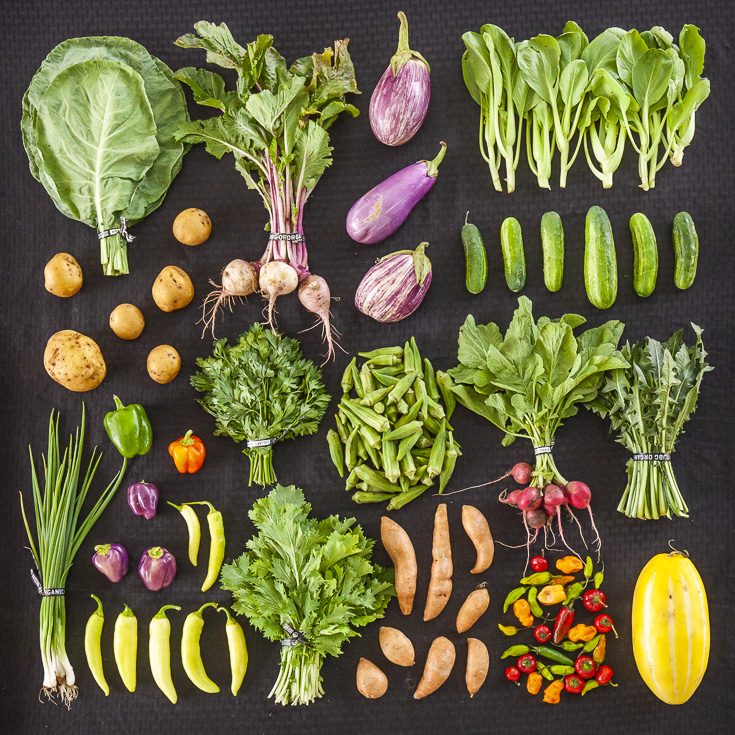
The arugula and purple daikon radishes bring the zing in this spicy spin on the traditional potato salad. Swapping ingredients is a must and such a fun flavor experiment when you have beautiful, bright, bi-weekly, seasonal ingredients from JBG. When we opened our box to find a bag of our favorite peppery greens and those piquant purple root stunners, we couldn’t wait to augment our potato side with some pizazz AND vibrant beauty to boot. This particular recipe uses a bevy of ingredients from the CSA box - and as seasoned CSA members, honestly, what more could you ask for! We like to think of this as fall’s tribute to a summer staple, as the days get shorter and shorter and **hopefully** the temps get colder and colder.
Ingredients
- 6 boiled potatoes
- 3 boiled eggs
- 2 purple daikon radishes, sliced paper thin
- 2 Claussen kosher dill spears, cut in half and chopped finely
- A quarter of a small red onion, thinly diced
- Handful of arugula, coarsely chopped
- 1 green onion, thinly chopped
- 1 clove of garlic, minced
- 1 lemon
- Spoonful of Claussen pickle juice
- Salt
- Pepper
- Extra virgin olive oil
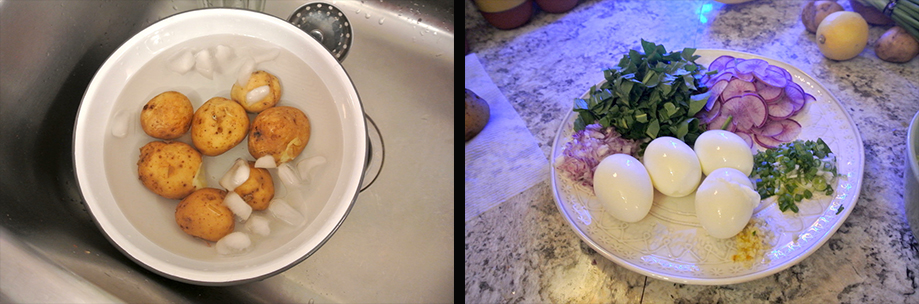
Boil the potatoes in lightly salted water (amount of salt up to you, lots of folks have lots of differing opinions about this!) until they are soft, about 20-25 minutes. Test with a fork - it should easily pierce the potato. Boil three eggs for about 9 minutes. Throw potatoes and eggs into an ice bath to cool down.
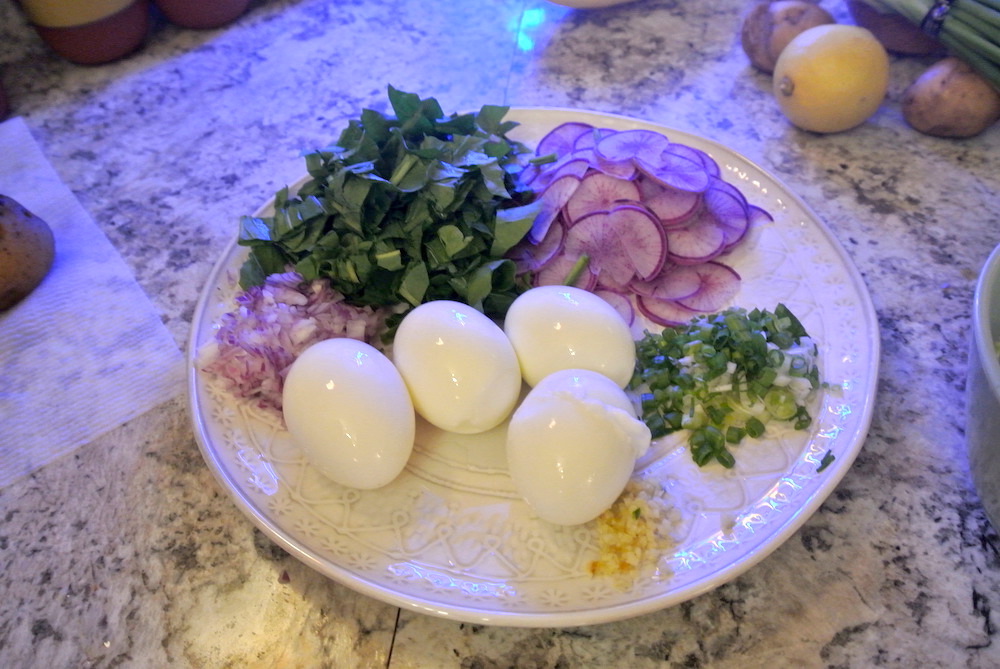
Prepare the purple daikon radishes, garlic, red onion, arugula, green onion, dill pickle spears, and set aside.
When the potatoes and eggs are properly cooled, skin and cube the potatoes. Peel and cube the eggs.
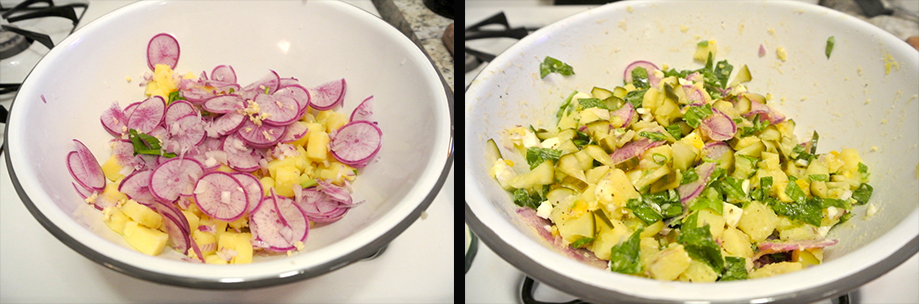
Combine all ingredients and gently toss. While gently tossing, add a healthy drizzle of EVOO, the juice of an entire lemon, a generous helping of salt and pepper, and a spoonful of pickle juice.
ENJOY! It will be even better the next day after spending the night in the fridge, trust us. Cheers.
TOP 5 CSA VEGETABLES
10/04/19 — Ada Broussard

FALL CSA PROMOTION ALERT FOR NEW CSA MEMBERS:
Join the CSA before the end of October and get vegetables delivered to your home (or office) for free for four weeks. Signup here and enter HOME at checkout.
It’s fall, technically, but we all know it’s still hot outside. The vegetables that are making their way into our CSA shares right now are reflective of this juxtaposition- summer crops are still hanging on, but fall crops are starting to creep in, announcing their presence like the cool new kid at school: confident, fresh, and a welcome change to the usual suspects. For farmers and CSA Members alike, this transitional moment in the season equates to a bounty of variety - you’re getting the best of all the Texas seasons… in one box!
Choosing a favorite vegetable is akin to choosing a favorite child. It’s hard, and not a perfect process, but for one reason or another, depending on the day, you may just have a couple favorites. The vegetables listed below are our top picks for CSA vegetables right now. It may change in a week or so when cucumbers are being difficult, but our top picks this week are: white Japanese turnips, collard greens, cucumbers, parsley, and sweet potatoes. We’ve chosen these vegetables for a myriad of reasons - either because they’re a reliable and accessible pack of flavor and nutrition, or because we think they’re underrated and deserve the spotlight.
1. White Japanese Turnips
If you’re not yet on the white Japanese (or salad) turnip train, please hop on. It’s a juicy, sweet, and versatile trip. These are indubiously one of our favorite vegetables right now. The white bulbs of this vegetable are so tender and juicy; biting through the thin skin into the tender root is more similar to taking a bite out of an apple versus a hard, crunchy carrot. We absolutely adore these eaten raw (seriously, it’s a snack we can’t get enough of), but they’re also great in a quick saute or in a cheesy, baked gratin. If you find these in your CSA share bunched, please don’t throw out those greens: the spicy and fresh tops of these turnips are another reason why they made our favorite list. From root to stem, the whole plant is edible. Two (delicious) vegetables, in one. Post harvest, per rinse.
2. Collards
This may seem like an odd choice, but we can’t get enough of our collards. You know everyone’s obsession with kale? We feel this way about collard greens. And believe it or not, you can use collards in just about any recipe that calls for kale… and then some. When tossed in a screaming hot pan with garlic and ginger and then doused with a bit of soy sauce, collards are the perfect vehicle for any Asian flavors. Travel to India and make a collard saag paneer. When slowly stewed with bacon and onions, collard’s silky texture sops up that savory goodness and begs to be topped by a buttery square of cornbread. Looking to add a nutritional punch to some scrambled eggs or a big stew pot? Think outside the frozen spinach block, and throw in some chopped collard greens, instead. Perhaps the most exciting use of large collard greens might be that of wrapper. Thanks recipe developer, Mackenzie Smith, for showing us the way. Recipe & Photo by Mackenzie Smith.
3. Cucumbers
These refreshing cucurbits are the perfect vegetable to carry us through this never ending summer. If it’s too soon for you to stew collards, consider muddling cucumbers with mint, some sugar, and a bit of gin. Sliced cucumbers, tossed with some acid and a bit of salt, are the easiest dish to whip up to balance a meal that’s on the heavy side. At this time in the season, cucumber skin can become somewhat bitter, so if that’s not your thing, remember to stripey peel them. And if you’re reading this thinking about how you are actually sick of cucumbers, please: don’t let them wither in your produce drawer. Do you future self a favor, slice them up, and make some quick pickles. A crunchy, cool, and pickled cucumber in the middle of that inevitable hot Texas winter day will be such a joy. Or, just make this cold soba noodle salad.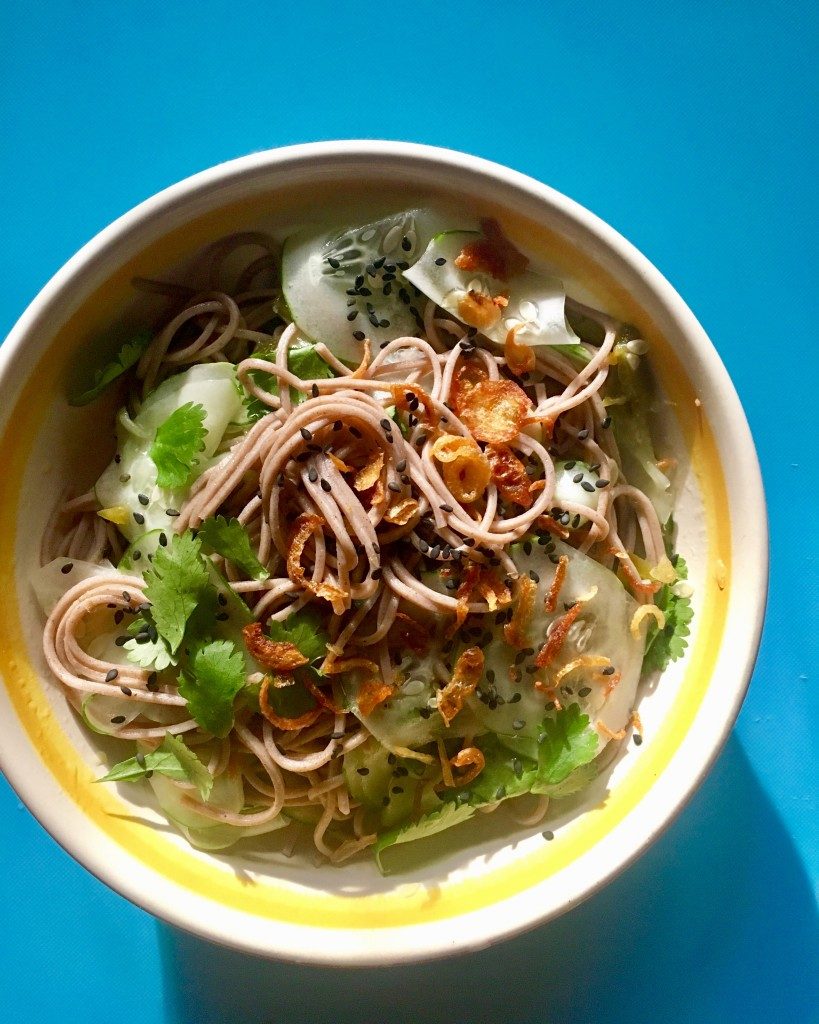 Recipe and Photo by Mackenzie Smith.
4. Parsley
We’re aiming to ignite a revolution with this one. Many of you may think of parsley as an herb, something to be sprinkled on top of grilled fish, and while it is just that, it’s so much more. Parsley is underrated. A bunch of parsley in your CSA box is a bunch of fun. Experiment with chopping up the entire bunch, stems and all, and adding it to your next salad, grain bowl, or pasta dish. Middle eastern cuisine makes use of this herb almost like a vegetable that can stand alone, and more is often better. Tabbouleh is of course the classic parsley salad, but a prominent-parsley strategy can be used in many dishes to add a punch of green and herby freshness. Blend it up with some oil, garlic, and salt (at least) for a simple herbed-oil, or load up that blender with parsley, peppers, lemon juice, other herbs like cilantro and dill, as well as some onions and garlic, for a hearty chimichurri (which is incredibly apt at being frozen, and then surprising the most boring of dinner plates with a wham of green punch). Juice it, smoothie it, salad it, soup it…. Whatever you do, don’t toss it. Stems, when finely died, are a great moment of crunch in a taco or an omelet.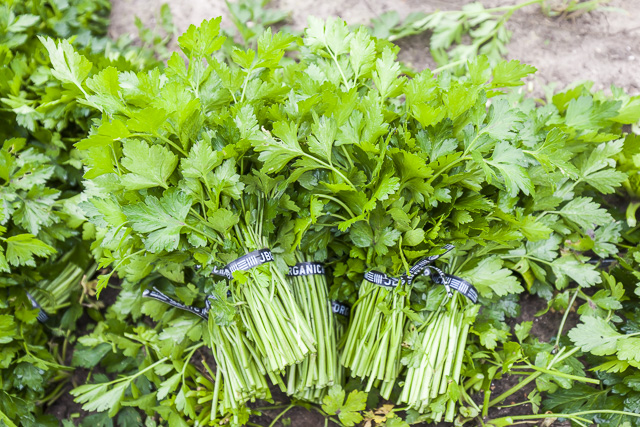 So fresh and so green. Photo by Scott David Gordon.
5. Sweet potatoes
Sweet potatoes are an easy choice. In Texas, their arrival always marks the transition from summer to fall (they’re a late summer crop), and they usually come to the scene just in time for the eggplant and okra anarchy. What’s not to love about a sweet potato? Roast ‘em, boil ‘em, heck… you can even microwave them for all we care, and then top them with whatever your heart desires for a full meal. Ideally this occasionally includes the classic baked potato toppings like green onions, sour cream, butter, and bacon. Sweet potatoes are more nutritionally dense than white potatoes, and you can make use of them in things like mashes, soups, hashes, or fries. Cut them in rustic wedges, toss with oil and spices, and roast until crispy for home-style wedges. Use sweet potato puree to make pancakes, pies, or bread. They even make an excellent treat for fido.
CSA BOX CONTENTS WEEK OF OCT 7TH
10/08/19 — Scott
 CSA Box Contents Week of Oct 7th
Large Box
Beets
Bok Choy
Cucumber
Eggplant
Greens, Collards
Greens, Kale, Curly
Herb, Basil
Lettuce, Braising Mix
Okra
Pepper, Sweet
Potato, Sweet
Radish, Purple Daikon
Turnip, White Japanese
Beets
Bok Choy
Cucumber
Eggplant
Greens, Collards
Greens, Kale, Curly
Herb, Basil
Lettuce, Braising Mix
Okra
Pepper, Sweet
Potato, Sweet
Radish, Purple Daikon
Turnip, White Japanese
Medium Box
Bok Choy
Carrot, Orange
Cucumber
Greens, Arugula
Greens, Collards
Greens, Kale, Curly
Herb, Cilantro
Pepper, Sweet
Potato
Radish, Purple Daikon
Bok Choy
Carrot, Orange
Cucumber
Greens, Arugula
Greens, Collards
Greens, Kale, Curly
Herb, Cilantro
Pepper, Sweet
Potato
Radish, Purple Daikon
Small Box
Greens, Kale, Curly
Herb, Basil
Lettuce, Braising Mix
Okra
Pepper, Sweet
Potato
Turnips
Greens, Kale, Curly
Herb, Basil
Lettuce, Braising Mix
Okra
Pepper, Sweet
Potato
Turnips
Individual Box
Eggplant
Greens, Arugula
Greens, Kale, Curly
Okra
Potato, Sweet
Eggplant
Greens, Arugula
Greens, Kale, Curly
Okra
Potato, Sweet
CSA BOX CONTENTS WEEK OF OCT 7TH
10/08/19 — Scott
CSA Box Contents Week of Oct 7th
Cucumber
Eggplant
Greens, Arugula
Greens, Collards
Greens, Mizuna
Kohlrabi, Purple
Melon, Korean
Okra
Onion, Multiplying
Pepper, Sweet
Potato
Radish, Red
HOMEMADE GNOCCHI
10/09/19 — Ada Broussard
 For an afternoon when you have time to experiment, give homemade gnocchi a try. The Migoni Kitchen sets you up for success in the recipe below.
Homemade Potato Gnocchi
Author: The Migoni Kitchen Servings: 5 People Total Time: 50 minutesIngredients
- 3 Large potatoes, unpeeled
- 2 Cups All-purpose flour - May need a little extra for rolling the gnocchi
- 1 Large Egg
- 5 Tbsp Kosher salt
- 2 Tbsp olive oil
 Homemade gnocchi perfection.
- Fill a large pot with water and bring to a boil. Add 2 tablespoons kosher salt.
- Wash potatoes, but do not peel. Once the water is boiling, place potatoes in the water, and allow them to cook for at least 20 minutes.
- After 20 minutes test the potatoes to see if they are done. You should be able to easily press a fork to the center of the potato without breaking it. If potatoes are still firm, allow the potatoes to continue cooking until done.
- Remove potatoes from the water and allow to cool. Once they are cool enough to handle, peel the skin off of the potatoes. Using a potato masher (or ricer), mash the potatoes in a large deep pan.
- Measure 1.5 cups of flour and sprinkle it on top of the mashed potato, along with 1 tablespoon salt.
- Create a small well in the middle of the flour and potato mixture, and break the egg in the middle of the well. Begin beating the egg with a fork to begin incorporating the flour.
- Use your hands to knead the potato, flour, and egg mixture into a dough. As you knead, add additional flour, as needed, until the dough is no longer sticky. You want a soft dough, that is easy to roll, but firm enough to retain a shape.
- Once you have obtained the desired consistency, roll the dough out into a wide rectangle. Using a sharp knife, cut 6-8 slices about 2 inches thick.
- On a lightly floured surface, roll each slice of dough into a long rope, about 1 inch thick. Use your knife again to begin cutting segments of the dough, about 1 inch long.
- Gently press and roll each segment of dough over the back of a large fork. This creates the traditional gnocchi "look". After rolling, lay your finished gnocchi out on a floured surface and sprinkle additional flour as needed to avoid sticking.
- Fill a large pot with at least 4 quarts of water and add the 2 remaining tablespoons of salt. Place water over high heat and allow to boil.
- Once the water has begun boiling, add half of the batch of gnocchi. The gnocchi will begin to rise to the top of the water when they are fully cooked. Begin skimming them out of the water and placing them into a separate pan.
- Once you have removed all of the gnocchi, you may begin cooking the second batch. Drizzle olive oil over the cooked gnocchi to prevent them from sticking until served.
- Serve with your favorite sauce or simply with some butter and Parmesan!
Notes
- The reason we like to boil the potatoes with the skin on, is because it prevents the potatoes from absorbing as much water. The less water the potatoes absorb, the better texture your gnocchi will have. You also want to avoid over cooking the potatoes, as they will become more mushy. The moral of the story is Watery Potato = Bad Gnocchi.
- I have read several articles that suggest peeling and mashing the potato as quickly as possible after removing them from the water. Supposedly, the hotter the potato is when you make the gnocchi, the fluffier the gnocchi will turn out. While this is an interesting thought, I have not read anything conclusive or scientific to justify this line of thought. We always simply wait until the potatoes are cool enough to handle without burning ourselves. No need for any fancy heat resistant gloves!
- The more flour you add to your gnocchi, the more dense they become. To avoid eating a hard or chewy piece of pasta, always aim to add less flour than anticipated, and add a little at a time as needed. This will ensure you maintain an adequate ratio of flour to potato. Additionally, try not to overwork the dough - the more you knead the dough, the less fluffy it becomes.
 Bon appetit!
PHOTOS FROM THE FARM: 10.11.19
10/11/19 — Ada Broussard
Farm photographer Scott David Gordon got an early start this week and captured pre-dawn eggplant harvests as well as middle of the day transplanting duties. If you look at the pictures below you should notice more sweatshirts than usual. We're loving this cold front!
![]() Vicente's two most used tools - his radio and his harvest log. And of course his hat and his truck... Photo by Scott David Gordon.
Vicente's two most used tools - his radio and his harvest log. And of course his hat and his truck... Photo by Scott David Gordon.
![]() When does a farmers' day get started? About 20 minutes before sunrise, when the day is coolest. Photo by Scott David Gordon.
When does a farmers' day get started? About 20 minutes before sunrise, when the day is coolest. Photo by Scott David Gordon.
![]() Eggplant toss, in the almost-dark. Photo by Scott David Gordon.
Eggplant toss, in the almost-dark. Photo by Scott David Gordon.
![]() Look at how much eggplant our crew harvested before official sunrise! Our harvest trailer makes transportation of heavy harvest bins an easier task. Photo by Scott David Gordon.
Look at how much eggplant our crew harvested before official sunrise! Our harvest trailer makes transportation of heavy harvest bins an easier task. Photo by Scott David Gordon.
![]() It takes a big team to harvest even one single crop! Photo by Scott David Gordon.
It takes a big team to harvest even one single crop! Photo by Scott David Gordon.
![]() Multiplying onions in the ground. We will let these babies size up, and then divide them to plant more onions. Photo by Scott David Gordon.
Multiplying onions in the ground. We will let these babies size up, and then divide them to plant more onions. Photo by Scott David Gordon.
![]() Jack and the John Deere. Photo by Scott David Gordon.
Jack and the John Deere. Photo by Scott David Gordon.
![]() Thai peppers, showing their bellies to the sun. Photo by Scott David Gordon.
Thai peppers, showing their bellies to the sun. Photo by Scott David Gordon.
![]() Thousands (and thousands) of onion transplants in our greenhouse. Photo by Scott David Gordon.
Thousands (and thousands) of onion transplants in our greenhouse. Photo by Scott David Gordon.
![]() Transplants hardening off outside the greenhouses. Photo by Scott David Gordon.
Transplants hardening off outside the greenhouses. Photo by Scott David Gordon.
![]() Bunching sweet potato greens. Photo by Scott David Gordon.
Bunching sweet potato greens. Photo by Scott David Gordon.
![]() The transplanter is all loaded up with fuel and plants... it's just missing two important things. Photo by Scott David Gordon.
The transplanter is all loaded up with fuel and plants... it's just missing two important things. Photo by Scott David Gordon.
 Vicente's two most used tools - his radio and his harvest log. And of course his hat and his truck... Photo by Scott David Gordon.
 When does a farmers' day get started? About 20 minutes before sunrise, when the day is coolest. Photo by Scott David Gordon.
 Eggplant toss, in the almost-dark. Photo by Scott David Gordon.
 Look at how much eggplant our crew harvested before official sunrise! Our harvest trailer makes transportation of heavy harvest bins an easier task. Photo by Scott David Gordon.
 It takes a big team to harvest even one single crop! Photo by Scott David Gordon.
 Multiplying onions in the ground. We will let these babies size up, and then divide them to plant more onions. Photo by Scott David Gordon.
 Jack and the John Deere. Photo by Scott David Gordon.
 Thai peppers, showing their bellies to the sun. Photo by Scott David Gordon.
 Thousands (and thousands) of onion transplants in our greenhouse. Photo by Scott David Gordon.
 Transplants hardening off outside the greenhouses. Photo by Scott David Gordon.
 Bunching sweet potato greens. Photo by Scott David Gordon.
 The transplanter is all loaded up with fuel and plants... it's just missing two important things. Photo by Scott David Gordon.
SOUP'S ON!
10/11/19 — Ada Broussard
In case you missed it, which we’re sure you didn’t, there are big, breezy, and cool things happening this weekend in Central Texas. Temperatures are about to dip, and the fall that we’ve been yearning for is coming. The time has come! Pull out those stock pots, maybe your pair of slippers, and as well as that “winter coats” box from the back of the closet. Hot tea, warm fires, and slowly simmered soups. It’s time! Well, maybe we’re a little over-eager at the farm, but the prospect of a sweater and a warm bowl of nourishment has us tingling with fall excitement. And plus - most of us work outside. If you didn’t notice, it’s been brutal. A day in the fields with a cool breeze at our backs? Soup’s on!
![]() Farmer Brenton making his Tortilla Soup for 100 Hungry Farmers. Recipe below!
Farmer Brenton making his Tortilla Soup for 100 Hungry Farmers. Recipe below!
But first, a quick sidebar: we wanted to draw your attention to the upcoming Austin Fermentation Festival happening at the Mueller Farmers’ Market on Sunday, October 20th. Whether you’re a practiced pickler or someone who is curious about the benefits of fermentation , this is an amazing (and free) event. There will be workshops focused on fermented foods and fermenting processes, as well as an expanded farmers’ market featuring local fermented products. We are even selling a Fermentation Kit ($20) - a curated box of our vegetables with accompanying recipes perfectly suited for your fermentation projects. (If you’d like to pre-order a Fermentation Kit, just email Faith at farm@jbgorganic.com).![]() Okay, now for the soup. All of the recipes below were written and developed by JBG CSA members, created specifically to utilize the produce in fall and winter CSA boxes. These recipes, along with plenty of others, live in the JBG Recipe Archive. Happy Simmering! Please shoot us a line if you have a favorite soup that you think is missing from this list… we’d love to add it to our archive!
Okay, now for the soup. All of the recipes below were written and developed by JBG CSA members, created specifically to utilize the produce in fall and winter CSA boxes. These recipes, along with plenty of others, live in the JBG Recipe Archive. Happy Simmering! Please shoot us a line if you have a favorite soup that you think is missing from this list… we’d love to add it to our archive!
![]() Soup, with dumplings! Photo and Recipe by Mackenzie Smith.
Soup, with dumplings! Photo and Recipe by Mackenzie Smith.
![]() A simple beet and carrot soup made new with a dollop of miso and some savory crunch. Photo and recipe by Mackenzie Smith
A simple beet and carrot soup made new with a dollop of miso and some savory crunch. Photo and recipe by Mackenzie Smith
![]() Ginger Spiced Butternut Squash Soup by Recipe Developer Mackenzie Smith.
Ginger Spiced Butternut Squash Soup by Recipe Developer Mackenzie Smith.
![]() Squash, white bean, and sausage soup.
Squash, white bean, and sausage soup.
![]() Kale, Potato, and Italian Sausage Soup (With a Poached Egg!) by Megan Winfrey
Kale, Potato, and Italian Sausage Soup (With a Poached Egg!) by Megan Winfrey
 Farmer Brenton making his Tortilla Soup for 100 Hungry Farmers. Recipe below!
But first, a quick sidebar: we wanted to draw your attention to the upcoming Austin Fermentation Festival happening at the Mueller Farmers’ Market on Sunday, October 20th. Whether you’re a practiced pickler or someone who is curious about the benefits of fermentation , this is an amazing (and free) event. There will be workshops focused on fermented foods and fermenting processes, as well as an expanded farmers’ market featuring local fermented products. We are even selling a Fermentation Kit ($20) - a curated box of our vegetables with accompanying recipes perfectly suited for your fermentation projects. (If you’d like to pre-order a Fermentation Kit, just email Faith at farm@jbgorganic.com).
 Soup, with dumplings! Photo and Recipe by Mackenzie Smith.
 A simple beet and carrot soup made new with a dollop of miso and some savory crunch. Photo and recipe by Mackenzie Smith
 Ginger Spiced Butternut Squash Soup by Recipe Developer Mackenzie Smith.
21 Soups Worth Simmering
Cherry Bomb Chili
Isaac’s Famous Chicken Soup
Soup with Dumplings!
Tom Kha Gai
Beet and Carrot Soup with Miso and Chickpeas
Roasted Carrot Ginger Soup
Roasted Carrot Beet Soup
Ginger Spiced Butternut Squash soup
Butternut Squash, White Bean, and Sausage Soup
Italian Meatball Soup
Kale, Potato, and Italian Sausage Soup (with a Poached Egg!)
Cajun 15-bean Collard Green Soup
Brenton’s Tortilla Soup for 100 Hungry Farmers
Green Pork Posole
Ribollita - Tuscan Bread Soup
Curried Fennel Cauliflower Soup
Broccoli and Cheese Soup (with Kale Chips!)
Vegan Broccoli Soup
Vegetable Cabbage Soup
Sweet Potato and Thyme Soup
Bavarian Vegetable Soup
 Squash, white bean, and sausage soup.
 Kale, Potato, and Italian Sausage Soup (With a Poached Egg!) by Megan Winfrey
CSA BOX CONTENTS WEEK OF OCT 14TH
10/14/19 — Scott
 CSA Box Contents Week of Oct 14th
Large Box
Beets
Carrot, Baby
Greens, Arugula
Greens, Collards
Greens, Kale, Curly
Greens, Mustard
Herb, Cilantro
Okra
Onion, Multiplying
Pepper, Sweet
Potato, Sweet
Radish
Turnips
Beets
Carrot, Baby
Greens, Arugula
Greens, Collards
Greens, Kale, Curly
Greens, Mustard
Herb, Cilantro
Okra
Onion, Multiplying
Pepper, Sweet
Potato, Sweet
Radish
Turnips
Medium Box
Beets
Carrot, Baby
Greens, Collards
Greens, Kale, Curly
Greens, Mustard
Herb, Cilantro
Onion, Multiplying
Pepper, Sweet
Potato, Sweet
Radish
Beets
Carrot, Baby
Greens, Collards
Greens, Kale, Curly
Greens, Mustard
Herb, Cilantro
Onion, Multiplying
Pepper, Sweet
Potato, Sweet
Radish
Small Box
Carrot, Baby
Greens, Arugula
Greens, Collards
Greens, Kale, Curly
Herb, Cilantro
Pepper, Sweet
Radish
Carrot, Baby
Greens, Arugula
Greens, Collards
Greens, Kale, Curly
Herb, Cilantro
Pepper, Sweet
Radish
Individual Box
Carrot, Baby
Greens, Arugula
Greens, Collards
Pepper, Sweet
Radish
Carrot, Baby
Greens, Arugula
Greens, Collards
Pepper, Sweet
Radish
CSA BOX CONTENTS WEEK OF OCT 14TH
10/15/19 — Scott
CSA Box Contents Week of Oct 14th
Large Box
Beets
Bok Choy
Cucumber
Eggplant
Greens, Collards
Greens, Kale, Curly
Herb, Basil
Lettuce, Braising Mix
Okra
Pepper, Sweet
Potato, Sweet
Radish, Purple Daikon
Turnip, White Japanese
COLLARD GREENS AND KIDNEY BEANS WITH MISO AND COCONUT
10/17/19 — Ada Broussard
 Photo by Mackenzie Smith.
Photo and Recipe by Mackenzie Smith.
Last year Von Diaz wrote a cookbook called “Coconut and Collards: Recipes and Stories from Puerto Rico to the Deep South”. Her book, Coconut and Collards, is still on my wishlist, but the mere mention of those two ingredients in the same sentence inspired this meal, which has become a huge hit in our house over the past year. If your grains are cooked ahead of time, this all comes together in about 20 minutes.
1 tablespoon coconut oil (butter or olive oil are great here, too) 2 scallions, sliced and separated by white and green 1 bunch collard greens or kale, sliced into 1/4-inch ribbons 1/2 teaspoon salt
1 ½ cup coconut milk 1 clove garlic 1 can kidney beans, drained 2 tablespoons miso salt lemon peel, sliced lemon juice toasted pecans
Heat olive oil in a skillet and add the white part of the sliced scallions. Cook until translucent, then add collard greens. Cover the pan for about a minute to gently steam the collards before adding 1 cup of coconut milk, garlic and salt. Simmer on medium-high heat until greens are tender. While cooking, whisk remaining coconut milk and 2 tablespoons of miso together until well combined. Stir in beans, then add miso coconut mixture. Simmer until beans are heated. Salt to taste.
Serve over cooked grained (quinoa is pictured here) and finish with a squeeze of lemon juice, sliced lemon peel, the green part of the sliced scallions and toasted nuts.
COOKING WITH KRISHNA
10/18/19 — Ada Broussard
Good day, blog readers! Ada here. Today on the blog we’re covering a topic near and dear to my heart… and belly. Today we’re featuring the cooking of our beloved Operations Manager, Krishna, and sharing a few of his recipes. We’ve had the idea to do a “Cooking with Krishna” blog post for quite some time… years, actually, but each time we considered doing it, Krishna’s workload at the farm was too much, and too important, to pause and cook. Though we are a mighty farm, growing thousands of pounds of vegetables on (two) hundred of acre, our office and administrative team is teenie. Krishna does the job of probably about 3.5 people. Maybe four. In any given day, Krishna is likely managing: all HR -everything-, payroll, all farm accounting and farm financing, all organic certification record keeping (this is a huge job). He also takes care of other major to-dos when they crop up like writing grant applications, loan applications, overseeing all purchasing, helping with seasonal crop planning, scouring Craig’s List for new farm vehicles, and troubleshooting daily operations logistics. The forklift went out and there are 3,000 pounds of carrots stranded on the loading dock? He’s on it. Lucas’s van broke down in Pflugerville and he’s supposed to be in Hyde Park for a delivery in 20 minutes? Call Krishna. He lives in far north Austin, and often drops off late delivery orders on his way home . On days when he can tell the barn staff are at their wit’s end, he makes sure hot, cheese Domino’s pizza is queued up. There is a sleeve of treats in his desk drawer for the dogs, even though he “doesn’t really like dogs.” He’s helped guide staff through personal struggles of the family and financial variety, and comes by his nickname “Papa Krish” as honestly as one could.
![]() Krishna cubing the boiled potatoes for the aloo mutter. Photo by Scott David Gordon.
Krishna cubing the boiled potatoes for the aloo mutter. Photo by Scott David Gordon.
Over the years, I’ve been lucky enough to eat Krishna’s food and hear bits of his food memories… little crumbles, here and there, including tales of harvesting and cracking fresh coconuts as a kid, freshly gathered milk, turned into freshly churned butter, made into golden ghee, or the time he moved to a small village in his early 20s and had to figure out how to make his favorite dishes. It’s made me feel like I’ve been invited to the doorstep of an ancient food culture, more steeped in tradition that this Cajun girl could ever fathom. Krishna and his sister live next door to each other (I think maybe there is even a hole in their backyard fences so they can walk through?), and the two cook for each other's families just about every day. When they have family visiting from out of town, everyone bunks up between their two houses, and of course there is so much homemade and delicious food. I often wonder if there are still lots for sale on his street, and if they'd notice when I came over for dinner every night...
![]() Some of the spices we used. Austin has several Indian grocery stores if you're looking to build your spice library. Photo by Scott David Gordon.
Some of the spices we used. Austin has several Indian grocery stores if you're looking to build your spice library. Photo by Scott David Gordon.
So thanks, Krishna, for coming to work early to clean the kitchen and for staying at work late to clean it again. But mostly, thanks for the delicious fodder! Below are the recipes* for the four dishes Krishna whipped up this past Tuesday. And by recipes, we mean more general directions for how to prepare these dishes. We’re taking a cue from my side project, Club Home Made (shameless plug), and aren’t providing you with very exact recipes. This is because Krishna couldn't give me exact measurements for each and everything (sign of a damn good cook)... or maybe, it’s really because I was lost in the fumes of garlic and ginger, mesmerized by sputtering cumin seeds, too distracted to ask. Krishna cooks with experience and intuition, and we invite you to pull out your Indian spices, cook with your senses, and enjoy.
![]() For as long as Ive known Krishna, Ive always admired his character. And his tupperware collection. Photo by Ada Broussard.
For as long as Ive known Krishna, Ive always admired his character. And his tupperware collection. Photo by Ada Broussard.
![]() Chef, Krishna, and Sous, Ada. Photo by Scott David Gordon.
Chef, Krishna, and Sous, Ada. Photo by Scott David Gordon.
I asked Krishna if this dish was something he ate often as a kid. “Of course,” he said. Instead of the ever-useful and highly recommended freezer bag of peas, Krisha’s childhood version included fresh peas that farmers would sell seasonally. Krishna promises this recipe is the simplest thing - “It doesn’t even require masala, and even the kids will like it.”.
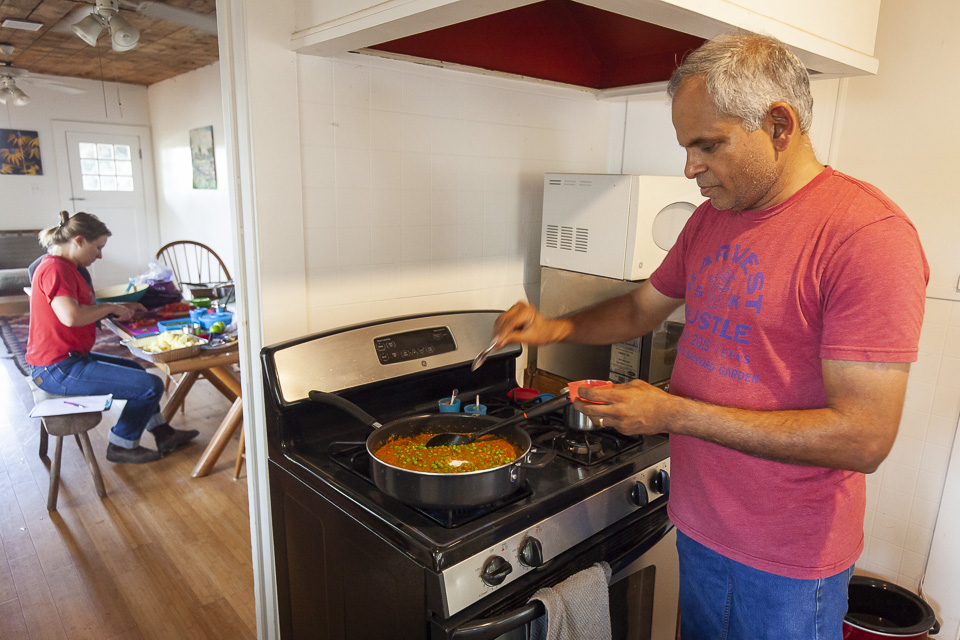
![]() Working on farm stuff, working on aloo mutter. The man is committed. Photos by Scott David Gordon.
Working on farm stuff, working on aloo mutter. The man is committed. Photos by Scott David Gordon.
Ingredients to feed 4 or 5: 5 yukon gold or red potatoes, 1 large red onion, 3 tomatoes, cumin seeds, turmeric, ginger, chili powder, peas, cilantro.
How-To: Boil potatoes until they’ve softened, but just before they’re extremely fork-tender or mashable. You want the potatoes to hold their shape when you cut them. After potatoes are boiled, remove from hot water and set aside to cool. Once cooled, peel the potatoes using your fingers - the skins should easily tear off by grabbing a piece with the tip of your finger. Once peeled, cut potatoes in small, bite size cubes, a tiny bit bigger than the size of a 4x2 lego.
Meanwhile, prepare the “gravy” or sauce. In a small blender, blend up 1 large purple onion until it’s soupy; add a splash of water to achieve this texture, if necessary. Set aside. Next, blend up 3 large or 4-5 small tomatoes on high speed till the mixture looks like gazpacho. Which it could be, if you wanted a bowl of cold soup. Which you don’t. You want aloo mutter. It’s cold outside.
In a hot pan, pour enough cooking oil to coat the bottom, plus a splash more, and then throw in a tablespoon or so of whole cumin seeds. Smell the smells. Once these are sputtering, which should happen in less than a minute, add 1-3 small green chilies that you’ve cut a small slice into. These should be cut so that the chili remains whole, but the pepper punctured so the goodness can seep out. A serrano or thai chili would work here, and I won’t tell Krishna if you even use a jalapeno, cherry bomb, or whatever other hot pepper is living in your crisper drawer. After these have cooked for a moment, add in the onion puree and cook 2-3 minutes. Next, add the tomato puree, followed by some turmeric, chili powder, grated ginger, and salt. Add in as many frozen peas as you’d like. Simmer this delicious gravy for 20-30 minutes, until the “raw” taste is cooked out of your onions and tomatoes and a deeper flavor emerges. Once you’re happy with the flavor of your gravy, add in your chopped potatoes as well as a ½ cup - 1 cup of water. Simmer for another 10 or some minutes, add a generous handful of chopped cilantro, and then enjoy with rice, roti, or farinas.
Protip: If your gravy is too spicy, add a bit of sugar to help balance it out.
![]() Sometimes Krishna chops his onions and tomatoes by hand, but for a quicker reduction, we blended.
Sometimes Krishna chops his onions and tomatoes by hand, but for a quicker reduction, we blended.
![]() The perfect gateway dish to Indian flavors, if yourre looking. Photo by Scott David Gordon.
The perfect gateway dish to Indian flavors, if yourre looking. Photo by Scott David Gordon.
![]() Crispy fried perfection. Photo by Scott David Gordon.
Crispy fried perfection. Photo by Scott David Gordon.
Ingredients: Banana peppers, and a few jalapeno peppers if you’re feeling bold. For about 10 peppers you’ll need about 1.5 cups of chickpea flour, ¼ of a cup of rice flour, about a ¼ teaspoon of chili powder, a ¼ teaspoon of asafetida, ½ teaspoon of carom seeds (optional), and a pinch (⅛ teaspoon?) of “sodium bicarbonate”.. aka, baking soda.
How-To: Prep your peppers. With a small knife, make a slit going lengthwise through one side of the peppers. This will allow the batter to infiltrate your peppers a bit… and also keep them from exploding. If the stems are on the peppers, keep them there; this is your handle.
Heat cooking oil in a pot or pan with high sides. Your are about to deep fry, so use more oil than you may be comfortable with… the oil should be able to cover a pepper completely. (Using more oil will actually help you fry your food better, and actually help decrease the greasy-factor)
Whisk together all the dry ingredients, and add some salt as well. Slowly whisk in about 1 cup of water until you form a smooth and thick batter. Whisk until there are no clumps. Test the heat of your oil by dropping in some drops of the batter - it should ball up and start to fry immediately. When the oil is ready, take the prepped peppers, dip in the batter, and then place immediately into the hot oil. Fry until golden brown. Remove with a slotted spoon, drain on a paper towel, and enjoy your Mirchi Pajjis by themselves or dipped in a chutney. Serve with tea.
![]() Farmer Brenton popped in and went straight for the jalapeno fritter. Photos by Scott David Gordon.
Farmer Brenton popped in and went straight for the jalapeno fritter. Photos by Scott David Gordon.
*We made pepper bajjis at the farm because our coolers were brimming with banana peppers, but you can make bajjis following this basic recipe with other light and starchy vegetables like potatoes, eggplant, onions (we actually made some of these, too… Indian onion rings for the win), cauliflower and broccoli.
![]()
Ingredients: 1 huge eggplant, or several small ones, one red onion, 2-3 tomatoes (diced), cumin seeds, 5-6 garlic cloves (minced), ginger paste, turmeric, garam masala, lime.
How-To: Like babaganoush, you need to roast your eggplant over an open flame, charring the outside skin and producing a tender interior. If you have a gas stove top, set your flame to medium and place the whole eggplant directly over the flame, turning occasionally. You want to really char the outside and slow-cook the inside… this process should take around 10 minutes (or more). If you don’t have a gas stove top, you can use the broiler on your oven (low setting), making sure to rotate the eggplant often. And last, if the fire or bbq pit presents itself, please do try and char your eggplant over a real-live fire. Once your eggplant is deflated like a soft, black balloon, set it aside to cool.
![]() Charred eggplant, before the skin was peeled off. Photo by Scott David Gordon.
Charred eggplant, before the skin was peeled off. Photo by Scott David Gordon.
Meanwhile, make your sauce. Blend your onion with a bit of water until soupy; set aside. Blend your tomatoes until gazpacho-y; set aside. In a large saucepan or pot, heat enough oil to cover the bottom, and then some. Add 1-2 tablespoons of cumin seeds to the hot oil. About 30 seconds later, add a couple whole (slitted) green chilies. Once your seeds crackle and start smelling good, add the pureed onions. Cook for a minute or two, then add the tomatoes, as well as some ginger paste (about a tablespoon or two), turmeric (a generous teaspoon or so), garam masala (follow your heart), your minced garlic and some salt. Let this delicious tomato sauce simmer for anywhere from 15-30 minutes. While this is simmering, peel the charred skin off of your eggplant and slice of their tops. Put peeled and topped eggplant flesh into a bowl, and mush up. Once sufficiently mushed, add eggplant to tomato mixture.
After 20-30 minutes, taste your tomato-eggplant mixture. If it tastes delicious and developed, it’s done. Stir in a generous handful of chopped cilantro, as well as the juice of 1 lime, and enjoy with rice, roti, or farinas.
Ingredients: 1 cup farinas (cream of wheat), a tablespoon or so of yellow split peas (optional), 1 tablespoon of mustard seeds, a tablespoon or so of ginger paste, 2 green chilis (slitted), one medium purple onion, diced.
![]() Farinas come together in a matter of moments, and can be savory or sweet. Photo by Scott David Gordon.
Farinas come together in a matter of moments, and can be savory or sweet. Photo by Scott David Gordon.
How-To: Get some water on to boil. In a separate pot, heat 3 or so tablespoons of oil. Once hot, add mustard seeds. When these start to crackle, add your split yellow peas, ginger paste, chilies, and the diced onion. Add some salt. Cook for a minute or two, then add 1 ¾ cup of boiling water to the pan. Once the water has returned to a boil, turn your heat down, and whisk in the farina. Switch your heat off, continuing to whisk to avoid lumpy farina. Once all mixed up, add a squeeze of lime and enjoy alongside Baingan Bharta or Aloo Mutter.
![]() CSA line turned lunch line. Photo by Scott David Gordon.
CSA line turned lunch line. Photo by Scott David Gordon.
![]() Tracy peeking his head in to see what's Krishna is cooking. Photo by Scott David Gordon.
Tracy peeking his head in to see what's Krishna is cooking. Photo by Scott David Gordon.
Ghee: You probably already know about ghee, but in case you need a reminder of what this “super food” actually is. Ghee is a form of clarified butter, and is made by melting regular butter, which separates the liquid fats and milk solids. This process removes lactose, creates a product with a higher smoke point, and provides a rich, nutty flavor. It’s addictive. Krishna whipped up a quick batch ghee, and I stared at him the whole time in disbelief. It’s really not that hard, and you should never buy the expensive jar of ghee again. Here is a great step by step for making ghee, but essentially: heat up butter, wait till milk solids sink, and then brown, strain. If you’re like Krishna, you save those browned bits, maybe mix with a bit of sugar, and enjoy as a sweet treat. When we were cooking, our Baingan Bharta got started in the pan where they resided.
![]() Ghee one, ghee two, ghee three. Photos by Scott David Gordon.
Ghee one, ghee two, ghee three. Photos by Scott David Gordon.
“Rotis” with Ghee: When Krishna isn’t pausing his busy work day to cook a quick feast for 20+ hungry farmers, he makes his own roti. But when he is cranking out a large feast in a small amount of time, he swings by HEB and buys the freshly made wheat tortillas. Heat wheat tortillas in a hot skillet or directly over a flame until they puff up. Flip over. Transfer to a warm plate, and brush with Ghee. Make a stack of these tortillas, and let them cool down a bit - allowing the ghee to soak in. Oh M Ghee.
![]()
Ginger Paste: Once a month, Krishna grates a huge batch of ginger. He mixes the grated ginger with some lime juice, puts this mixture in a tupperware, and stores it in the fridge for easy use. You should do this, too.
Lime-ade: The day Krishna and I cooked, it was warm, made warmer by the fact that there was no AC in the farm house we were cooking in.. We were hot. After enjoying 1, 2, and then 3 servings of our feast with farm friends, I headed back to the hot kitchen to clean up. Except there was Krishna, drying off the last pot…. Papa Krish had already cleaned everything. He handed me one of his grandmother’s stainless steel nesting bowls filled with a liquid and said “drink this”. Lime juice, water, salt, and sugar, less diluted than your traditional limeade and leaning more towards “delicious nourishing tonic” than “derby cocktail with straw”.
![]() This is one of several stainless steel ingredient bowls, given to Krishnas grandparents, Ranga and Jaya, as a wedding gift in 1918. Their initials were hammered into the side. Seems a lot classier than sharpie on a tupperware, to me. Photo by Scott David Gordon.
This is one of several stainless steel ingredient bowls, given to Krishnas grandparents, Ranga and Jaya, as a wedding gift in 1918. Their initials were hammered into the side. Seems a lot classier than sharpie on a tupperware, to me. Photo by Scott David Gordon.
**A note on Krishna and chai tea: On the coldest of days at the farm, or when we happen to have milk in the office fridge (whichever comes first), Krishna is known to make tiny cups of chai for everyone to enjoy. He mixes the ingredients (and subsequently froths the milk) through an impressive pouring technique wherein one cup’s contents cascades into an empty cup waiting below, and then again and again. If you’re a JBG employee and are reading this, wait until it gets truly cold, and then bring some whole milk or half and half into the office fridge and simply tell Krishna it’s there. Warm, sweet chai will soon be in your future, the perfect afternoon pick me up.
One last random-ish aside: If the sheer number of Indian spices used in these recipes, or any others, intimidates you, I encourage you to checkout the new and highly acclaimed cookbook Indian-ish. One of our recipe developers, Mackenzie Smith actually shot the photos in this beautiful book! The cookbook’s author, Priya, makes a deliberate point to explain each spice, and her recipes only require the spices she deems absolutely necessary.
![]() Illustration by Maria Qamar, taken from Indian-ish by Priya Krishna.
Illustration by Maria Qamar, taken from Indian-ish by Priya Krishna.
 Krishna cubing the boiled potatoes for the aloo mutter. Photo by Scott David Gordon.
Over the years, I’ve been lucky enough to eat Krishna’s food and hear bits of his food memories… little crumbles, here and there, including tales of harvesting and cracking fresh coconuts as a kid, freshly gathered milk, turned into freshly churned butter, made into golden ghee, or the time he moved to a small village in his early 20s and had to figure out how to make his favorite dishes. It’s made me feel like I’ve been invited to the doorstep of an ancient food culture, more steeped in tradition that this Cajun girl could ever fathom. Krishna and his sister live next door to each other (I think maybe there is even a hole in their backyard fences so they can walk through?), and the two cook for each other's families just about every day. When they have family visiting from out of town, everyone bunks up between their two houses, and of course there is so much homemade and delicious food. I often wonder if there are still lots for sale on his street, and if they'd notice when I came over for dinner every night...
 Some of the spices we used. Austin has several Indian grocery stores if you're looking to build your spice library. Photo by Scott David Gordon.
So thanks, Krishna, for coming to work early to clean the kitchen and for staying at work late to clean it again. But mostly, thanks for the delicious fodder! Below are the recipes* for the four dishes Krishna whipped up this past Tuesday. And by recipes, we mean more general directions for how to prepare these dishes. We’re taking a cue from my side project, Club Home Made (shameless plug), and aren’t providing you with very exact recipes. This is because Krishna couldn't give me exact measurements for each and everything (sign of a damn good cook)... or maybe, it’s really because I was lost in the fumes of garlic and ginger, mesmerized by sputtering cumin seeds, too distracted to ask. Krishna cooks with experience and intuition, and we invite you to pull out your Indian spices, cook with your senses, and enjoy.
 For as long as Ive known Krishna, Ive always admired his character. And his tupperware collection. Photo by Ada Broussard.
 Chef, Krishna, and Sous, Ada. Photo by Scott David Gordon.
Aloo Mutter Aloo = potato, Mutter = Pea Potato and Peas
Making a big pot of Aloo Mutter for our family of hungry farmers was a no-brainer for Krishna. It’s a crowd pleaser, even for those who are new or wary of Indian flavors. There’s something anciently satisfying about the homey combination of potato and peas. JBG’s potato cellar is about to be empty, so make this dish soon. When I asked Krishna if you could sub sweet potatoes or turnips for the white potatoes, he sort of smiled and shook his head (no). The tender boiled potatoes really are the perfect sponge to soak up this sauce. But don’t tell Krishna: I may riff on this recipe and try making it with other winter roots when the craving for this hearty, satisfying, and savory dish hits mid-January.I asked Krishna if this dish was something he ate often as a kid. “Of course,” he said. Instead of the ever-useful and highly recommended freezer bag of peas, Krisha’s childhood version included fresh peas that farmers would sell seasonally. Krishna promises this recipe is the simplest thing - “It doesn’t even require masala, and even the kids will like it.”.
 Working on farm stuff, working on aloo mutter. The man is committed. Photos by Scott David Gordon.
Ingredients to feed 4 or 5: 5 yukon gold or red potatoes, 1 large red onion, 3 tomatoes, cumin seeds, turmeric, ginger, chili powder, peas, cilantro.
How-To: Boil potatoes until they’ve softened, but just before they’re extremely fork-tender or mashable. You want the potatoes to hold their shape when you cut them. After potatoes are boiled, remove from hot water and set aside to cool. Once cooled, peel the potatoes using your fingers - the skins should easily tear off by grabbing a piece with the tip of your finger. Once peeled, cut potatoes in small, bite size cubes, a tiny bit bigger than the size of a 4x2 lego.
Meanwhile, prepare the “gravy” or sauce. In a small blender, blend up 1 large purple onion until it’s soupy; add a splash of water to achieve this texture, if necessary. Set aside. Next, blend up 3 large or 4-5 small tomatoes on high speed till the mixture looks like gazpacho. Which it could be, if you wanted a bowl of cold soup. Which you don’t. You want aloo mutter. It’s cold outside.
In a hot pan, pour enough cooking oil to coat the bottom, plus a splash more, and then throw in a tablespoon or so of whole cumin seeds. Smell the smells. Once these are sputtering, which should happen in less than a minute, add 1-3 small green chilies that you’ve cut a small slice into. These should be cut so that the chili remains whole, but the pepper punctured so the goodness can seep out. A serrano or thai chili would work here, and I won’t tell Krishna if you even use a jalapeno, cherry bomb, or whatever other hot pepper is living in your crisper drawer. After these have cooked for a moment, add in the onion puree and cook 2-3 minutes. Next, add the tomato puree, followed by some turmeric, chili powder, grated ginger, and salt. Add in as many frozen peas as you’d like. Simmer this delicious gravy for 20-30 minutes, until the “raw” taste is cooked out of your onions and tomatoes and a deeper flavor emerges. Once you’re happy with the flavor of your gravy, add in your chopped potatoes as well as a ½ cup - 1 cup of water. Simmer for another 10 or some minutes, add a generous handful of chopped cilantro, and then enjoy with rice, roti, or farinas.
Protip: If your gravy is too spicy, add a bit of sugar to help balance it out.
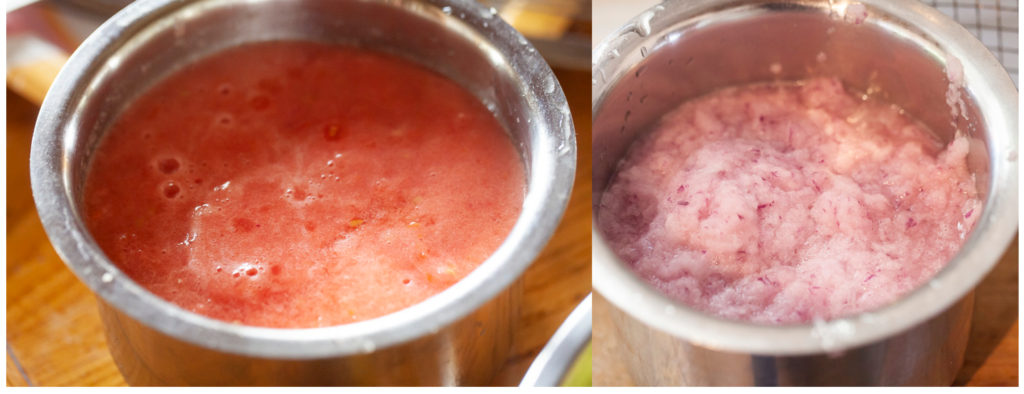 Sometimes Krishna chops his onions and tomatoes by hand, but for a quicker reduction, we blended.
 The perfect gateway dish to Indian flavors, if yourre looking. Photo by Scott David Gordon.
Mirchi Bajji Mirchi = Peppers, Bajji = Fritters Pepper Fritters
For Krishna, this dish is synonymous with a rainy or cold day - best made as a snack, of sorts, and enjoyed with hot tea* featuring masala, cloves, cardamom, and ginger steeped in warm, sweetened milk. Also according to Krishna, this dish should never really be made unless you’re feeding a group of 10 or more. It’s a party food, begging for a crowd. He would never make this for his immediate family of four, but should his sister Lakshmi and her crew come over (she does live next door…) he might just fry up a batch for the big group to enjoy. Crispy fried perfection. Photo by Scott David Gordon.
Ingredients: Banana peppers, and a few jalapeno peppers if you’re feeling bold. For about 10 peppers you’ll need about 1.5 cups of chickpea flour, ¼ of a cup of rice flour, about a ¼ teaspoon of chili powder, a ¼ teaspoon of asafetida, ½ teaspoon of carom seeds (optional), and a pinch (⅛ teaspoon?) of “sodium bicarbonate”.. aka, baking soda.
How-To: Prep your peppers. With a small knife, make a slit going lengthwise through one side of the peppers. This will allow the batter to infiltrate your peppers a bit… and also keep them from exploding. If the stems are on the peppers, keep them there; this is your handle.
Heat cooking oil in a pot or pan with high sides. Your are about to deep fry, so use more oil than you may be comfortable with… the oil should be able to cover a pepper completely. (Using more oil will actually help you fry your food better, and actually help decrease the greasy-factor)
Whisk together all the dry ingredients, and add some salt as well. Slowly whisk in about 1 cup of water until you form a smooth and thick batter. Whisk until there are no clumps. Test the heat of your oil by dropping in some drops of the batter - it should ball up and start to fry immediately. When the oil is ready, take the prepped peppers, dip in the batter, and then place immediately into the hot oil. Fry until golden brown. Remove with a slotted spoon, drain on a paper towel, and enjoy your Mirchi Pajjis by themselves or dipped in a chutney. Serve with tea.
*We made pepper bajjis at the farm because our coolers were brimming with banana peppers, but you can make bajjis following this basic recipe with other light and starchy vegetables like potatoes, eggplant, onions (we actually made some of these, too… Indian onion rings for the win), cauliflower and broccoli.
Baingan Bharta Baingan = Eggplant Delicious Eggplant Dish
Eggplant haters out there, I see you. Give this recipe a try. It’s sort of the Indian answer to Babaganoush, except after the eggplant is charred over an open flame, the meat is simmered with tomatoes and spices, making a distinct eggplant flavor hardly detectable. What is detectable is smokey, silky, and savory heaven. Krishna likes babaganoush, but he loves baingan bharta. You might be like Krishna, but you won’t know until you try this easy and delicious recipe… perfect for using up summer’s lingering eggplant.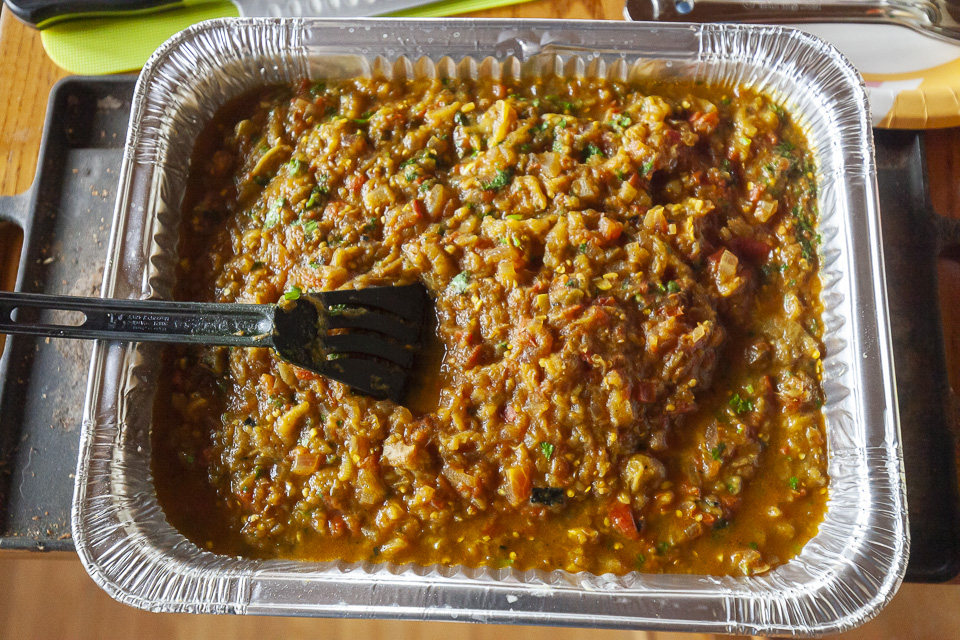
Ingredients: 1 huge eggplant, or several small ones, one red onion, 2-3 tomatoes (diced), cumin seeds, 5-6 garlic cloves (minced), ginger paste, turmeric, garam masala, lime.
How-To: Like babaganoush, you need to roast your eggplant over an open flame, charring the outside skin and producing a tender interior. If you have a gas stove top, set your flame to medium and place the whole eggplant directly over the flame, turning occasionally. You want to really char the outside and slow-cook the inside… this process should take around 10 minutes (or more). If you don’t have a gas stove top, you can use the broiler on your oven (low setting), making sure to rotate the eggplant often. And last, if the fire or bbq pit presents itself, please do try and char your eggplant over a real-live fire. Once your eggplant is deflated like a soft, black balloon, set it aside to cool.
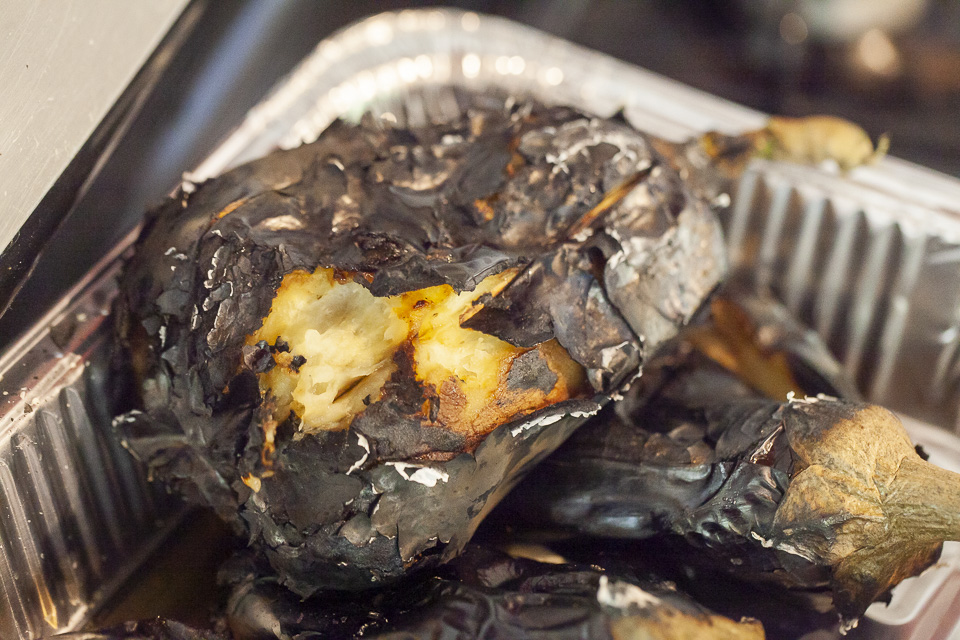 Charred eggplant, before the skin was peeled off. Photo by Scott David Gordon.
Meanwhile, make your sauce. Blend your onion with a bit of water until soupy; set aside. Blend your tomatoes until gazpacho-y; set aside. In a large saucepan or pot, heat enough oil to cover the bottom, and then some. Add 1-2 tablespoons of cumin seeds to the hot oil. About 30 seconds later, add a couple whole (slitted) green chilies. Once your seeds crackle and start smelling good, add the pureed onions. Cook for a minute or two, then add the tomatoes, as well as some ginger paste (about a tablespoon or two), turmeric (a generous teaspoon or so), garam masala (follow your heart), your minced garlic and some salt. Let this delicious tomato sauce simmer for anywhere from 15-30 minutes. While this is simmering, peel the charred skin off of your eggplant and slice of their tops. Put peeled and topped eggplant flesh into a bowl, and mush up. Once sufficiently mushed, add eggplant to tomato mixture.
After 20-30 minutes, taste your tomato-eggplant mixture. If it tastes delicious and developed, it’s done. Stir in a generous handful of chopped cilantro, as well as the juice of 1 lime, and enjoy with rice, roti, or farinas.
Farina (Cream of Wheat)
Krishna introduced me to this savory preparation of farina years ago, and it’s often something I whip up with I want (need?) a quick starch to go along with whatever I’m simmering. Like any good host, Krishna was worried there wouldn’t be enough food for everyone, so he made a big pot of farinas. It was the perfect base to sop up our delicious potato and peas, eggplant and tomatoes. It’s like couscous, but different. The addition of split yellow peas is optional - they will dot your farinas with a nice crunchy bite.Ingredients: 1 cup farinas (cream of wheat), a tablespoon or so of yellow split peas (optional), 1 tablespoon of mustard seeds, a tablespoon or so of ginger paste, 2 green chilis (slitted), one medium purple onion, diced.
 Farinas come together in a matter of moments, and can be savory or sweet. Photo by Scott David Gordon.
How-To: Get some water on to boil. In a separate pot, heat 3 or so tablespoons of oil. Once hot, add mustard seeds. When these start to crackle, add your split yellow peas, ginger paste, chilies, and the diced onion. Add some salt. Cook for a minute or two, then add 1 ¾ cup of boiling water to the pan. Once the water has returned to a boil, turn your heat down, and whisk in the farina. Switch your heat off, continuing to whisk to avoid lumpy farina. Once all mixed up, add a squeeze of lime and enjoy alongside Baingan Bharta or Aloo Mutter.
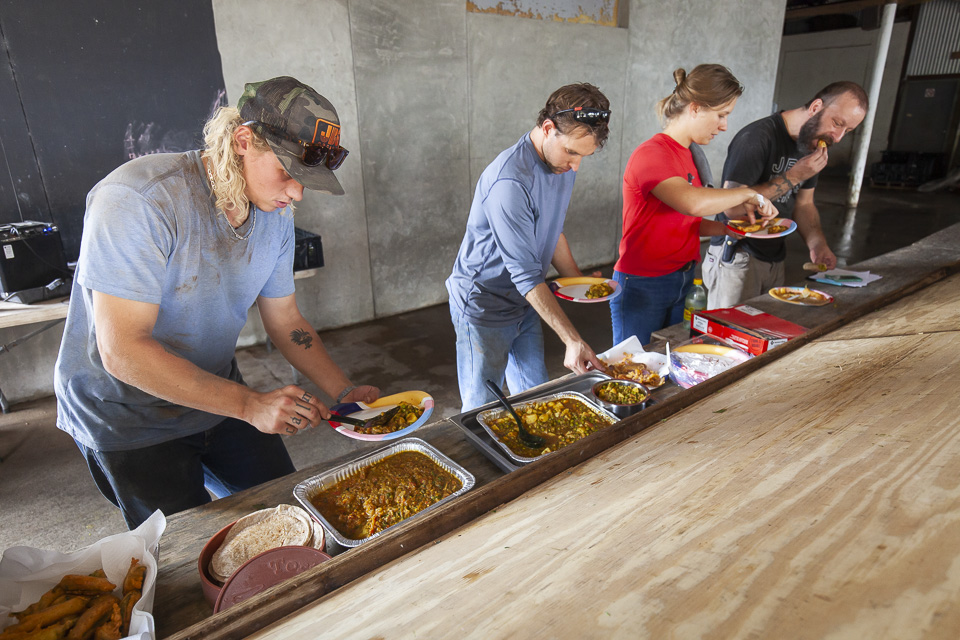 CSA line turned lunch line. Photo by Scott David Gordon.
Bonus Recipes:
Krishna is a true scratch-cook. One time, he brought in this delicious snack that sort of resembled chex mix: a variety of tiny fried bits, different shapes and sizes, mixed with nuts and some fried split peas. To my complete shock, Krishna made and fried each of the pieces. The dude made his own (Indian) chex mix (!), and it was delicious. For Krishna, cranking out things like magic chex mix, homemade yogurt, spicy tomato pastes (tomato pickle), and chutneys are no big deal. When he was little, his mom used to give him a jar of milk to shake into butter. Not surprisingly, there were several quick tricks that he pulled out during our afternoon of cooking that, to me, can only come from the kitchen of a very seasoned cook… who makes magic Indian chex mix.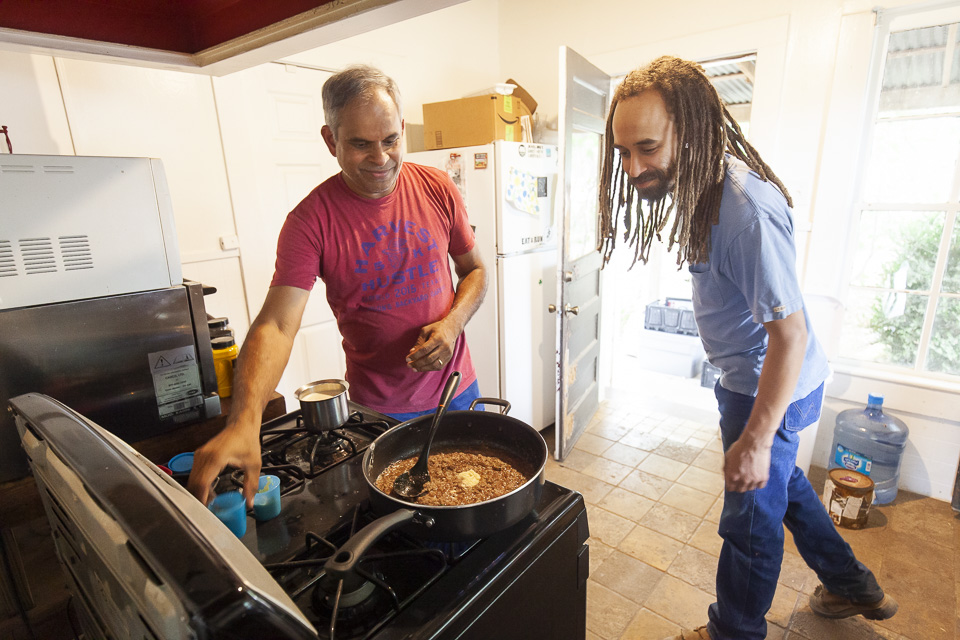 Tracy peeking his head in to see what's Krishna is cooking. Photo by Scott David Gordon.
Ghee: You probably already know about ghee, but in case you need a reminder of what this “super food” actually is. Ghee is a form of clarified butter, and is made by melting regular butter, which separates the liquid fats and milk solids. This process removes lactose, creates a product with a higher smoke point, and provides a rich, nutty flavor. It’s addictive. Krishna whipped up a quick batch ghee, and I stared at him the whole time in disbelief. It’s really not that hard, and you should never buy the expensive jar of ghee again. Here is a great step by step for making ghee, but essentially: heat up butter, wait till milk solids sink, and then brown, strain. If you’re like Krishna, you save those browned bits, maybe mix with a bit of sugar, and enjoy as a sweet treat. When we were cooking, our Baingan Bharta got started in the pan where they resided.
 Ghee one, ghee two, ghee three. Photos by Scott David Gordon.
“Rotis” with Ghee: When Krishna isn’t pausing his busy work day to cook a quick feast for 20+ hungry farmers, he makes his own roti. But when he is cranking out a large feast in a small amount of time, he swings by HEB and buys the freshly made wheat tortillas. Heat wheat tortillas in a hot skillet or directly over a flame until they puff up. Flip over. Transfer to a warm plate, and brush with Ghee. Make a stack of these tortillas, and let them cool down a bit - allowing the ghee to soak in. Oh M Ghee.

Ginger Paste: Once a month, Krishna grates a huge batch of ginger. He mixes the grated ginger with some lime juice, puts this mixture in a tupperware, and stores it in the fridge for easy use. You should do this, too.
Lime-ade: The day Krishna and I cooked, it was warm, made warmer by the fact that there was no AC in the farm house we were cooking in.. We were hot. After enjoying 1, 2, and then 3 servings of our feast with farm friends, I headed back to the hot kitchen to clean up. Except there was Krishna, drying off the last pot…. Papa Krish had already cleaned everything. He handed me one of his grandmother’s stainless steel nesting bowls filled with a liquid and said “drink this”. Lime juice, water, salt, and sugar, less diluted than your traditional limeade and leaning more towards “delicious nourishing tonic” than “derby cocktail with straw”.
 This is one of several stainless steel ingredient bowls, given to Krishnas grandparents, Ranga and Jaya, as a wedding gift in 1918. Their initials were hammered into the side. Seems a lot classier than sharpie on a tupperware, to me. Photo by Scott David Gordon.
**A note on Krishna and chai tea: On the coldest of days at the farm, or when we happen to have milk in the office fridge (whichever comes first), Krishna is known to make tiny cups of chai for everyone to enjoy. He mixes the ingredients (and subsequently froths the milk) through an impressive pouring technique wherein one cup’s contents cascades into an empty cup waiting below, and then again and again. If you’re a JBG employee and are reading this, wait until it gets truly cold, and then bring some whole milk or half and half into the office fridge and simply tell Krishna it’s there. Warm, sweet chai will soon be in your future, the perfect afternoon pick me up.
One last random-ish aside: If the sheer number of Indian spices used in these recipes, or any others, intimidates you, I encourage you to checkout the new and highly acclaimed cookbook Indian-ish. One of our recipe developers, Mackenzie Smith actually shot the photos in this beautiful book! The cookbook’s author, Priya, makes a deliberate point to explain each spice, and her recipes only require the spices she deems absolutely necessary.
 Illustration by Maria Qamar, taken from Indian-ish by Priya Krishna.
CSA BOX CONTENTS WEEK OF OCT 21ST
10/21/19 — Scott
 CSA Box Contents Week of Oct 21st
Large Box
Bok Choy
Carrots X 2
Eggplant
Greens, Kale, Curly
Greens, Mizuna
Herb, Parsley, Flat
Lettuce, Braising Mix
Onion, Multiplying
Pepper, Hot Medley
Potato
Radish
Turnips
Bok Choy
Carrots X 2
Eggplant
Greens, Kale, Curly
Greens, Mizuna
Herb, Parsley, Flat
Lettuce, Braising Mix
Onion, Multiplying
Pepper, Hot Medley
Potato
Radish
Turnips
Medium Box
Beets
Carrot, Baby
Eggplant
Greens, Kale, Curly
Herb, Parsley, Flat
Lettuce, Braising Mix
Pepper, Sweet
Potato
Radish
Turnips
Beets
Carrot, Baby
Eggplant
Greens, Kale, Curly
Herb, Parsley, Flat
Lettuce, Braising Mix
Pepper, Sweet
Potato
Radish
Turnips
Small Box
Bok Choy
Carrot, Baby
Greens, Collards
Herb, Basil
Pepper, Hot Medley
Potato
Turnips
Bok Choy
Carrot, Baby
Greens, Collards
Herb, Basil
Pepper, Hot Medley
Potato
Turnips
Individual Box
Bok Choy
Carrot, Baby
Greens, Kale, Curly
Pepper, Sweet
Turnips
Bok Choy
Carrot, Baby
Greens, Kale, Curly
Pepper, Sweet
Turnips
CSA BOX CONTENTS WEEK OF OCT 21ST
10/23/19 — Scott
CSA Box Contents Week of Oct 21st
Large Box
Beets
Carrot, Baby
Farmers Choice
Greens, Arugula
Greens, Collards
Greens, Kale, Curly
Greens, Mustard
Herb, Cilantro
Onion, Multiplying
Pepper, Sweet
Potato, Sweet
Radish
Turnips
HOW TO STORE YOUR VEGETABLES THIS FALL
10/25/19 — Ada Broussard
You open up your fridge, assume a squatting position, and look in the back right corner of your bottom shelf. There lies a crispy bunch of lemongrass, as well as a mushy (and now brown-spotted) eggplant. In your crisper drawer, beneath the mystery bags filled of root crops, is a moldy beet.
Things have gotten out of control in your fridge, vegetables are heading to the compost, and this lingering local produce is becoming more burden than bounty.
WE’RE HERE TO HELP.
![]()
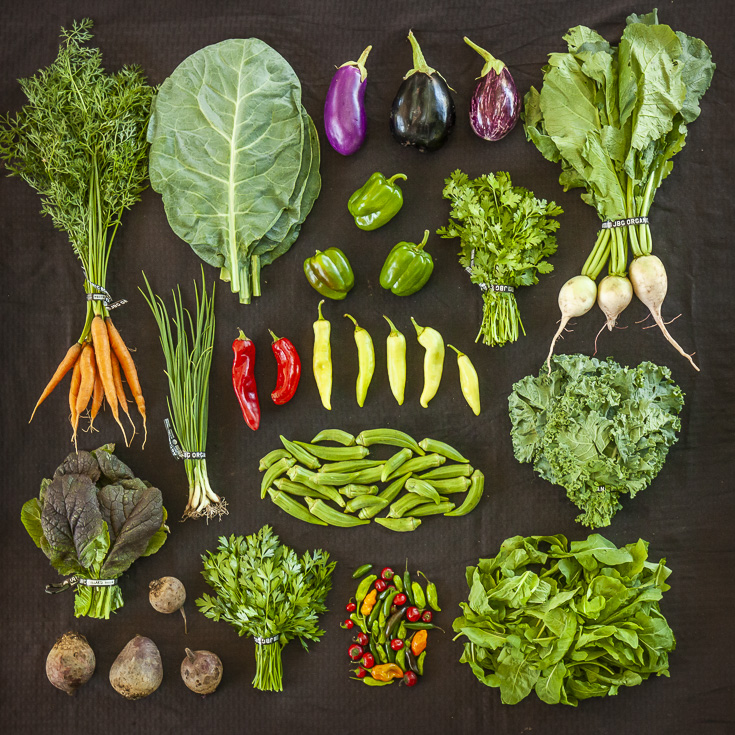
With the seasonal shift upon us, there are some new vegetable players showing up in your CSA box or farmers’ market haul. Many of our new CSA members are reading this (hi!!) and so they’re all new. Today, we’re taking this opportunity to share our wisdom on how to store these vegetables once they make it home to your kitchen. Knowing how to properly store your vegetables is an acquired skill, and once you start to employ these storage techniques, the shelf life of your veggies will extend and you will be happy. Refrigerator equilibrium is now restored, and vegetables are back to being a bundle of bounty, devoid of any burden.
Those of who have been around for a while know that this isn’t the first time we’re talking veggie-storage. But it’s so important, that it begs another post.
Some general storage knowledge to frame your decision making:
PUT A STOP TO MOISTURE LOSS: Vegetables contain lots of water, and as soon as they’re picked, they begin to lose this water, or moisture. This moisture-loss is what causes a vegetable to wilt. Once vegetables arrive in your kitchen, you should think about how you can put a stop to this moisture loss! Generally: keep vegetables in bags, in your fridge. Bags will help trap the moisture around the vegetable instead of letting the water evaporate into the refrigerator. When you set a naked vegetable on a fridge shelf, it’s bound to dry up. Here at the farm, we store most vegetables in closed bins and even hose down the floors of our coolers - all in attempt to retain the moisture. This is what keeps a carrot crunchy and a head of romaine perky.
SEVER THE ROOTS: If you receive bunched vegetables (i.e. turnips, beets, carrots, etc., that have the root attached to the greens), you should remove the roots from the greens as soon as possible. Aka, as soon as you unpack your vegetables! If attached, the greens will operate under a “business as usual” assumption, and will continue to pull moisture out of the root, just as it would do in the field. This will leave you with a soft (albeit edible) root end. Detach those leaves, store the leaves and the roots in separate bags, and you’ll be assured to get the most enjoyment out of this two-for-one vegetable. The roots will last a bit longer than the greens, so saute your turnip greens on Tuesday, and roast the bulbs on Friday.
![]() Separate roots from stems and leaves to prevent the roots from becoming soft. Photo by Scott David Gordon.
Separate roots from stems and leaves to prevent the roots from becoming soft. Photo by Scott David Gordon.
BAG IT: In the list below, we mention “place them into a bag or a container” quite often. This deserves a little more elaboration. A container can mean a glass or plastic Tupperware, and a bag can mean a plastic bag, recycled produce bags from the grocery store, ziplocks, or even fancy mesh produce bags like this .These stasher bags are all the rage right now, and these would also work perfectly for prepped veggies like sliced carrots, ready for a hummus dip. If using a ziplock or Tupperware, it’s a good idea to crack the opening so as to capture most of the moisture, but to allow an escape route for ethylene. These cloth produce bags are also awesome - get them damp, and they’re retain even more moisture. Though the plastic bags might seem wasteful, please note that you can reuse them until they basically fall apart and the zippers break. New kale goes into the old kale bag… if you use a paper towel to wrap veggies, you can reuse it to wipe up a spill, so on and so forth. Protip: Use clear bags and clear containers so you can actually see what you’re working with.
![]()
![]() Krishna's impressive collection of containers. Photo by Ada Broussard.
Krishna's impressive collection of containers. Photo by Ada Broussard.
Potatoes - Despite not actually being related botanically, potatoes should be treated just like sweet potatoes. To mimic a dark cabinet, you can always place potatoes in a brown paper bag on your counter top.
Broccoli + Cauliflower - Get these yummy crops into a baggy or container in the refrigerator’s crisper drawer, and they should be good for a week.
Bulk Roots (rutabagas, radishes, turnips, beets without greens attached) - If greens are attached, remove and then store in the refrigerator in a bag or container of some sort to keep the moisture in. Beets can last up to 3 weeks, radishes can last up to 2 weeks, and lastly, turnips and rutabagas can last up to 2 weeks. The greens of beets and turnips should be enjoyed within 3 days of being trimmed, and stored in a container or bag after being cleaned and dried.
Carrots - Cut off the greens if they come bunched (Make pesto with the greens!) and put in a container or bag in the crisper drawer, and these tasty snack veggies will last about 2 to 3 weeks.
Cabbage - This should be stored in a bag or container, in the crisper drawer. In these conditions, a head of Napa cabbage can last 1-2 weeks, and a head of green or purple cabbage can last anywhere from 2-5 weeks.
Salad Greens (arugula, spinach, romaine, loose-leaf lettuce) - If these come in a little dirty, don't be alarmed. For easiest meal prep, you can wash these when you get them; however, make sure that they're completely dry before you put them in the fridge! Any water left on these leafy greens will turn them into slime. There are two great ways to ensure dryness. First off, a salad spinner - for the fall and winter seasons, this kitchen tool is well worth the cabinet real estate. You can always use the bowl for other functions, too! If a salad spinner isn’t your speed, another good way to dry greens is by laying them out on a tea towel and gently wrapping them in the towel until they are good and dry. For especially muddy greens (sometimes our low-growing spinach comes in pretty muddy), you can dunk these in a bowl of water. Pro ecological tip: reuse water to water a houseplant! If you’re having trouble keeping your greens from going bad, try putting a folded paper towel in the bag along with the greens. If you didn’t dry the greens completely, this will help to absorb the excess moisture. These should remain fresh for about 10 days.
Kohlrabi - Cut the leaves off the bulb (you can eat the greens! Clean and use within three days), scrub the bulb, and place in a container or bag in the crisper drawer. These should keep for about a week, likely longer.
Bunched Greens (chard, beet greens, kale, collards, mustard greens) - These greens should given a quick rinse and dried thoroughly before being placed in a bag and placed in the crisper drawer. Along with salad greens, you should prioritize the precious space in your crisper drawer for bunched greens. These should remain fresh for about a week.
PRO TIP: If your bunched greens arrive at your house looking a little sad, you can easily refresh them and bring them back to life! To do this: trim the bottom of the stems (like you would do with a bouquet) and place in a cup of water. Place this cup in your fridge, and put a plastic bag lightly covering your bunched greens. Store them in the fridge like this until they look better, then remove, dry stems, and place in a bag bound for the crisper drawer.
Herbs (parsley, cilantro) - Treat these like bunched greens. If they need refreshing, you can trim the stems and place in a cup of water. Once sufficiently refreshed, store these in a lightly sealed bag in the crisper drawer. They should store for about a week.
![]() Bunched root veggies are about to make their debut. Photo by Scott David Gordon.
Bunched root veggies are about to make their debut. Photo by Scott David Gordon.
Pickle it, Ferment it, or Freeze it. This post has a ton of information about ways to preserve your vegetables, long term. If you anticipate a surplus of vegetables piling up in your fridge, plan to pickle. Making a mason jar’s worth of refrigerator pickles isn’t as hard as you might think. Operation: save these veggies for later use before the are sentenced to the compost.
![]() Pickled Daikon Radishes. Recipe and photo by Nadia Tamby.
Pickled Daikon Radishes. Recipe and photo by Nadia Tamby.
Make Soup. Make a big pot of soup, or stew, with the sunsetting vegetables. Not only are we entering the perfect season for warm bowls of nourishment, but it’s also a very simple, one-pot way to use up a ton of vegetables. Here is a formula for how to make a soup with whatever vegetables you have. Exclude dairy ingredients to make a soup that is easily-freezable… Aka, make soup to eat now, and soup to eat later. Your tired, hungry, and on-the-verge-of-a-cold-self will thank you later.
Throw it in the Freezer. The easiest of options is to throw your dying vegetable into your stock bag that lives in your freezer. Oh, you don’t have a stock bag? You should start one…. Simply get the largest ziplock you have, label it stock, and then add the heads and tails of vegetables to the bag, plus veggies that are on the road out. Once your bag is full, cook the frozen veg with water, salt, and spices; strain, and use as vegetable stock. Add the bones and carcasses of chickens to this ensemble for chicken stock. You can also freeze vegetables you have in surplus to use as ingredients later. Chop and blanch first for best results.
Loosen up. Before you condemn a vegetable to the compost, make sure it’s received a fair trial. Somewhere along the way, farmers stopped selling vegetables out of the back of their trucks and instead starting distributing vegetables through grocery stores. Here, unrealistic produce cosmetic and seasonality standards were born. Just because your bunch of kale has lost it’s wow-factor, do what a farmer would do, and cook it up anyway. Because it’s still perfectly nutritious and delicious.
![]() Store your vegetables properly, and you'll extend their shelf life. Photo by Scott David Gordon.
Store your vegetables properly, and you'll extend their shelf life. Photo by Scott David Gordon.
Things have gotten out of control in your fridge, vegetables are heading to the compost, and this lingering local produce is becoming more burden than bounty.
WE’RE HERE TO HELP.
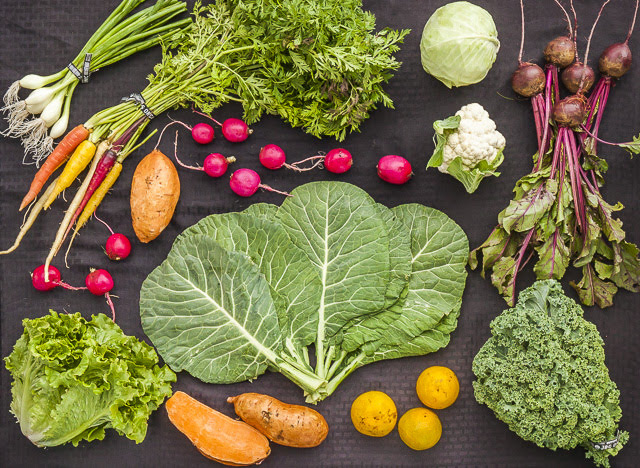
With the seasonal shift upon us, there are some new vegetable players showing up in your CSA box or farmers’ market haul. Many of our new CSA members are reading this (hi!!) and so they’re all new. Today, we’re taking this opportunity to share our wisdom on how to store these vegetables once they make it home to your kitchen. Knowing how to properly store your vegetables is an acquired skill, and once you start to employ these storage techniques, the shelf life of your veggies will extend and you will be happy. Refrigerator equilibrium is now restored, and vegetables are back to being a bundle of bounty, devoid of any burden.
Those of who have been around for a while know that this isn’t the first time we’re talking veggie-storage. But it’s so important, that it begs another post.
Some general storage knowledge to frame your decision making:
PUT A STOP TO MOISTURE LOSS: Vegetables contain lots of water, and as soon as they’re picked, they begin to lose this water, or moisture. This moisture-loss is what causes a vegetable to wilt. Once vegetables arrive in your kitchen, you should think about how you can put a stop to this moisture loss! Generally: keep vegetables in bags, in your fridge. Bags will help trap the moisture around the vegetable instead of letting the water evaporate into the refrigerator. When you set a naked vegetable on a fridge shelf, it’s bound to dry up. Here at the farm, we store most vegetables in closed bins and even hose down the floors of our coolers - all in attempt to retain the moisture. This is what keeps a carrot crunchy and a head of romaine perky.
SEVER THE ROOTS: If you receive bunched vegetables (i.e. turnips, beets, carrots, etc., that have the root attached to the greens), you should remove the roots from the greens as soon as possible. Aka, as soon as you unpack your vegetables! If attached, the greens will operate under a “business as usual” assumption, and will continue to pull moisture out of the root, just as it would do in the field. This will leave you with a soft (albeit edible) root end. Detach those leaves, store the leaves and the roots in separate bags, and you’ll be assured to get the most enjoyment out of this two-for-one vegetable. The roots will last a bit longer than the greens, so saute your turnip greens on Tuesday, and roast the bulbs on Friday.
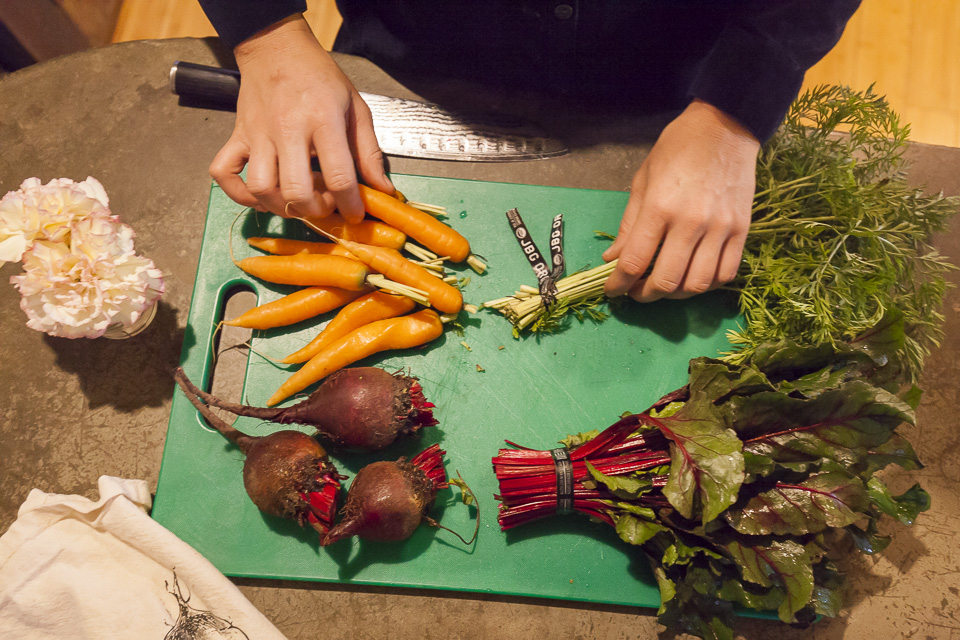 Separate roots from stems and leaves to prevent the roots from becoming soft. Photo by Scott David Gordon.
BAG IT: In the list below, we mention “place them into a bag or a container” quite often. This deserves a little more elaboration. A container can mean a glass or plastic Tupperware, and a bag can mean a plastic bag, recycled produce bags from the grocery store, ziplocks, or even fancy mesh produce bags like this .These stasher bags are all the rage right now, and these would also work perfectly for prepped veggies like sliced carrots, ready for a hummus dip. If using a ziplock or Tupperware, it’s a good idea to crack the opening so as to capture most of the moisture, but to allow an escape route for ethylene. These cloth produce bags are also awesome - get them damp, and they’re retain even more moisture. Though the plastic bags might seem wasteful, please note that you can reuse them until they basically fall apart and the zippers break. New kale goes into the old kale bag… if you use a paper towel to wrap veggies, you can reuse it to wipe up a spill, so on and so forth. Protip: Use clear bags and clear containers so you can actually see what you’re working with.
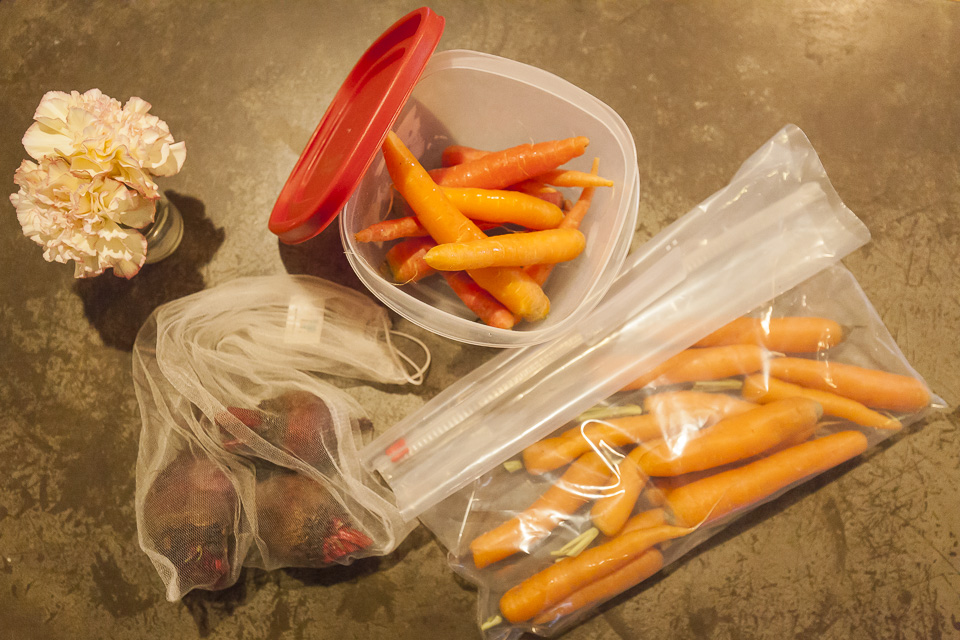
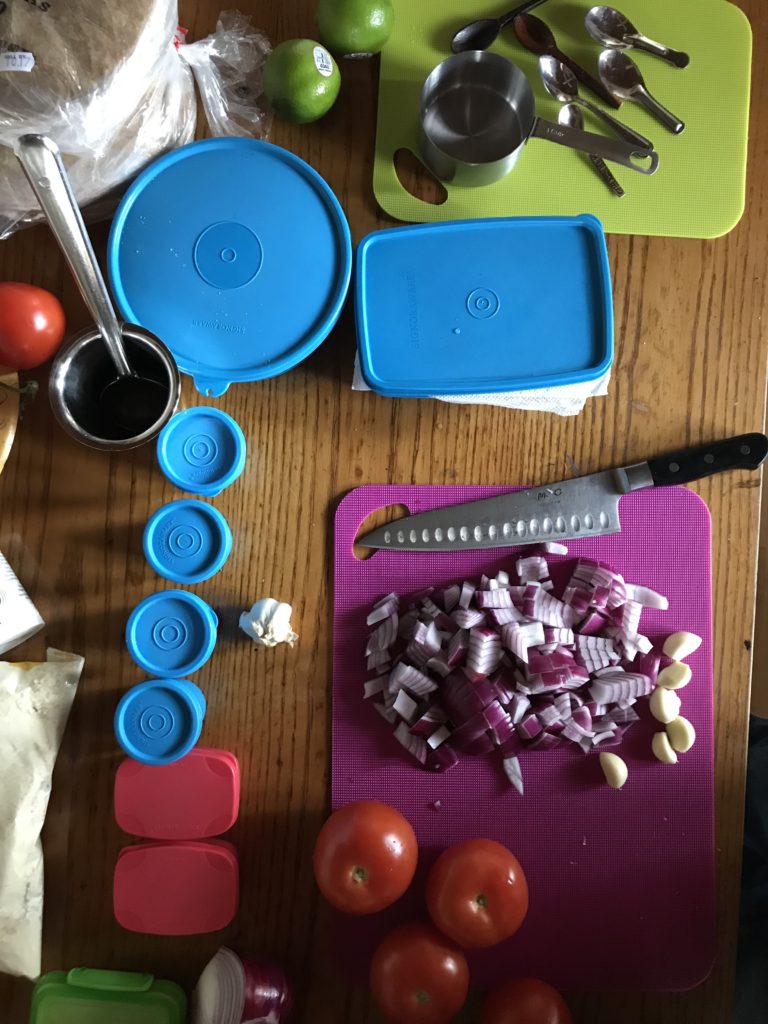 Krishna's impressive collection of containers. Photo by Ada Broussard.
VEGGIE STORAGE TIPS BY CROP:
Sweet potatoes - This early fall tubers should live outside of the fridge, and stored in a cool, dark place out of direct sunlight. Traditionally farmers would build root cellars underground to store valuable fall crops to last them through the winter. Try emulate this environment, and store your sweet potatoes at the bottom of a cabinet, in a pantry, or just in a dark corner on your counter top.Potatoes - Despite not actually being related botanically, potatoes should be treated just like sweet potatoes. To mimic a dark cabinet, you can always place potatoes in a brown paper bag on your counter top.
Broccoli + Cauliflower - Get these yummy crops into a baggy or container in the refrigerator’s crisper drawer, and they should be good for a week.
Bulk Roots (rutabagas, radishes, turnips, beets without greens attached) - If greens are attached, remove and then store in the refrigerator in a bag or container of some sort to keep the moisture in. Beets can last up to 3 weeks, radishes can last up to 2 weeks, and lastly, turnips and rutabagas can last up to 2 weeks. The greens of beets and turnips should be enjoyed within 3 days of being trimmed, and stored in a container or bag after being cleaned and dried.
Carrots - Cut off the greens if they come bunched (Make pesto with the greens!) and put in a container or bag in the crisper drawer, and these tasty snack veggies will last about 2 to 3 weeks.
Cabbage - This should be stored in a bag or container, in the crisper drawer. In these conditions, a head of Napa cabbage can last 1-2 weeks, and a head of green or purple cabbage can last anywhere from 2-5 weeks.
Salad Greens (arugula, spinach, romaine, loose-leaf lettuce) - If these come in a little dirty, don't be alarmed. For easiest meal prep, you can wash these when you get them; however, make sure that they're completely dry before you put them in the fridge! Any water left on these leafy greens will turn them into slime. There are two great ways to ensure dryness. First off, a salad spinner - for the fall and winter seasons, this kitchen tool is well worth the cabinet real estate. You can always use the bowl for other functions, too! If a salad spinner isn’t your speed, another good way to dry greens is by laying them out on a tea towel and gently wrapping them in the towel until they are good and dry. For especially muddy greens (sometimes our low-growing spinach comes in pretty muddy), you can dunk these in a bowl of water. Pro ecological tip: reuse water to water a houseplant! If you’re having trouble keeping your greens from going bad, try putting a folded paper towel in the bag along with the greens. If you didn’t dry the greens completely, this will help to absorb the excess moisture. These should remain fresh for about 10 days.
Kohlrabi - Cut the leaves off the bulb (you can eat the greens! Clean and use within three days), scrub the bulb, and place in a container or bag in the crisper drawer. These should keep for about a week, likely longer.
Bunched Greens (chard, beet greens, kale, collards, mustard greens) - These greens should given a quick rinse and dried thoroughly before being placed in a bag and placed in the crisper drawer. Along with salad greens, you should prioritize the precious space in your crisper drawer for bunched greens. These should remain fresh for about a week.
PRO TIP: If your bunched greens arrive at your house looking a little sad, you can easily refresh them and bring them back to life! To do this: trim the bottom of the stems (like you would do with a bouquet) and place in a cup of water. Place this cup in your fridge, and put a plastic bag lightly covering your bunched greens. Store them in the fridge like this until they look better, then remove, dry stems, and place in a bag bound for the crisper drawer.
Herbs (parsley, cilantro) - Treat these like bunched greens. If they need refreshing, you can trim the stems and place in a cup of water. Once sufficiently refreshed, store these in a lightly sealed bag in the crisper drawer. They should store for about a week.
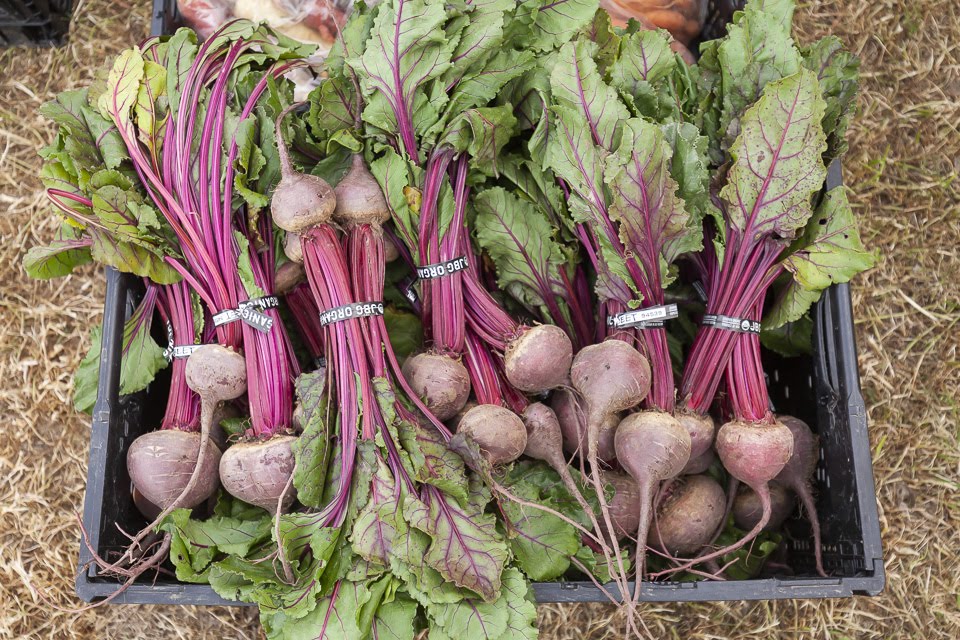 Bunched root veggies are about to make their debut. Photo by Scott David Gordon.
Habits worth heeding:
Think about the natural shelf life of each vegetable you bring home when planning your menus, and use delicate items like salad greens and bunched kale first. Unless, of course, you have an insatiable craving to roast your sweet potatoes and cover with sour cream. We will not stop you. If that’s the case, eat that first.Pickle it, Ferment it, or Freeze it. This post has a ton of information about ways to preserve your vegetables, long term. If you anticipate a surplus of vegetables piling up in your fridge, plan to pickle. Making a mason jar’s worth of refrigerator pickles isn’t as hard as you might think. Operation: save these veggies for later use before the are sentenced to the compost.
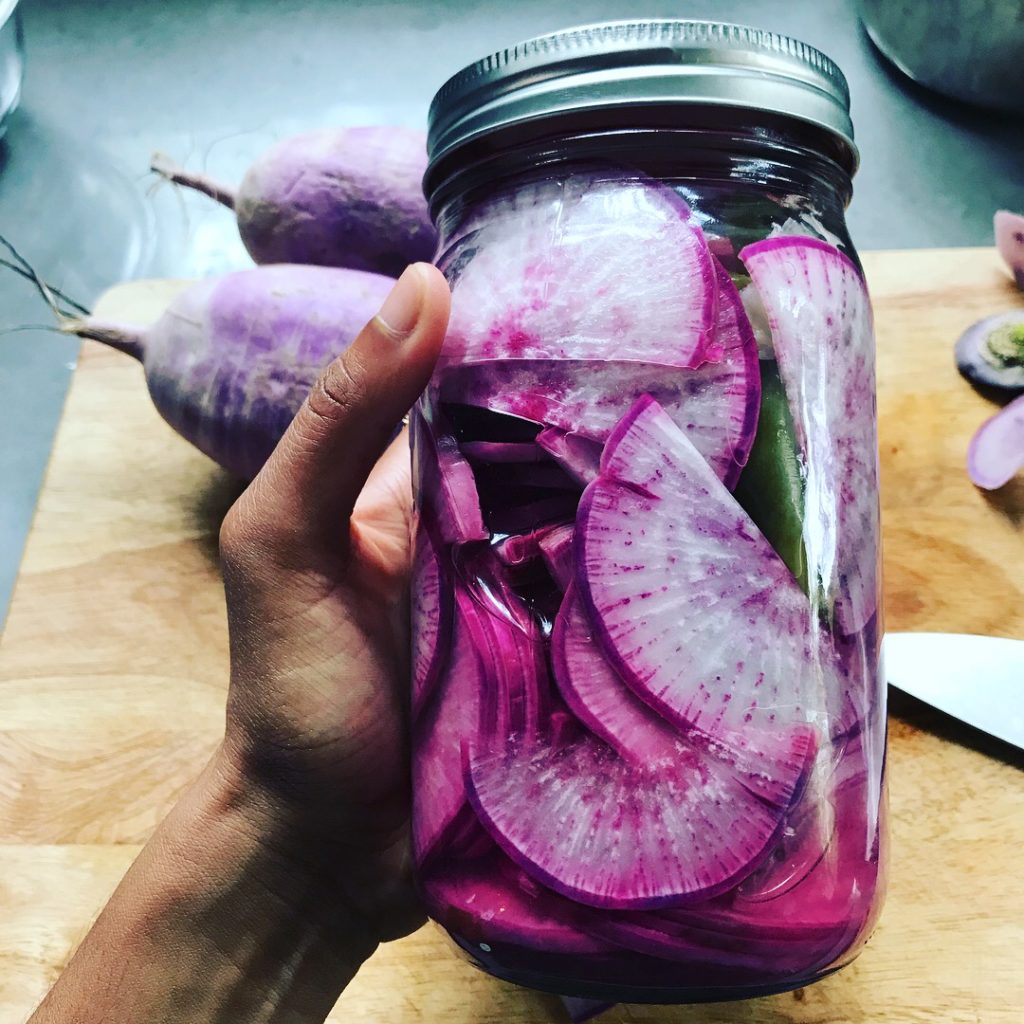 Pickled Daikon Radishes. Recipe and photo by Nadia Tamby.
Make Soup. Make a big pot of soup, or stew, with the sunsetting vegetables. Not only are we entering the perfect season for warm bowls of nourishment, but it’s also a very simple, one-pot way to use up a ton of vegetables. Here is a formula for how to make a soup with whatever vegetables you have. Exclude dairy ingredients to make a soup that is easily-freezable… Aka, make soup to eat now, and soup to eat later. Your tired, hungry, and on-the-verge-of-a-cold-self will thank you later.
Throw it in the Freezer. The easiest of options is to throw your dying vegetable into your stock bag that lives in your freezer. Oh, you don’t have a stock bag? You should start one…. Simply get the largest ziplock you have, label it stock, and then add the heads and tails of vegetables to the bag, plus veggies that are on the road out. Once your bag is full, cook the frozen veg with water, salt, and spices; strain, and use as vegetable stock. Add the bones and carcasses of chickens to this ensemble for chicken stock. You can also freeze vegetables you have in surplus to use as ingredients later. Chop and blanch first for best results.
Loosen up. Before you condemn a vegetable to the compost, make sure it’s received a fair trial. Somewhere along the way, farmers stopped selling vegetables out of the back of their trucks and instead starting distributing vegetables through grocery stores. Here, unrealistic produce cosmetic and seasonality standards were born. Just because your bunch of kale has lost it’s wow-factor, do what a farmer would do, and cook it up anyway. Because it’s still perfectly nutritious and delicious.
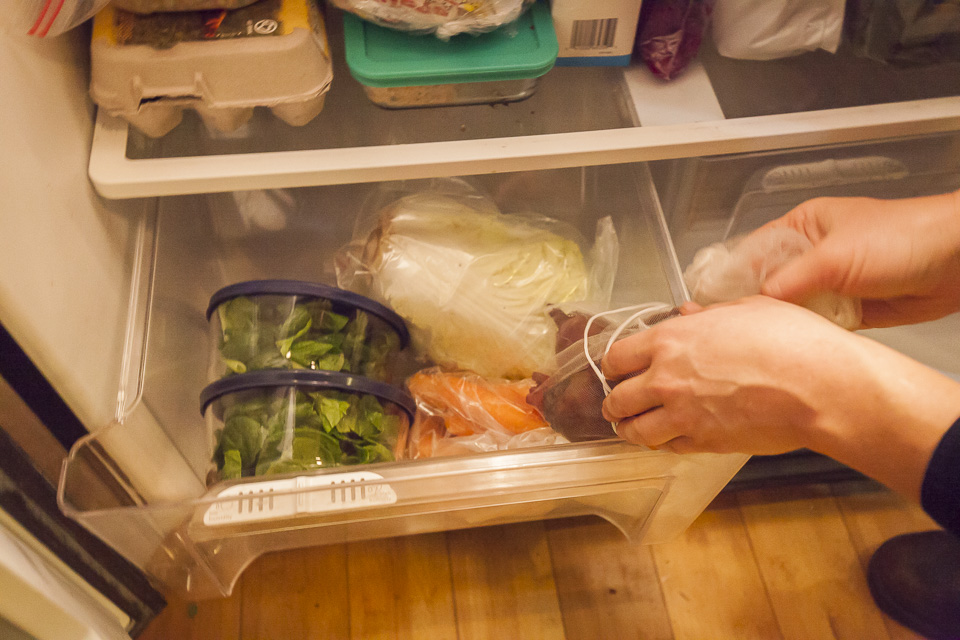 Store your vegetables properly, and you'll extend their shelf life. Photo by Scott David Gordon.
CSA BOX CONTENTS WEEK OF OCT 28TH
10/28/19 — Scott
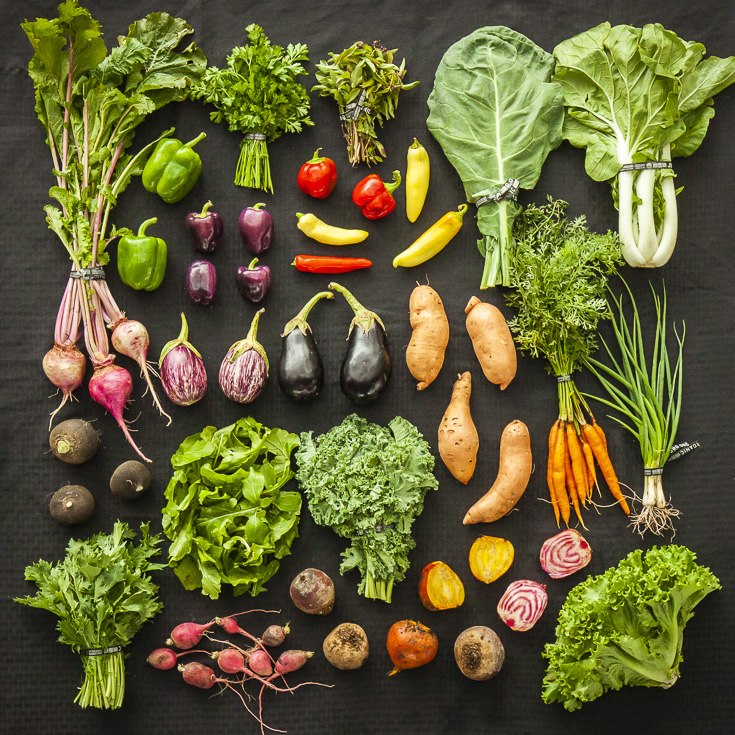 CSA Box Contents Week of Oct 28th
Large Box
Beets
Carrots
Eggplant
Greens, Arugula
Greens, Collards
Greens, Kale, Curly
Herb, Cilantro
Onion, Multiplying
Pepper, Sweet
Potato, Sweet
Radish
Turnips
Beets
Carrots
Eggplant
Greens, Arugula
Greens, Collards
Greens, Kale, Curly
Herb, Cilantro
Onion, Multiplying
Pepper, Sweet
Potato, Sweet
Radish
Turnips
Medium Box
Beets
Bok Choy
Carrots
Eggplant
Greens, Kale, Red
Greens, Mustard
Herb, Cilantro
Pepper, Sweet
Potato
Turnips
Beets
Bok Choy
Carrots
Eggplant
Greens, Kale, Red
Greens, Mustard
Herb, Cilantro
Pepper, Sweet
Potato
Turnips
Small Box
Beets
Carrots
Greens, Arugula
Greens, Kale, Curly
Herb, Cilantro
Onion, Multiplying
Pepper, Sweet
Beets
Carrots
Greens, Arugula
Greens, Kale, Curly
Herb, Cilantro
Onion, Multiplying
Pepper, Sweet
Individual Box
Beets
Carrots
Greens, Collards
Greens, Mustard
Potato
Beets
Carrots
Greens, Collards
Greens, Mustard
Potato
CSA BOX CONTENTS WEEK OF OCT 28TH
10/29/19 — Scott
CSA Box Contents Week of Oct 28th
Large Box
Bok Choy
Carrots X 2
Eggplant
Greens, Kale, Curly
Greens, Mizuna
Herb, Parsley, Flat
Lettuce, Green Leaf
Onion, Multiplying
Pepper, Hot Medley
Potato
Radish
Turnips