CSA BOX CONTENTS WEEK OF APR 22ND
04/23/19 — Scott
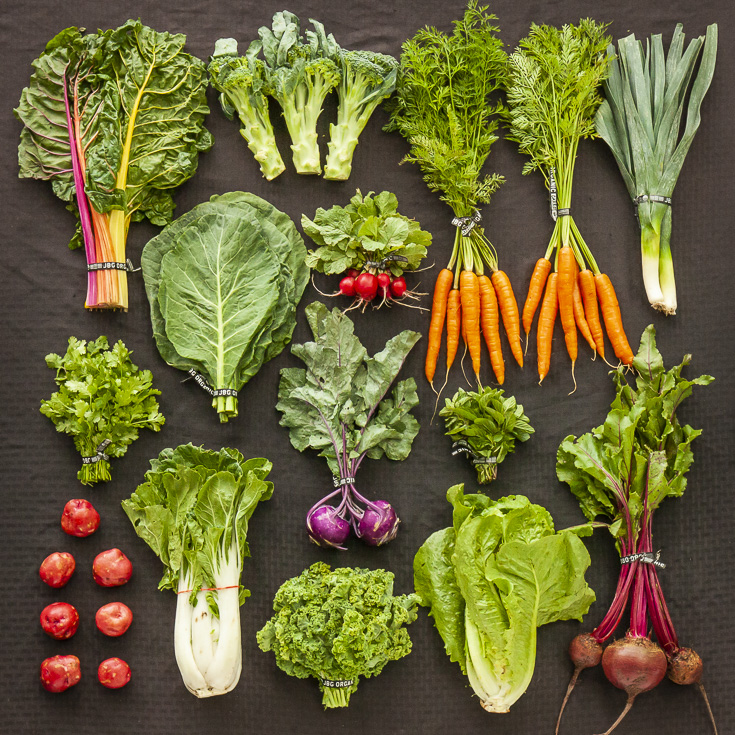 CSA Box Contents Week of Apr 22nd
Large Box
Beets
Carrots
Greens, Chard, White
Greens, Kale, Curly
Herb, Dry
Leek
Lettuce, Romaine
Onion, Ball
Potato X 2
Radish
Squash, Farmer's Choice
Beets
Carrots
Greens, Chard, White
Greens, Kale, Curly
Herb, Dry
Leek
Lettuce, Romaine
Onion, Ball
Potato X 2
Radish
Squash, Farmer's Choice
Medium Box
Beets
Bok Choy, Baby
Greens, Kale, Curly
Herb, Dry
Leek
Lettuce, Romaine
Onion, Ball
Potato
Radish
Squash, Farmer's Choice
Beets
Bok Choy, Baby
Greens, Kale, Curly
Herb, Dry
Leek
Lettuce, Romaine
Onion, Ball
Potato
Radish
Squash, Farmer's Choice
Small Box
Carrots
Greens, Chard, White
Herb, Dry
Leek
Lettuce, Romaine
Onion, Ball
Potato
Squash, Farmer's Choice
Carrots
Greens, Chard, White
Herb, Dry
Leek
Lettuce, Romaine
Onion, Ball
Potato
Squash, Farmer's Choice
Individual Box
Greens, Chard, White
Leek
Onion, Ball
Potato
Squash, Farmer's Choice
Greens, Chard, White
Leek
Onion, Ball
Potato
Squash, Farmer's Choice
5 KITCHEN HACKS TO HELP YOU COOK MORE VEGETABLES
04/19/19 — Heydon Hatcher
Loading up on a bounty of fresh vegetables is the best way to eat healthily at home, but we know that working your way through a CSA box or market haul can sometimes be intimidating. The women at Club Home Made offer up some of their favorite tips to more easily create delicious food with those beautiful vegetables.
![]() Simple, gorgeous, and delicious. Salad and photo by Mackenzie Smith Kelley.
Simple, gorgeous, and delicious. Salad and photo by Mackenzie Smith Kelley.
1. Find Your Go-To
Having a couple of recipes* in your arsenal that will work with whatever vegetables you have is a wonderful way of avoiding veggie waste. And when we say recipe, we really mean a cooking technique. Some of our favorite dishes that work well with just about any seasonal vegetable are stir-fries, quiches, and tacos. If you're interested in strengthening your confidence to throw together a meal with whatever you have, check out Club Home Made. We're passionate about arming cooks and wanna-be-cooks with these kinds of skills.
![]() Ada and Becky from Club Home Made stocking up on veggies. Photo by Scott David Gordon.
Ada and Becky from Club Home Made stocking up on veggies. Photo by Scott David Gordon.
![]() Photo by Casey Willson.
Photo by Casey Willson.
I'm a firm believer that you don't need super fancy gadgetry to cook good food, but having a knife you love (that is sharp!) and a big and solid cutting board will make vegetable prep so much more enjoyable. Seriously. When I got my first grown-up knife, I was shocked to see that the non-serrated blade sliced through a tomato without any trouble. You shouldn't have to put any muscle behind chopping vegetables. A sharp knife should do the work for you. Head to YouTube to learn how to sharpen your knife, or do like me and get a professional to sharpen it at the farmers' market.
![]() Invest in a good knife like Megan! Photo by Scott David Gordon.
Invest in a good knife like Megan! Photo by Scott David Gordon.
![]() Don't overcrowd. Photo by Scott David Gordon.
Don't overcrowd. Photo by Scott David Gordon.
I have an enviable collection of beautiful ceramic bowls in my kitchen, but my most used bowl is the huge stainless steel mixing bowl I got at Ace Mart. I have a gorgeous cutting board from Straight Leg Ranch that I use for meat and cheese boards, but my favorite cutting board for daily use is a restaurant quality cutting board, also from Ace Mart. It's no-frills, easy to clean, and has a big enough surface area to chop all the vegetables. Again, give yourself some space.
In addition to a good knife and chopping surface, my two other most used items in the kitchen are my dutch oven and honestly, my set of glass pyrex storage containers. I use these to store pre-chopped vegetables (ready for quick cooking) and also leftovers. Speaking of leftovers, might I recommend this quick read to help you think about your leftovers (among other things) differently: The Everlasting Meal.
Freezing Leftovers: Steer clear of freezing dishes with dairy products in them, but if you're making meatballs, for example, consider making a double batch and freezing leftovers in single-serving containers for quick lunches when you ain't got nothing else. Making a big pot of beans? Make more than you need! I freeze cooked beans in 1 or 2 cup portions, which can easily be thrown into the microwave. Realize that you suddenly have an entire drawer full of beets? For the quickest of preservation, boil, peel, and then dice your extra beets and freeze for a ready-to-go addition to a smoothie or salad. This method can really be applied to just about anything you have too much of and is a wonderful way to avoiding wasting a vegetable you may be (momentarily) sick of. I promise you'll miss those beets and that chard come July.
Do yourself a favor, and label what you put in the fridge. Even if you think you'll remember, just stick a label on it. Because the more you start to use your freezer, the crazier it will get in there. Include the date. I try to eat frozen leftovers in about 4 months, and try to use up frozen vegetables/ingredients in about 7 months. Of course, the food will likely still be fine past these dates, but you'll start to lose flavor and texture.
Freezing Ingredients: Freeze other ingredients like freshly minced garlic and ginger paste, seasonal pesto, or tomato sauce. During tomato season: dedicate one lazy Sunday afternoon to hitting up the market, buying a bounty of tomatoes, and have nothing on your schedule except making and freezing tomato sauce. Consider making this tomato gimlet to fuel the enterprise.
![]() Frozen ingredients. Photo by Scott David Gordon.
Frozen ingredients. Photo by Scott David Gordon.
I have a sheet of paper taped to the side of my fridge: every time I add something to my freezer, I add it to the list. That way when I'm trying to cobble together a quick and easy meal, I can see what ingredients I have frozen at just a quick glance. Having the list up also is a visual reminder at all times that there are beautiful ingredients just begging to be used in the freezer. It helps me work through these things quickly, which facilitates this entire method of preservation. The more I utilize these ingredients when I'm out of fresh options or need to go to the store, the more space I have to then freeze them when the CSA box overfloweth.
For more tips on how to properly store your veggies, check out this JBG blog post. Storing your vegetables properly will extend their life, and avoid any incidents of veggie-shame that may accompany wasting delicious produce.
Hope you enjoyed these tips. Join Club Home Made's newsletter or follow along on their brand new Instagram for more veggie tips 'n tricks and recipe videos (to come!). Happy cooking!
![]() Kale bath. Photo by Scott David Gordon.
Kale bath. Photo by Scott David Gordon.
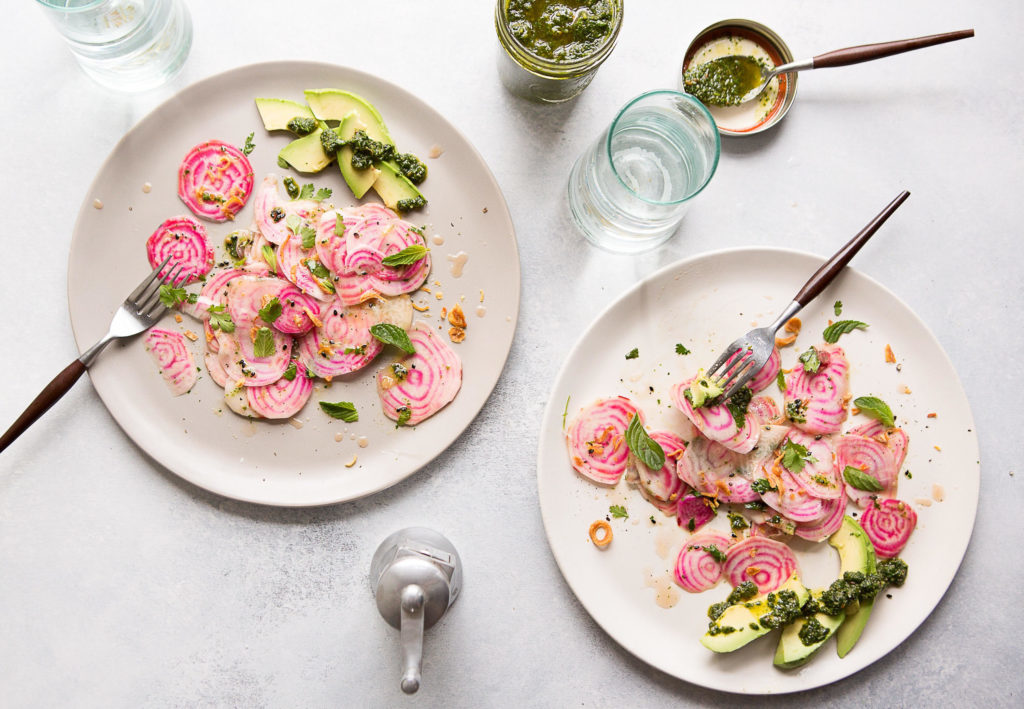 Simple, gorgeous, and delicious. Salad and photo by Mackenzie Smith Kelley.
1. Find Your Go-To Recipes Cooking Methods
Having a couple of recipes* in your arsenal that will work with whatever vegetables you have is a wonderful way of avoiding veggie waste. And when we say recipe, we really mean a cooking technique. Some of our favorite dishes that work well with just about any seasonal vegetable are stir-fries, quiches, and tacos. If you're interested in strengthening your confidence to throw together a meal with whatever you have, check out Club Home Made. We're passionate about arming cooks and wanna-be-cooks with these kinds of skills.
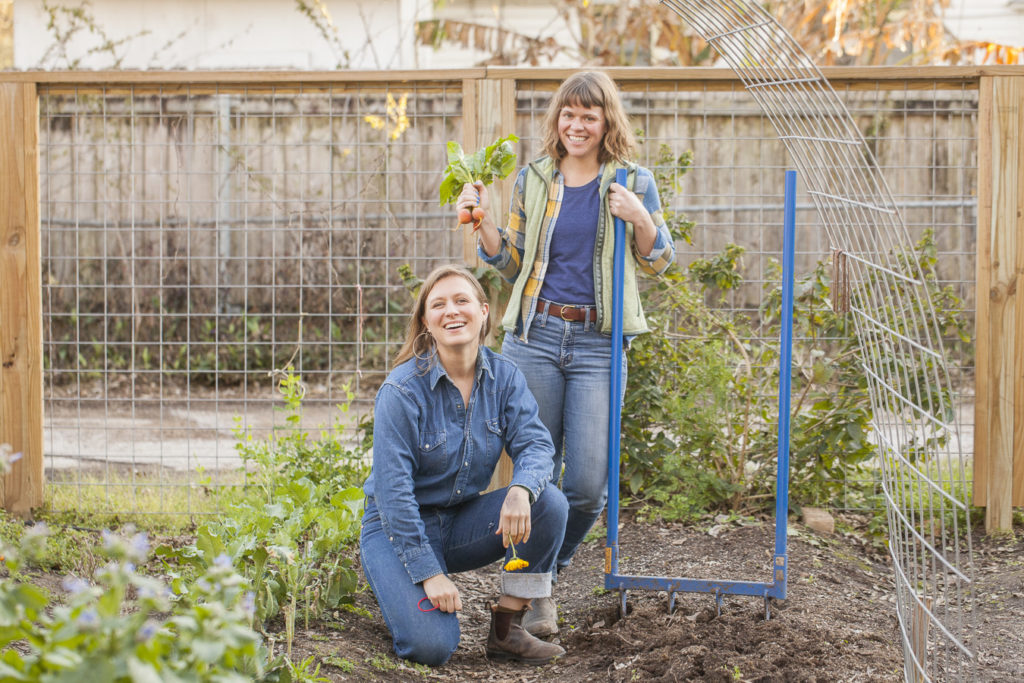 Ada and Becky from Club Home Made stocking up on veggies. Photo by Scott David Gordon.
2. A Few of My Favorite Things...
Get a fancy-ish knife and good cutting board.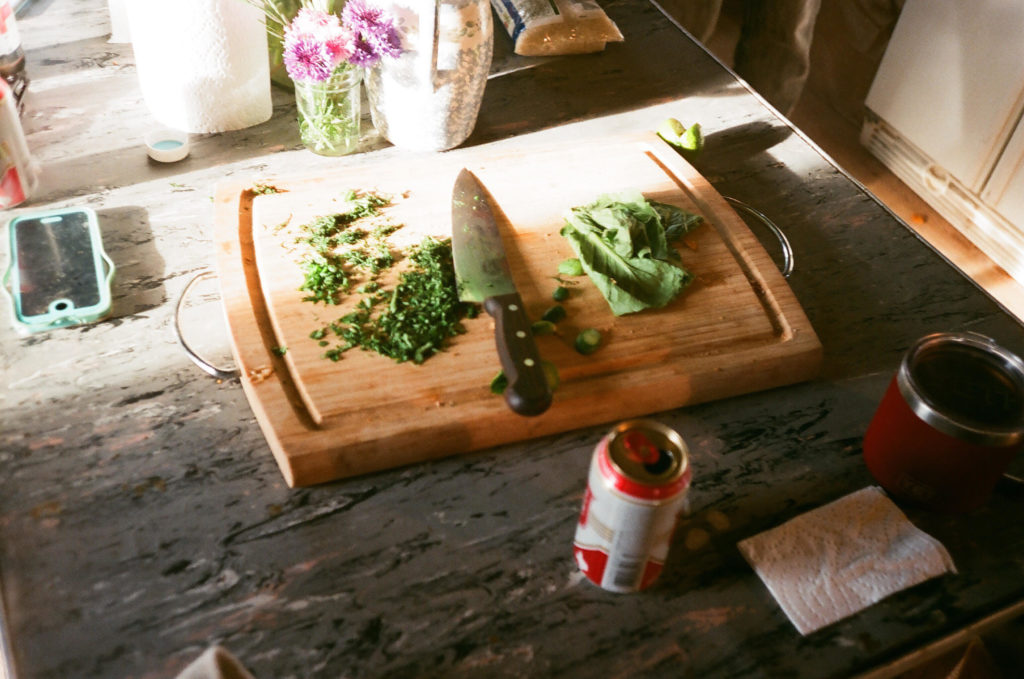 Photo by Casey Willson.
I'm a firm believer that you don't need super fancy gadgetry to cook good food, but having a knife you love (that is sharp!) and a big and solid cutting board will make vegetable prep so much more enjoyable. Seriously. When I got my first grown-up knife, I was shocked to see that the non-serrated blade sliced through a tomato without any trouble. You shouldn't have to put any muscle behind chopping vegetables. A sharp knife should do the work for you. Head to YouTube to learn how to sharpen your knife, or do like me and get a professional to sharpen it at the farmers' market.
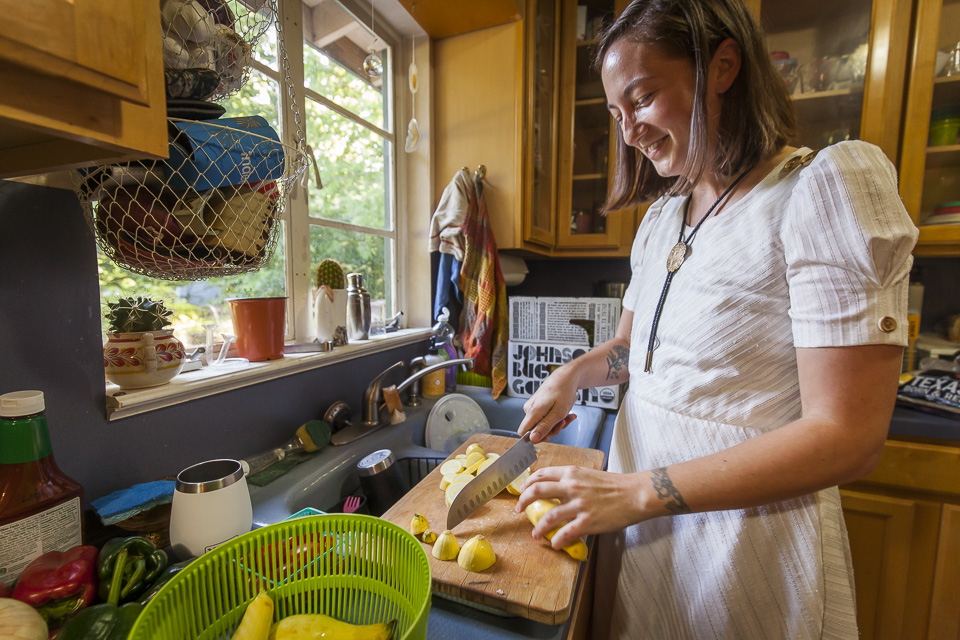 Invest in a good knife like Megan! Photo by Scott David Gordon.
3. Don't Crowd
Don't overcrowd your pan, your pot, your bowl, or your cutting board. Food will brown better when it's spaced out in a pan, and mixing will be easier when you choose the right bowl. Your prep space will be better organized when you have room on your cutting board to chop multiple ingredients at once. When choosing a bowl or cutting board, I always choose one size larger than I think I need. And have never wished for a smaller vessel.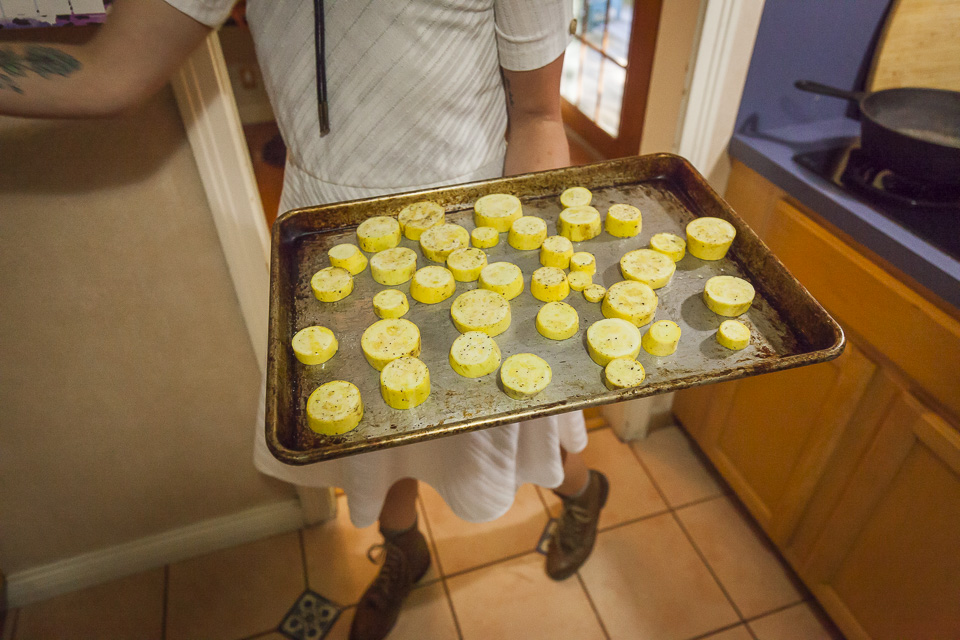 Don't overcrowd. Photo by Scott David Gordon.
I have an enviable collection of beautiful ceramic bowls in my kitchen, but my most used bowl is the huge stainless steel mixing bowl I got at Ace Mart. I have a gorgeous cutting board from Straight Leg Ranch that I use for meat and cheese boards, but my favorite cutting board for daily use is a restaurant quality cutting board, also from Ace Mart. It's no-frills, easy to clean, and has a big enough surface area to chop all the vegetables. Again, give yourself some space.
In addition to a good knife and chopping surface, my two other most used items in the kitchen are my dutch oven and honestly, my set of glass pyrex storage containers. I use these to store pre-chopped vegetables (ready for quick cooking) and also leftovers. Speaking of leftovers, might I recommend this quick read to help you think about your leftovers (among other things) differently: The Everlasting Meal.
4. Become Friends with Your Freezer
Specifically, start to utilize your freezer space for things other than pizzas and frozen-potato products, which, for the record, we support. But, your freezer is also a wonderful way to store leftover meals, or even just components of future meals, for quick and easy use.Freezing Leftovers: Steer clear of freezing dishes with dairy products in them, but if you're making meatballs, for example, consider making a double batch and freezing leftovers in single-serving containers for quick lunches when you ain't got nothing else. Making a big pot of beans? Make more than you need! I freeze cooked beans in 1 or 2 cup portions, which can easily be thrown into the microwave. Realize that you suddenly have an entire drawer full of beets? For the quickest of preservation, boil, peel, and then dice your extra beets and freeze for a ready-to-go addition to a smoothie or salad. This method can really be applied to just about anything you have too much of and is a wonderful way to avoiding wasting a vegetable you may be (momentarily) sick of. I promise you'll miss those beets and that chard come July.
Do yourself a favor, and label what you put in the fridge. Even if you think you'll remember, just stick a label on it. Because the more you start to use your freezer, the crazier it will get in there. Include the date. I try to eat frozen leftovers in about 4 months, and try to use up frozen vegetables/ingredients in about 7 months. Of course, the food will likely still be fine past these dates, but you'll start to lose flavor and texture.
Freezing Ingredients: Freeze other ingredients like freshly minced garlic and ginger paste, seasonal pesto, or tomato sauce. During tomato season: dedicate one lazy Sunday afternoon to hitting up the market, buying a bounty of tomatoes, and have nothing on your schedule except making and freezing tomato sauce. Consider making this tomato gimlet to fuel the enterprise.
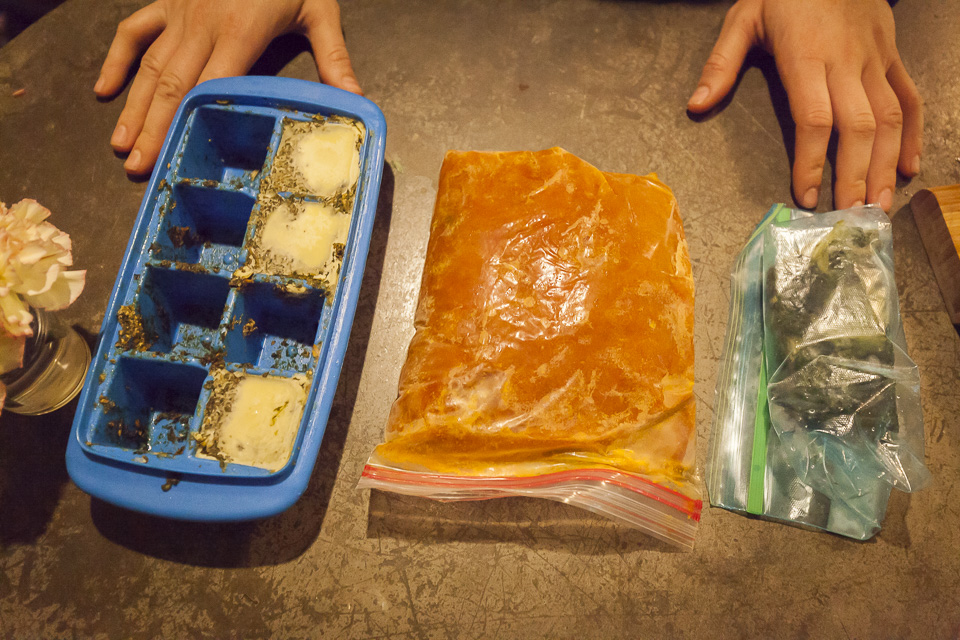 Frozen ingredients. Photo by Scott David Gordon.
I have a sheet of paper taped to the side of my fridge: every time I add something to my freezer, I add it to the list. That way when I'm trying to cobble together a quick and easy meal, I can see what ingredients I have frozen at just a quick glance. Having the list up also is a visual reminder at all times that there are beautiful ingredients just begging to be used in the freezer. It helps me work through these things quickly, which facilitates this entire method of preservation. The more I utilize these ingredients when I'm out of fresh options or need to go to the store, the more space I have to then freeze them when the CSA box overfloweth.
5. Wash Your Veggies
Clean, wash, chop, and sort your veggies when they arrive in your kitchen. Sourcing vegetables straight from a farm means your vegetables are closer to their harvest date... aka, fresher. This means vegetables that are far superior in flavor and also in nutritional value. We all know that sometimes vegetables that come straight from a farm may arrive in your kitchen with a story to tell. "I'm a carrot! I grow underground, and to prove it, here's a little dirt." Grocery stores have primed us to expect spotless vegetables, void of any trace of how they actually grew. If you're new to getting farm-fresh vegetables, do yourself a favor and get them immediately ready for cooking when they arrive at the house. This will help you get used to your organic, homegrown, and superior tasting vegetables from the farm.For more tips on how to properly store your veggies, check out this JBG blog post. Storing your vegetables properly will extend their life, and avoid any incidents of veggie-shame that may accompany wasting delicious produce.
Hope you enjoyed these tips. Join Club Home Made's newsletter or follow along on their brand new Instagram for more veggie tips 'n tricks and recipe videos (to come!). Happy cooking!
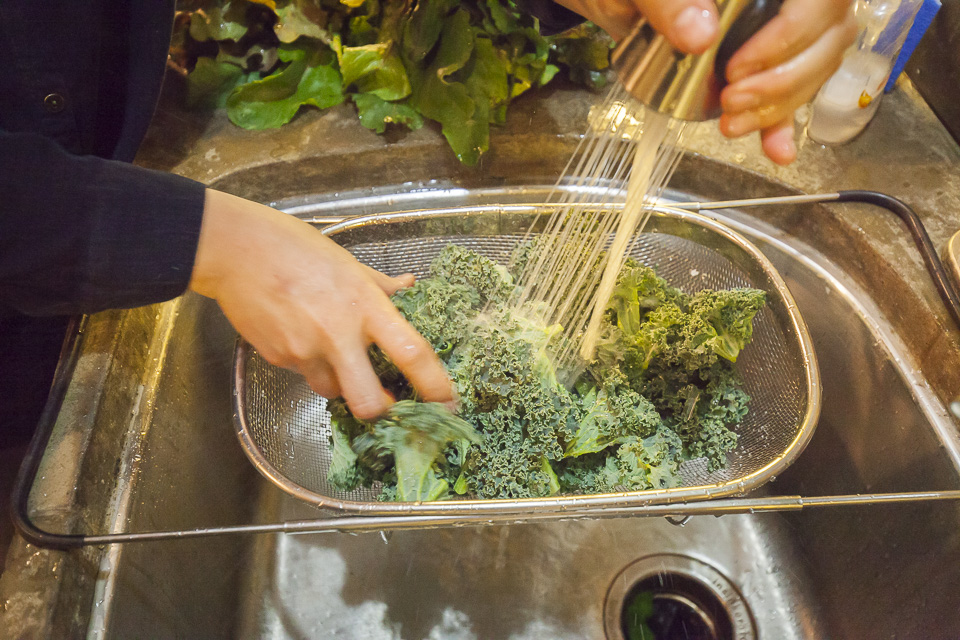 Kale bath. Photo by Scott David Gordon.
CAMPFIRE CARROTS
04/18/19 — Heydon Hatcher
Photos and Recipe by Ada Broussard
Preparing food over a campfire is a great practice in simplifying your cooking, and letting a few (quality) ingredients shine. We love simple and vegetable-driven cooking at Club Home Made, and this recipe is just that. Enjoy!
![]() Campfire carrots.
Campfire carrots.
Wash and prep carrots. Small carrots can be kept whole, larger carrots sliced lengthwise. If the carrots still have their greens on them, you can trim these, keeping about 1-2 inches of green stem attached. Not only is this bit delicious, but it makes for a convenient handle while camping.
Drop carrots into a pot of boiling and highly salted water for just about 2-5 minutes. They should still be pretty firm when done. Skip this step if it seems too fussy. Remove carrots from water, dry, and toss with olive oil and salt.
Place carrots on a hot grill, and cook turning a few times, until carrots are al dente. Depending on your carrots and depending on your fire, this will take anywhere from 15-35 minutes. Drink beer whilst waiting. Transfer carrots to a bowl, and toss with a bit of acid to taste. These are delicious enjoyed both hot and at room (outdoor?) temperature.
If you're making these while camping, par-boil your carrots at home, and bring pre-chopped and pre-(par)boiled and carrots in a Ziploc or tightly sealed Tupperware already tossed with salt and oil. If you don't have a grill, carrots wrapped in double layers of aluminum foil and a big pad of butter cook well over hot coals. Save leftover carrots from dinner, and enjoy for breakfast on a tortilla with a scrambled egg, maybe some canned corn and spicy salsa.
![]() A Feast! Smoked chicken, ribs, grilled romaine with Cesar dressing, campfire carrots, grilled spring onions, and buttery rice cooked in home made chicken stock. This is what weekend eating should be!
A Feast! Smoked chicken, ribs, grilled romaine with Cesar dressing, campfire carrots, grilled spring onions, and buttery rice cooked in home made chicken stock. This is what weekend eating should be!
Preparing food over a campfire is a great practice in simplifying your cooking, and letting a few (quality) ingredients shine. We love simple and vegetable-driven cooking at Club Home Made, and this recipe is just that. Enjoy!
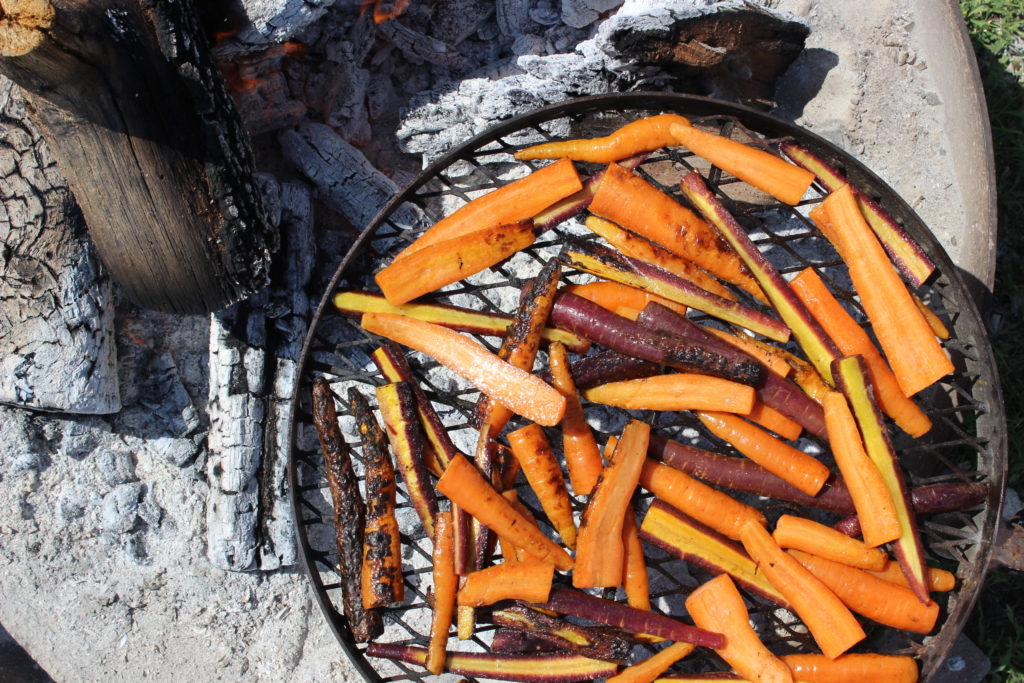 Campfire carrots.
Ingredients:
- Carrots - If they're small carrots, keep them whole. For larger carrots, slice in half lengthwise. Depending on the grill, keeping the carrots large will help you avoid losing carrots to the fire gods.
- Olive Oil
- Salt
- Acid of choice - I prefer a squeeze of lemon, but any vinegar would work, too.
- Optional: Toppings like carrot-top pesto, Greek yogurt, shaved Parmesan, or freshly chopped herbs and nuts.
How to:
Make fire! Most good campfire cooking happens over hot coals, not roaring flames.Wash and prep carrots. Small carrots can be kept whole, larger carrots sliced lengthwise. If the carrots still have their greens on them, you can trim these, keeping about 1-2 inches of green stem attached. Not only is this bit delicious, but it makes for a convenient handle while camping.
Drop carrots into a pot of boiling and highly salted water for just about 2-5 minutes. They should still be pretty firm when done. Skip this step if it seems too fussy. Remove carrots from water, dry, and toss with olive oil and salt.
Place carrots on a hot grill, and cook turning a few times, until carrots are al dente. Depending on your carrots and depending on your fire, this will take anywhere from 15-35 minutes. Drink beer whilst waiting. Transfer carrots to a bowl, and toss with a bit of acid to taste. These are delicious enjoyed both hot and at room (outdoor?) temperature.
If you're making these while camping, par-boil your carrots at home, and bring pre-chopped and pre-(par)boiled and carrots in a Ziploc or tightly sealed Tupperware already tossed with salt and oil. If you don't have a grill, carrots wrapped in double layers of aluminum foil and a big pad of butter cook well over hot coals. Save leftover carrots from dinner, and enjoy for breakfast on a tortilla with a scrambled egg, maybe some canned corn and spicy salsa.
 A Feast! Smoked chicken, ribs, grilled romaine with Cesar dressing, campfire carrots, grilled spring onions, and buttery rice cooked in home made chicken stock. This is what weekend eating should be!
CSA BOX CONTENTS WEEK OF APR 15TH
04/16/19 — Scott
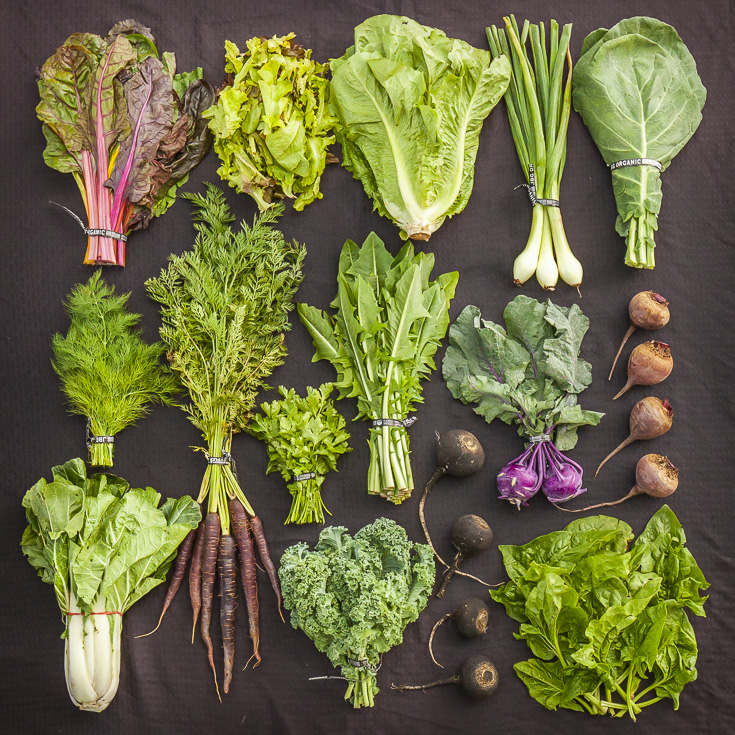 CSA Box Contents Week of Apr 15th
Large Box
Beets
Bok Choy
Brussels Sprouts
Carrots X 2
Greens, Collards
Greens, Kale, Curly
Herb, Dry
Leek
Lettuce, Romaine
Potato
Beets
Bok Choy
Brussels Sprouts
Carrots X 2
Greens, Collards
Greens, Kale, Curly
Herb, Dry
Leek
Lettuce, Romaine
Potato
Medium Box
Beets
Brussels Sprouts
Carrots X 2
Greens, Chard, Rainbow
Greens, Spinach
Herb, Dry
Leek
Lettuce, Romaine
Potato
Beets
Brussels Sprouts
Carrots X 2
Greens, Chard, Rainbow
Greens, Spinach
Herb, Dry
Leek
Lettuce, Romaine
Potato
Small Box
Beets
Bok Choy
Carrots X 2
Greens, Collards
Herb, Cilantro
Lettuce, Romaine
Beets
Bok Choy
Carrots X 2
Greens, Collards
Herb, Cilantro
Lettuce, Romaine
Individual Box
Beets
Carrots
Greens, Kale, Curly
Lettuce, Romaine
Potato
Beets
Carrots
Greens, Kale, Curly
Lettuce, Romaine
Potato
ALL THE DIRT: A REVIEW OF OUR FAVORITE BLOG POSTS
04/12/19 — Heydon Hatcher
This week, we are revisiting and mapping out some of our favorite blog posts (along with a couple videos and a Statesman article) covering a gamut of helpful and informative topics regarding all things JBG. Wondering about the history of tomatoes? How about what the entire process from seed to market of a crop looks like? Or maybe you were wondering about pro tips on how to increase your produce's longevity... it's all covered below!
![]() Photo by Scott David Gordon.
Photo by Scott David Gordon.
![]() "The green bean picker - this machine’s sole purpose is to pick green beans. The reason for that is that it’s super labor intensive to pick all those little green beans that are hiding in leaves. With three people we can harvest large swaths of green bean crops that would otherwise take us all day plus a lot more people." - excerpt from Farm Machinery and Efficiency.
"The green bean picker - this machine’s sole purpose is to pick green beans. The reason for that is that it’s super labor intensive to pick all those little green beans that are hiding in leaves. With three people we can harvest large swaths of green bean crops that would otherwise take us all day plus a lot more people." - excerpt from Farm Machinery and Efficiency.
![]() "Missoula, Chucha, and Roxy are our three dreamboat farm pups, and they are so ingrained in the farm lifestyle that we would absolutely be lost without them. They serve as emotional support during those long and stressful farm days, entertainment when someone’s in dire need of a smile, companionship for farm walks long or short, and an endless supply of friendly tail wags to anyone who graces the farm. First, we will hand off the mic to Roxy." -excerpt from Farm Dog Spotlight.
"Missoula, Chucha, and Roxy are our three dreamboat farm pups, and they are so ingrained in the farm lifestyle that we would absolutely be lost without them. They serve as emotional support during those long and stressful farm days, entertainment when someone’s in dire need of a smile, companionship for farm walks long or short, and an endless supply of friendly tail wags to anyone who graces the farm. First, we will hand off the mic to Roxy." -excerpt from Farm Dog Spotlight.
![]() "Get yourself a good knife. The one I have, I’ve had since my college years, and I (and Hunter) sharpen often" -Megan on CSA Hacks.
"Get yourself a good knife. The one I have, I’ve had since my college years, and I (and Hunter) sharpen often" -Megan on CSA Hacks.
![]() "My first introduction to local farmers was through Johnson's Backyard Garden, back when y’all were extremely small. Brent was at all the Farmers Markets himself, and hosting everybody on the farm very often. So, that's why I still do business with JBG... it's really special to me, and I think a lot of the product is just really amazing." - Gabe Erales from Dai Due Taqueria.
"My first introduction to local farmers was through Johnson's Backyard Garden, back when y’all were extremely small. Brent was at all the Farmers Markets himself, and hosting everybody on the farm very often. So, that's why I still do business with JBG... it's really special to me, and I think a lot of the product is just really amazing." - Gabe Erales from Dai Due Taqueria.
![]() "The watermelon radish, named for it’s magenta-pink striated inside similar in hue to that of a watermelon, has a pale exterior with some green coloring at the top of the root. It has a peppery taste that is mild, and a succulent crunch. Nature's neon vegetable, and natural source of Vitamin C - here for an immune boost if you're feeling low." -excerpt from Ravishing Radishes.
"The watermelon radish, named for it’s magenta-pink striated inside similar in hue to that of a watermelon, has a pale exterior with some green coloring at the top of the root. It has a peppery taste that is mild, and a succulent crunch. Nature's neon vegetable, and natural source of Vitamin C - here for an immune boost if you're feeling low." -excerpt from Ravishing Radishes.
 Photo by Scott David Gordon.
GROWING PRACTICES
- Here is a blog post about our growing practices.
- Here is a post explaining our production from seed to market (broccoli!).
- Here is a post about some of our farm machinery and systems for increased efficiency.
- Here is a post about cover crops at JBG.
- Here is a short post about weeds at the farm.
- Here is a post about Gap Audit + NICS certification.
- Here is a post about what it means to be certified organic (similar to above).
- Here is a post that may answer some questions about the use of plastic on the farm.
- Here is a post about the day in the life of our planting crew.
 "The green bean picker - this machine’s sole purpose is to pick green beans. The reason for that is that it’s super labor intensive to pick all those little green beans that are hiding in leaves. With three people we can harvest large swaths of green bean crops that would otherwise take us all day plus a lot more people." - excerpt from Farm Machinery and Efficiency.
HISTORY + CULTURE
- Here is a flashback blog post we did.
- Here is a post where Brenton answered lots of questions from social media.
- Here is a little about us video.
- Here is a video about Brenton, head farmer, and founder.
- Here is that farmer to farmer podcast episode featuring Brenton + JBG.
- Here is a post written by the farm dogs.
- Here is a post about the music at Hergotz.
- Here is a post about some volunteers.
- Here, here, here, and here are examples of a series of "CSA Member Spotlight" we do.
- Here and here are examples of a series of "First Friday Staff Picks" that we do.
- Here are a bunch of quotes from CSA Members about their JBG experience.
 "Missoula, Chucha, and Roxy are our three dreamboat farm pups, and they are so ingrained in the farm lifestyle that we would absolutely be lost without them. They serve as emotional support during those long and stressful farm days, entertainment when someone’s in dire need of a smile, companionship for farm walks long or short, and an endless supply of friendly tail wags to anyone who graces the farm. First, we will hand off the mic to Roxy." -excerpt from Farm Dog Spotlight.
CSA TIPS
- Here is a post with lots of storage recommendations for produce. This can also be found on the veggie guide.
- Here is a post about summer CSA Hacks.
- Here is a post about the necessary servings of fruits and veggies.
- Here is a post about getting your garden prepped for transplants.
- Here is a bit of info about our Referral Program.
- Here is some information about donating your share instead of postponing it.
- Here are some reasons to join the CSA.
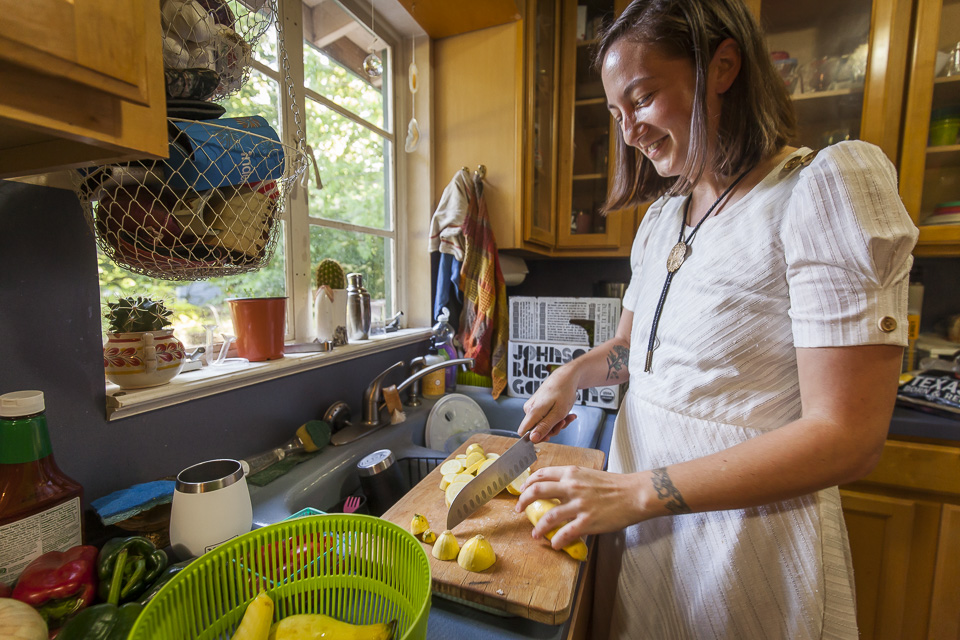 "Get yourself a good knife. The one I have, I’ve had since my college years, and I (and Hunter) sharpen often" -Megan on CSA Hacks.
PARTNERSHIPS
- Here is an article about one of our favorite partnerships that we have - with our local school district!
- Here is a post about our Sponsored Share program with The Settlement Home.
- Here and here are posts about some of our restaurant partners.
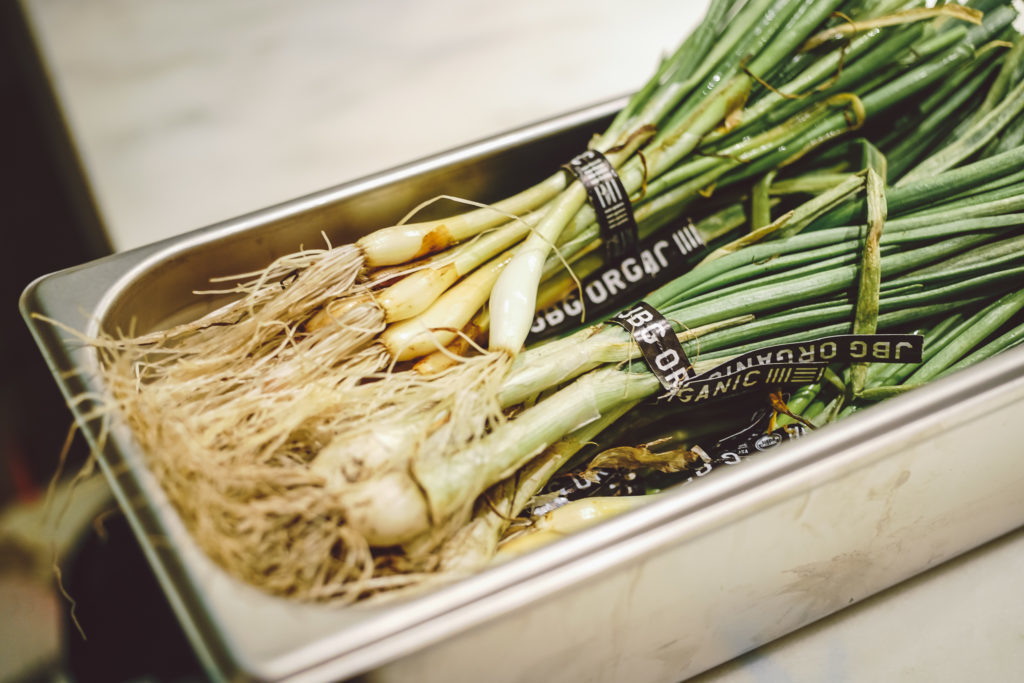 "My first introduction to local farmers was through Johnson's Backyard Garden, back when y’all were extremely small. Brent was at all the Farmers Markets himself, and hosting everybody on the farm very often. So, that's why I still do business with JBG... it's really special to me, and I think a lot of the product is just really amazing." - Gabe Erales from Dai Due Taqueria.
VEGETABLES
**What varieties we grow can change every season... so, there may be certain varieties that we don't grow anymore, and others that aren't included in these posts.- Here and here are posts about all the different peppers we grow!
- Here is a post about why we don't grow pumpkins.
- Here is a post about all the radishes we grow.
- Here is a post about some of the Asian greens we grow.
- Here is a post all about our onion production.
- Here is post about melon varieties we often grow.
- Here is a post about tomatoes - history, varieties, and more.
- Here is a post about carrots - history, fun facts, and more.
 "The watermelon radish, named for it’s magenta-pink striated inside similar in hue to that of a watermelon, has a pale exterior with some green coloring at the top of the root. It has a peppery taste that is mild, and a succulent crunch. Nature's neon vegetable, and natural source of Vitamin C - here for an immune boost if you're feeling low." -excerpt from Ravishing Radishes.
PHOTOS FROM THE FARM: 4.12.2019
04/12/19 — Heydon Hatcher
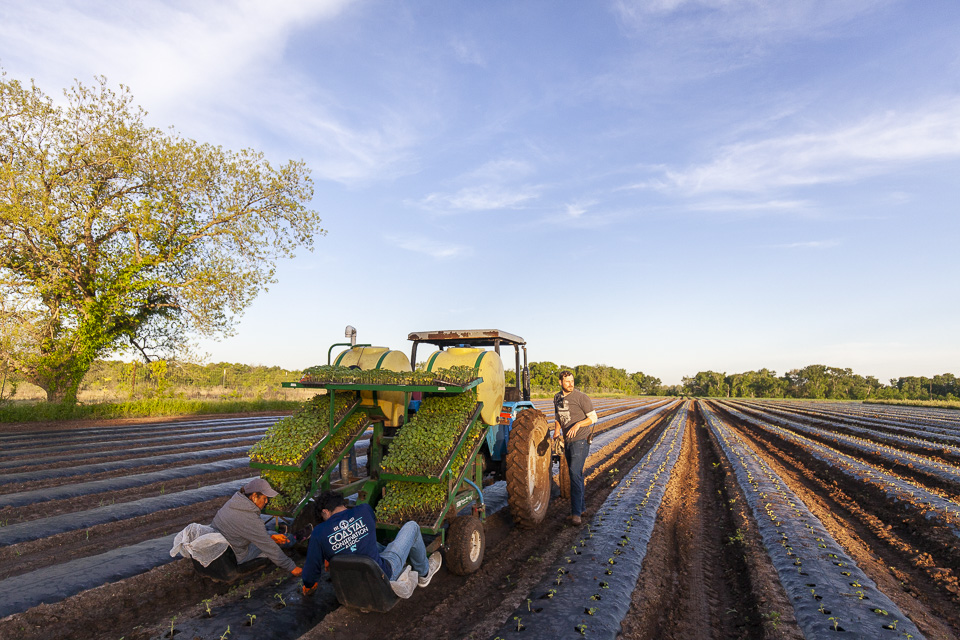 Transplants going in the ground. Photo by Scott David Gordon.
During this gorgeous week, we are busy with the usual farm business of transplanting and harvesting veggies. One of our old farm managers, Jason Hamelwright, stopped by with a gaggle of his students from Calhoun High School to volunteer! It was wonderful to see him and the students were very hard-working and eager to learn. It's forecasted to be a rainy Saturday, but we will be open at all markets rain or shine. Come support your local farmer!
We are now offering volunteer opportunities on Saturdays! Devon, our market coordinator, needs someone who is willing to help organize Saturday market returns and assist in getting everything set up for the Sunday markets. We are looking for someone to help out from 2:30 to 6:30 and you would, of course, be given a box of veggies to take home and enjoy. Email us at farm@jbgorganic.com if you are interested. Lots of heavy lifting and time spent in walk-in coolers involved!
We're excited to welcome a new vehicle to our delivery fleet - a 24-foot refrigerated truck! But, we need help to get this thing in proper delivery shape. Help us paint this baby!! Our first painting volunteer day will be on Tuesday, April 16th from 4-7pm at our 9515 Hergotz Lane location. Volunteers should have some experience painting or be artistically inclined. If you'd like to join us on April 16th, please email Ada at ada@jbgorganic.com with "Painting Volunteer" in the subject line. Please make sure to mention what experience you have wielding a paintbrush. Per usual, all volunteers are thanked with a CSA box of veggies!
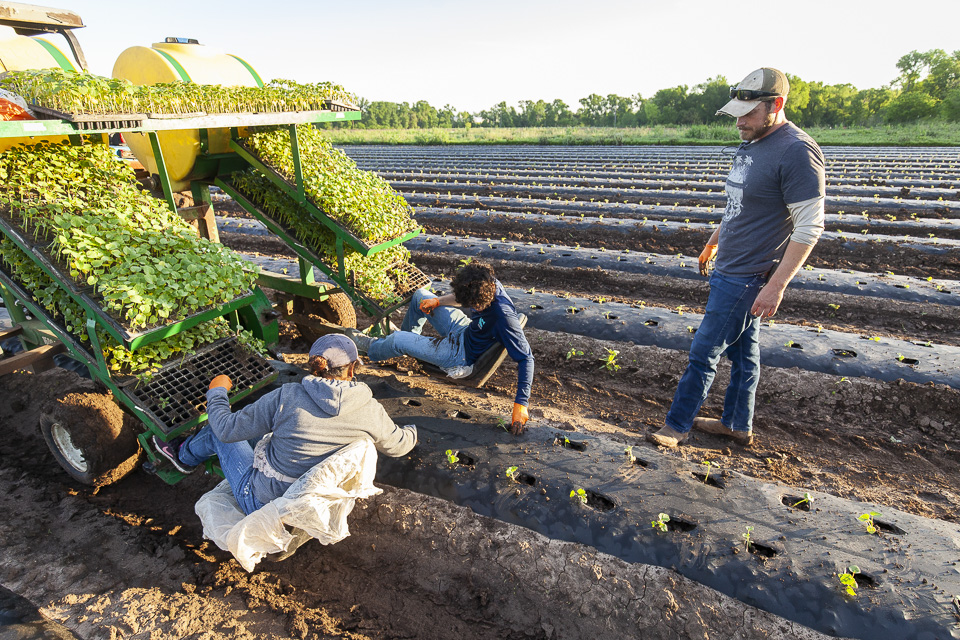 Transplant beauties. Photo by Scott David Gordon.
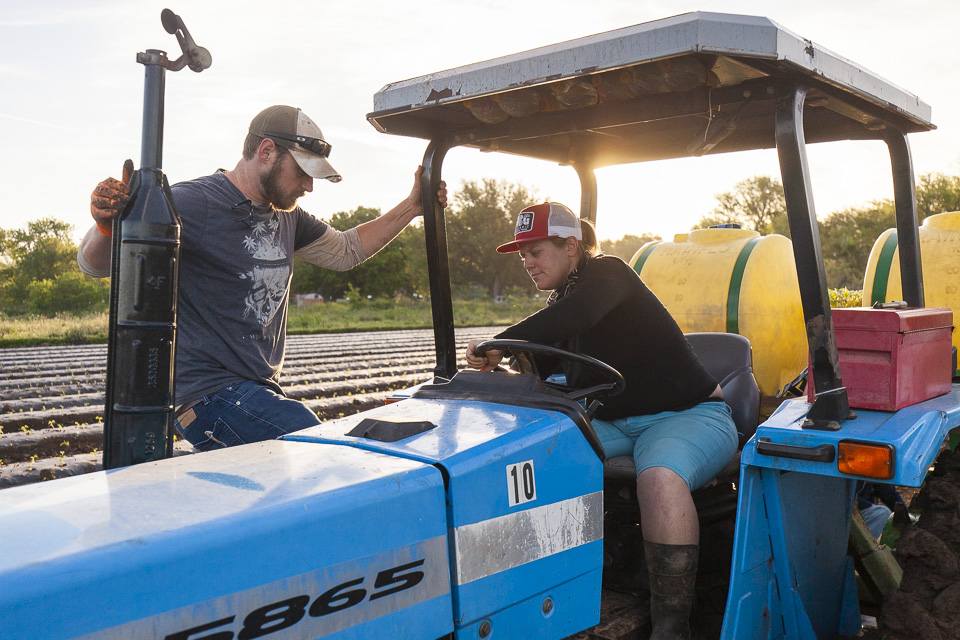 Teamwork. Photo by Scott David Gordon.
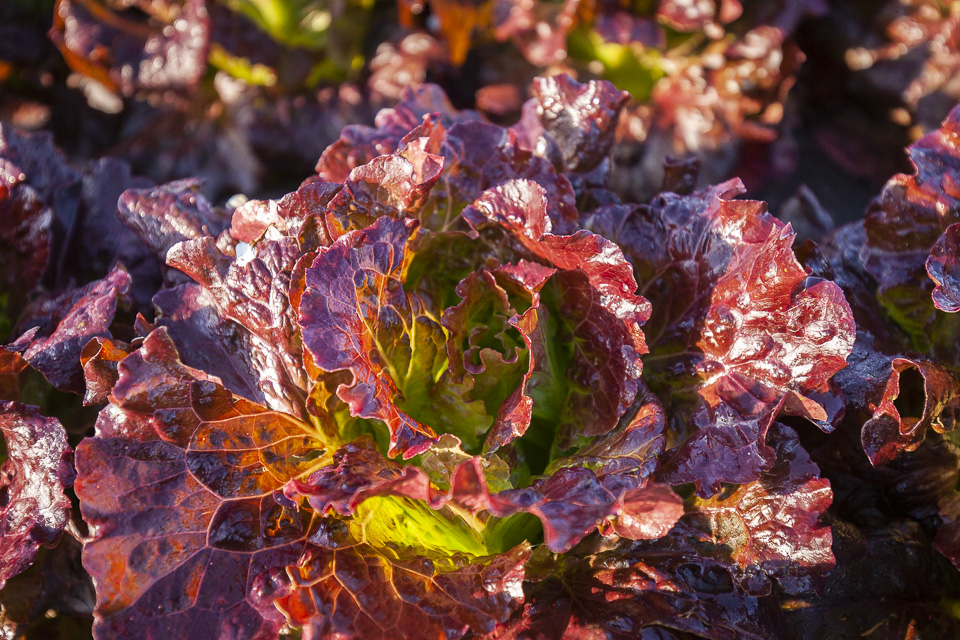 Gorgeous lettuce. Photo by Scott David Gordon.
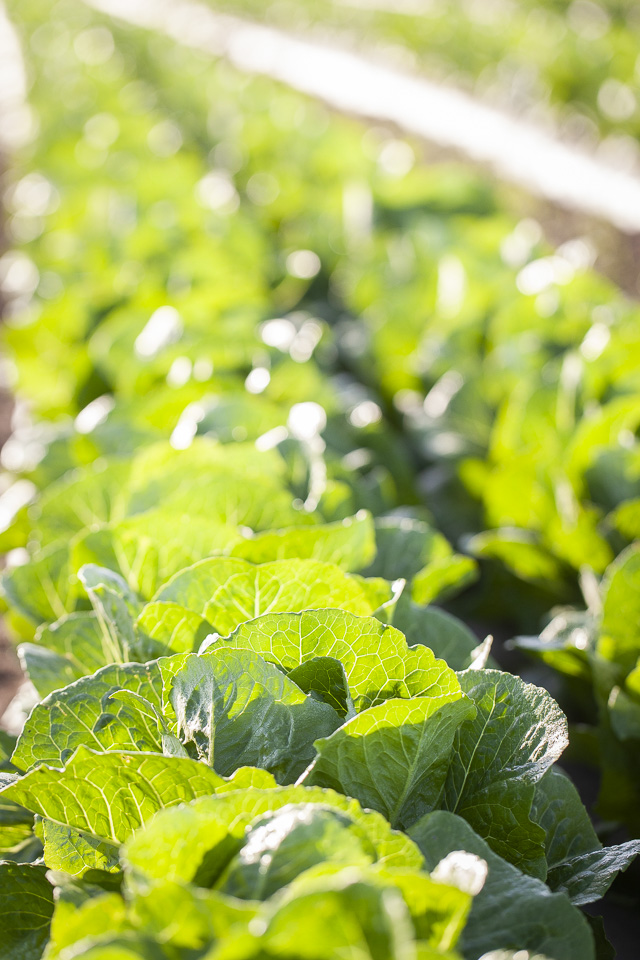 Stunning greens. Photo by Scott David Gordon.
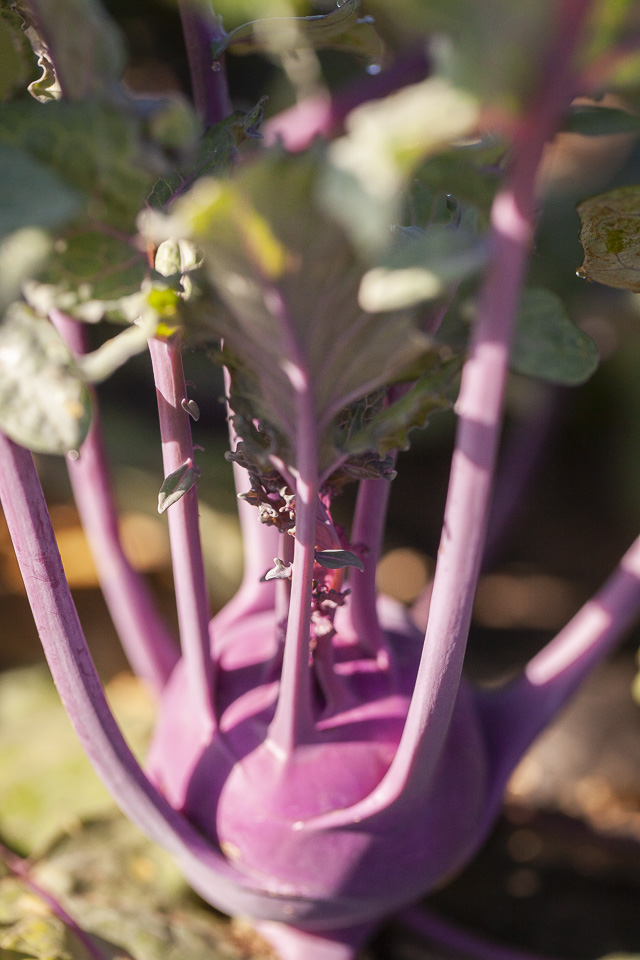 Kohlrabi. Photo by Scott David Gordon.
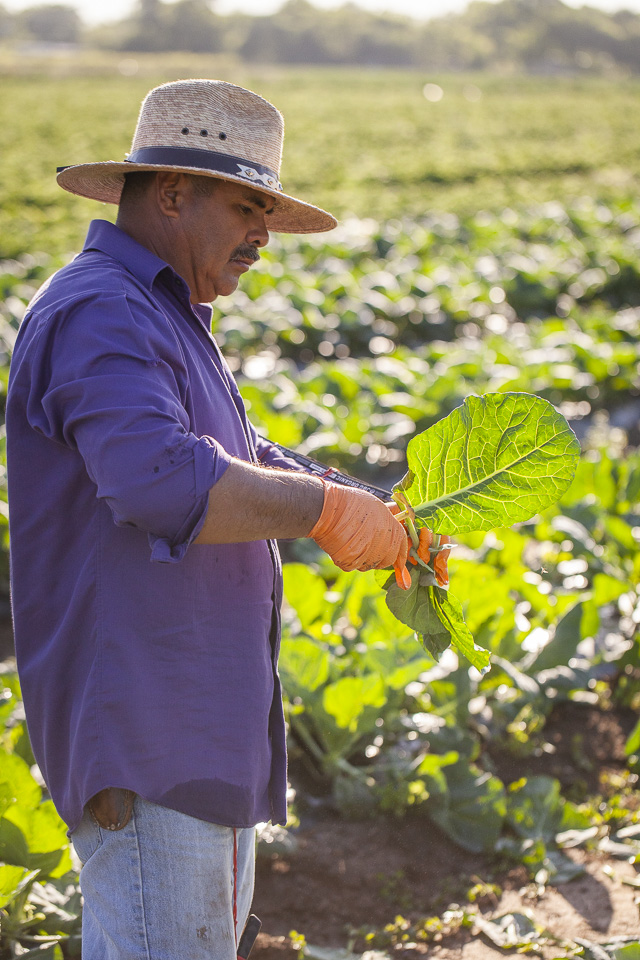 Collard harvest. Photo by Scott David Gordon.
 Collard harvest. Photo by Scott David Gordon.
 Jason Hamelwright, an old farm manager, with his students from Calhoun High School in Port LaVaca. Photo by Scott David Gordon.
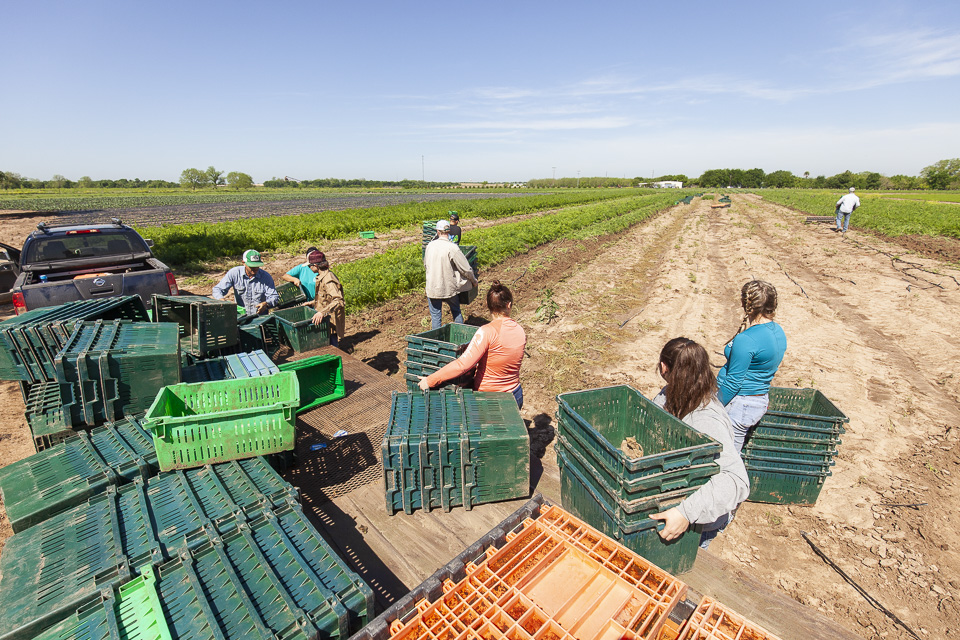 The students preparing to volunteer harvest. Photo by Scott David Gordon.
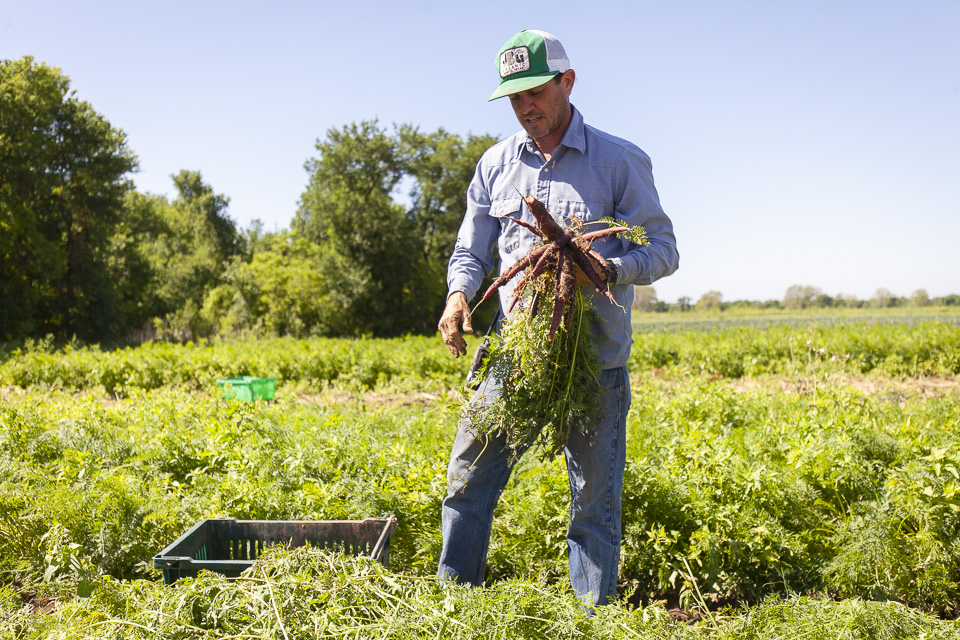 Brenton teaching the students. Photo by Scott David Gordon.
 Learning at the farm. Photo by Scott David Gordon.
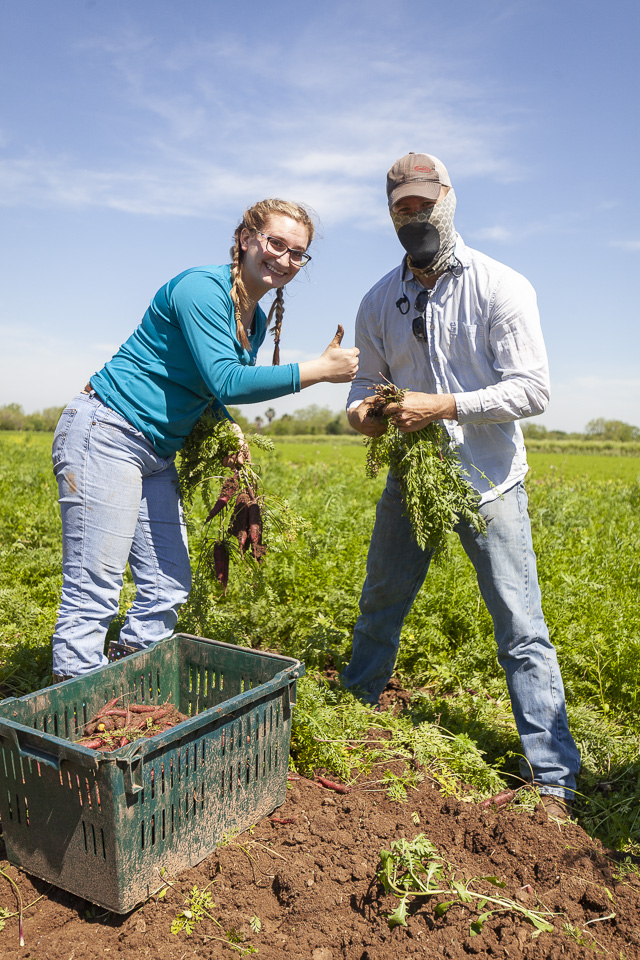 Having a great time! Photo by Scott David Gordon.
CARROT TOP WALNUT PESTO
04/11/19 — Heydon Hatcher
Author: The Migoni Kitchen / Servings: 1 Cups / Total Time: 5 minutes
We have loved getting a box of fresh vegetables every week with our CSA membership. We get carrots often and usually get the carrot top greens as well. The greens are beautiful and we feel terrible just throwing them out so we often use them to make a delicious carrot top pesto. There are so many variations on pesto that we’ve tried. The most traditional Italian pesto is hand chopped and contains basil, pine nuts, parmesan cheese, garlic, and olive oil. This definitely produces a deliciously bright pesto, but pine nuts can be pricey and basil is not the only herb that lends itself well to a pesto. You can use parsley, arugula, spinach, and of course, carrot tops, and still get a delicious pesto.
![]()
Ingredients:
![]()
Instructions:
Add your walnuts to a small saucepan over low-medium heat and toast for about 5-7 minutes or until gently browned. Shake the pan every 30 seconds or so to prevent them from burning.
Remove from heat and set aside.
Add the toasted nuts along with the remaining ingredients except for the salt and pepper to your food processor or blender.
Pulse lightly until the ingredients are well incorporated.
Add salt and pepper to taste. Store in an airtight jar for up to 1 week in the fridge.
We have loved getting a box of fresh vegetables every week with our CSA membership. We get carrots often and usually get the carrot top greens as well. The greens are beautiful and we feel terrible just throwing them out so we often use them to make a delicious carrot top pesto. There are so many variations on pesto that we’ve tried. The most traditional Italian pesto is hand chopped and contains basil, pine nuts, parmesan cheese, garlic, and olive oil. This definitely produces a deliciously bright pesto, but pine nuts can be pricey and basil is not the only herb that lends itself well to a pesto. You can use parsley, arugula, spinach, and of course, carrot tops, and still get a delicious pesto.
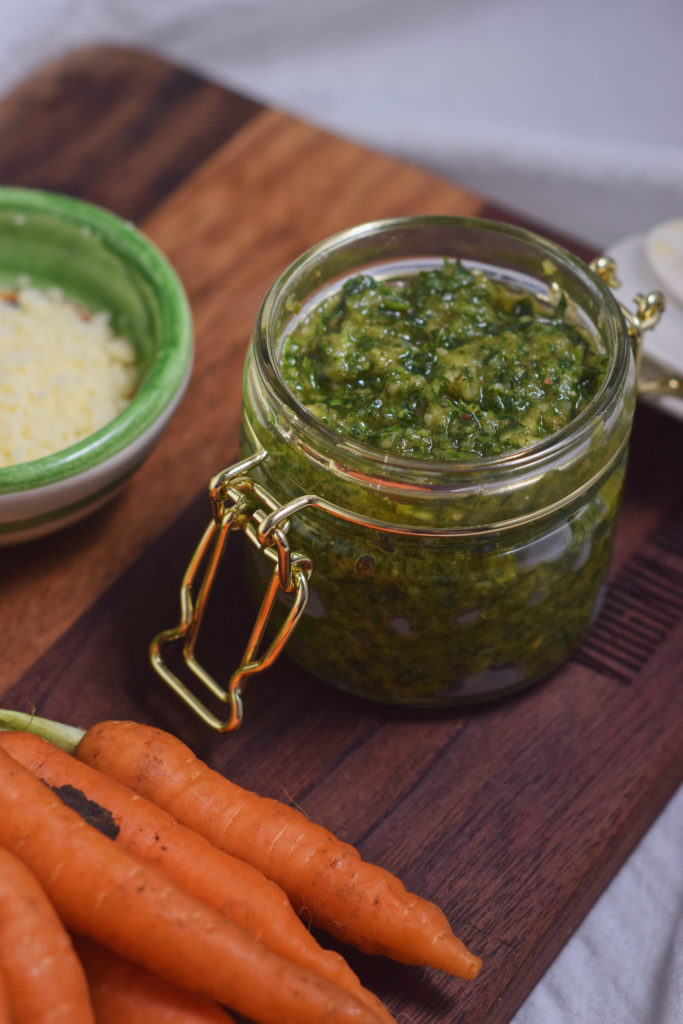
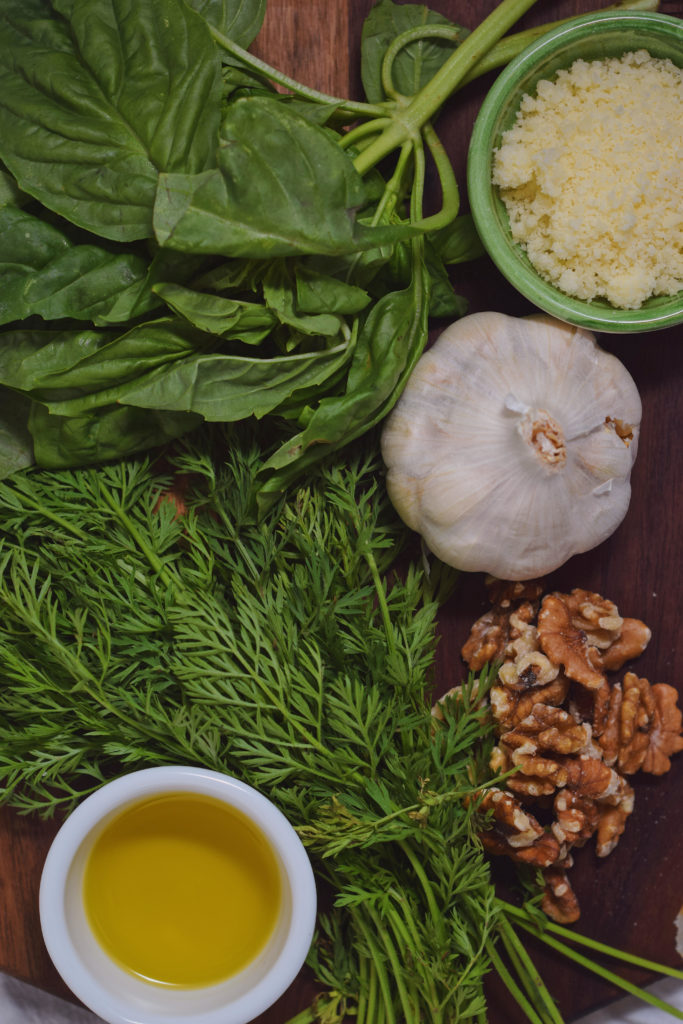
Ingredients:
- 1 Cup Carrot Tops
- 1 Cup Fresh Basil
- 1 Clove Garlic
- 1/3 Cup Walnuts Or other nuts of your choice
- 1/2 Cup Grated Parmesan Cheese
- 1/2 Cup Extra Virgin Olive Oil
- Salt and Black Pepper to taste
Instructions:
Add your walnuts to a small saucepan over low-medium heat and toast for about 5-7 minutes or until gently browned. Shake the pan every 30 seconds or so to prevent them from burning.
Remove from heat and set aside.
Add the toasted nuts along with the remaining ingredients except for the salt and pepper to your food processor or blender.
Pulse lightly until the ingredients are well incorporated.
Add salt and pepper to taste. Store in an airtight jar for up to 1 week in the fridge.


 0 ITEMS IN CART
