HERBY CHICKPEA SALAD
04/02/20 — Ada Broussard
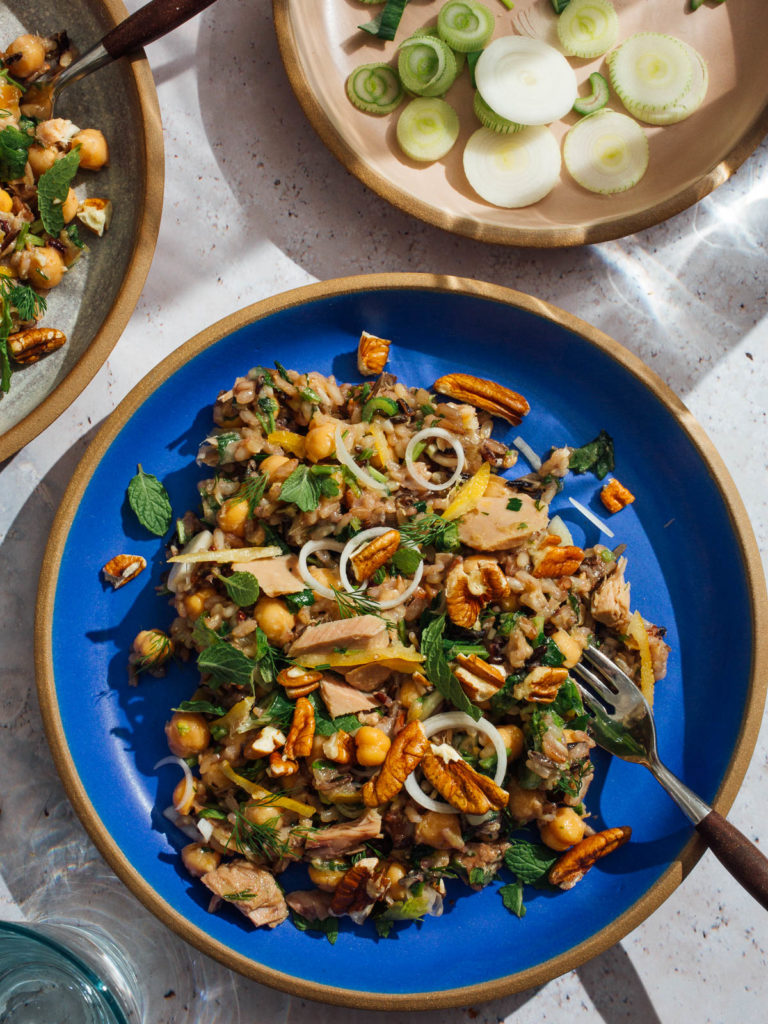
Recipe and photo by Mackenzie Smith
Our almost-20-month-old toddler and lazy pit bull pup are both having the time of their lives as my husband and I scramble to figure out this new rhythm of working two full-time jobs from home while also caring for a really cute tiny dictator. The first week of self isolation was a total mess, even with gratitude for our health and employment top of mind. It just didn’t feel like we had enough time to give to our jobs and to Maya and to whatever needed to get done around the house — or that we had anything to actually complain about, all things considered. We are swimming in privilege over here, and that is not lost on me.
Still, I am tired.
Week two has been more manageable, though I do not see any time-intensive cooking projects happening for us in the near future. My goal is to make sure everything in our CSA is consumed, and that we all enjoy 3 square meals a day. This herby grain salad with spring onion, chickpea and tinned smoked trout comes together really quickly, and makes for a solid lunch at the computer.
The beauty of spring onions is that they are so sweet and mild that they act as much like a punchy green herb as they do an allium, and this grain salad really lets them shine. I used wild rice in the photo, but this recipe works just as well with quinoa, farro or orzo. Tinned fish is a nice addition, but also completely omit-able. Roasted vegetables always welcome. I love serving this bulky grain salad on a bed of fresh dandelion greens or spicy arugula. Feta cheese never hurt a grain salad, though none made it into this photo. Use what you have and make it fashion!
- 1/3 cup olive oil
- 1 clove grated garlic
- 1/2 a preserved lemon, seeds removed and chopped (or juice and zest from one whole lemon)*
- 1/3 cup very finely chopped fresh dill
- 1 bunch parsley (stems included), finely chopped, divided in two
- If using fresh lemons, add about 1/4 teaspoon salt
- 1 large can of chickpeas, drained
- 1 can smoked trout, forked into pieces and any bones removed
- 1-2 cups wild rice, ideally cooled ahead of time
- 1 large or two small spring onions, both green and white parts sliced into circles
- salt to taste
- a handful of fresh mint leaves
- 1/3 cup chopped toasted pecans
In a large mixing bowl, combine olive oil, grated garlic, lemon, dill, 1/2 of your chopped parsley, and salt (don’t add salt if using preserved lemon). Add chickpeas and tinned fish (and roasted veg if you have), then your cooked grains. Stir in onions and the rest of your parsley. Taste, and season with salt and pepper as necessary. Top with toasted pecans, fresh mint leaves and any other accouterments that will bring joy to your salad. Count your blessings!
HECTOR'S BEET MUFFINS
04/02/20 — Ada Broussard
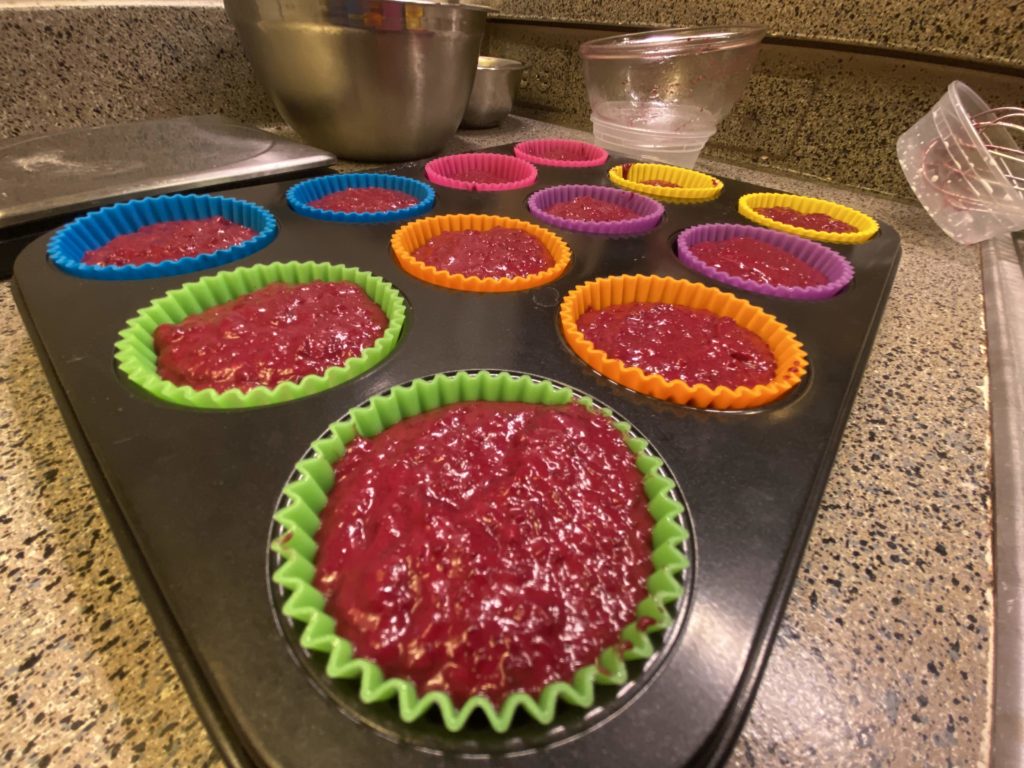
Recipe and Photos by: Héctor González Mexican at large Abuelita Profesional
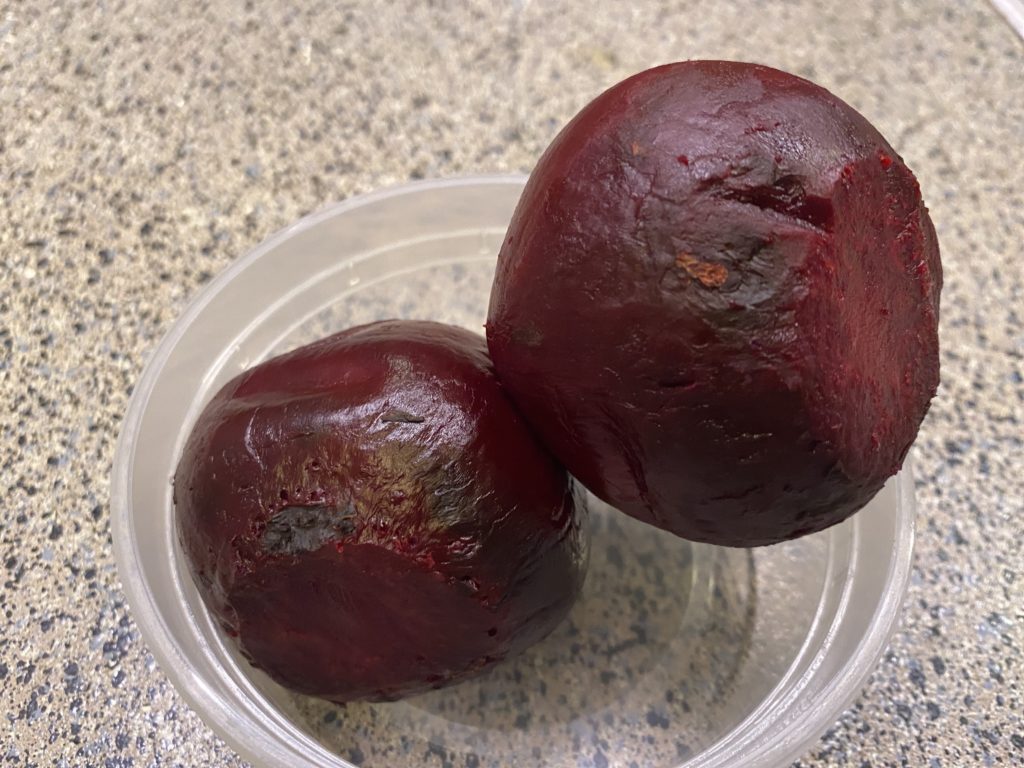
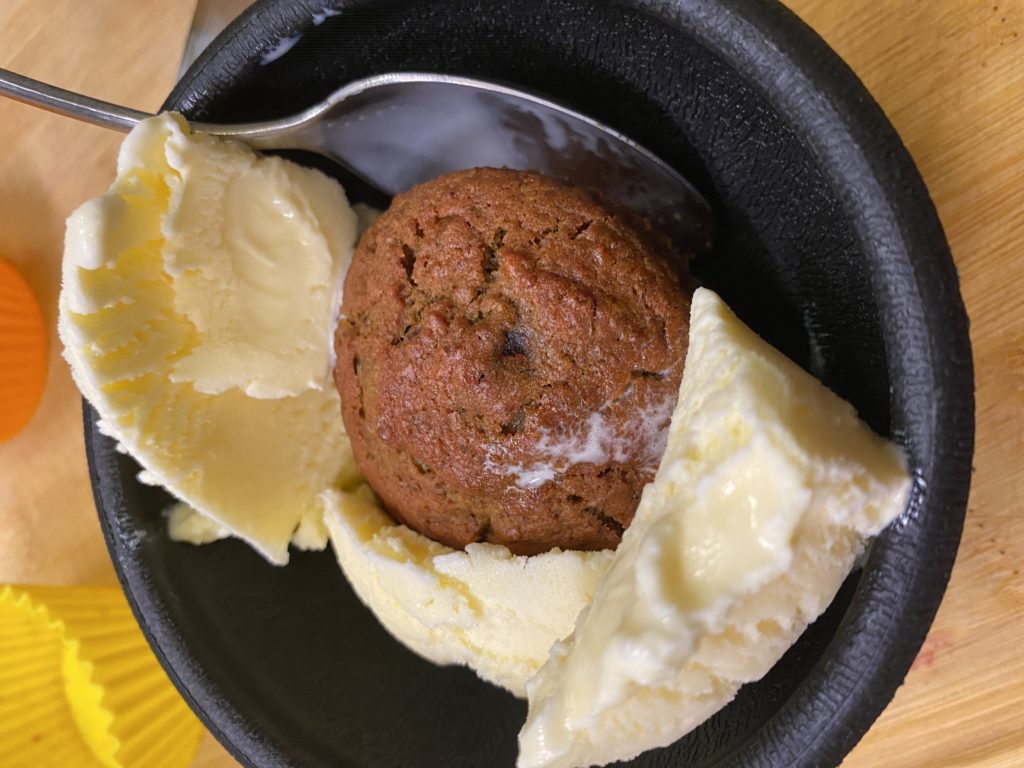
JBG's beet season is one of my favorite things. I have roasted, grilled, juiced and even made beet ketchup with this taproot. However, one of my favorite recipes is beet muffins. It started with the simple premise of baking with beets, using these the same way as carrots for a cake. After playing with the recipe, roasting the beets, then turning these into a mush. Usually 2 medium beets will produce enough mash for a good dozen.
Beet Muffins
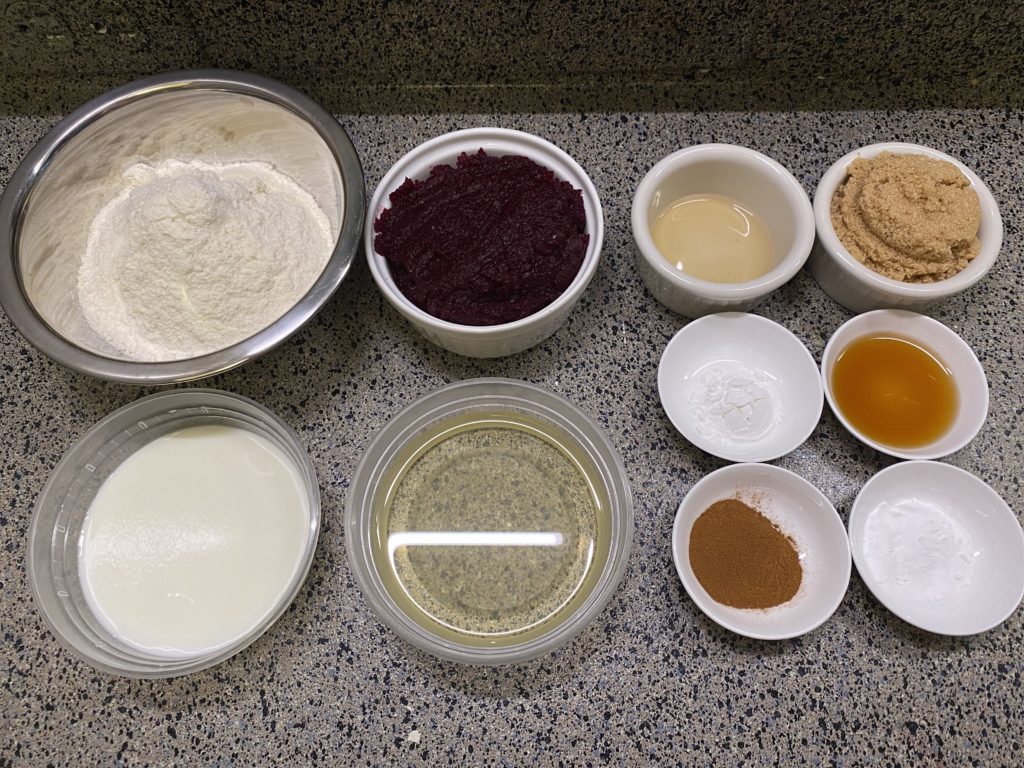
- Ingredients
- 250 g beets, shredded or mashed with a food processor or blender
- 200 g all purpose flour (You can mix with whole wheat flour, if you want)
- 100 g brown sugar
- 120 ml vegetable oil
- 120 ml liquid (you can use soy, almond, coconut, oats or any milk if desired)
- 5 g baking powder
- 5 g baking soda
- 5 ml pure vanilla extract
- 10 ml apple cider vinegar
- 2 g tsp. cinnamon
- 2 g tsp. ginger
- 1 pinch of salt

CSA BOX CONTENTS WEEK OF MAR 30TH
03/30/20 — Scott
 CSA Box Contents Week of Mar 30th
Large Box
Beets
Carrots
Greens, Chard, Rainbow
Greens, Collards
Greens, Dandelion
Greens, Kale, Curly
Greens, Kale, Dino
Greens, Spinach
Herb, Cilantro
Onion, Spring White
Roasting Veggies
Beets
Carrots
Greens, Chard, Rainbow
Greens, Collards
Greens, Dandelion
Greens, Kale, Curly
Greens, Kale, Dino
Greens, Spinach
Herb, Cilantro
Onion, Spring White
Roasting Veggies
Medium Box
Beets
Carrot, Orange
Greens, Chard, Rainbow
Greens, Collards
Greens, Dandelion
Greens, Kale, Curly
Greens, Spinach
Herb, Cilantro
Onion, Spring White
Roasting Veggies
Beets
Carrot, Orange
Greens, Chard, Rainbow
Greens, Collards
Greens, Dandelion
Greens, Kale, Curly
Greens, Spinach
Herb, Cilantro
Onion, Spring White
Roasting Veggies
Small Box
Beets
Carrot, Orange
Greens, Chard, Rainbow
Greens, Kale, Curly
Greens, Spinach
Herb, Cilantro
Onion, Spring White
Beets
Carrot, Orange
Greens, Chard, Rainbow
Greens, Kale, Curly
Greens, Spinach
Herb, Cilantro
Onion, Spring White
Individual Box
Beets
Carrots
Greens, Chard, Rainbow
Greens, Kale, Curly
Roasting Veggies
Beets
Carrots
Greens, Chard, Rainbow
Greens, Kale, Curly
Roasting Veggies
FARMSTAND AT OUR GARFIELD FARM: SATURDAY, MARCH 28TH.
03/27/20 — Ada Broussard
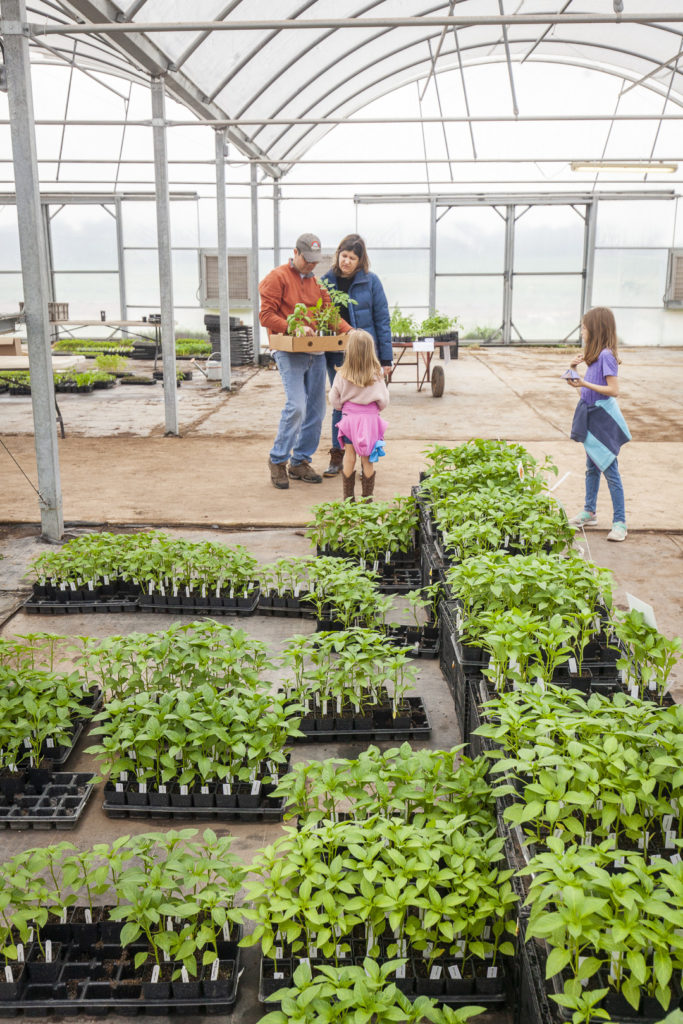
This Saturday, March 28th, we're hosting a farmstand at our Garfield, Texas farm. From 9am-2pm. Drop by the farm on Saturday to grab veggies for the week (or a couple of weeks...) as well as spring transplants. This is the last opportunity to get certified organic transplants from our farm and all transplants are discounted to $2/plant. Victory garden, anyone? We can't think of a better time to grow your own food.
When: Saturday, March 28th, 9am-2pm
Where: **4008 River Road, Garfield, 78612
What: JBG Farmstand and Transplant Sale
**Please make sure to use this address. Google may lead you astray.
Please note: We will have a modified market booth on site selling our organic produce. In addition to that, we will have a limited number of pre-packed boxes of vegetables. If you're interested in one of these, please ask your cashier if any are available.
We will be operating the farm stand following very strict no-contact and social distancing procedures. Hand washing stations are setup outside and inside the greenhouse, and we will be enacting a strict "you touch it, you buy it policy". In our experience, farmstands that we host at our out-of-town Garfield Farm have a slow stream of shoppers, and so we don't anticipate a large number of people arriving at one. Should this happen, however, we will be limiting the number of customers' in our greenhouse.
If you make your way to the farm this Saturday, we invite you to enjoy the open air our farm has to provide and take a stroll around the farm. Our spring crops look beautiful right now. Please, just make sure you practice responsible social distancing not only with others around you, but also with our crops, tools, trailers, and tractors.
MIDDLE EASTERN SPINACH PIES
03/27/20 — Ada Broussard
Middle Eastern Spinach Pies
![]()
Author: The Migoni Kitchen
Makes 16 Pies
Total Time: Approx 70-90 minutes
For the full post, head to Summer's blog.
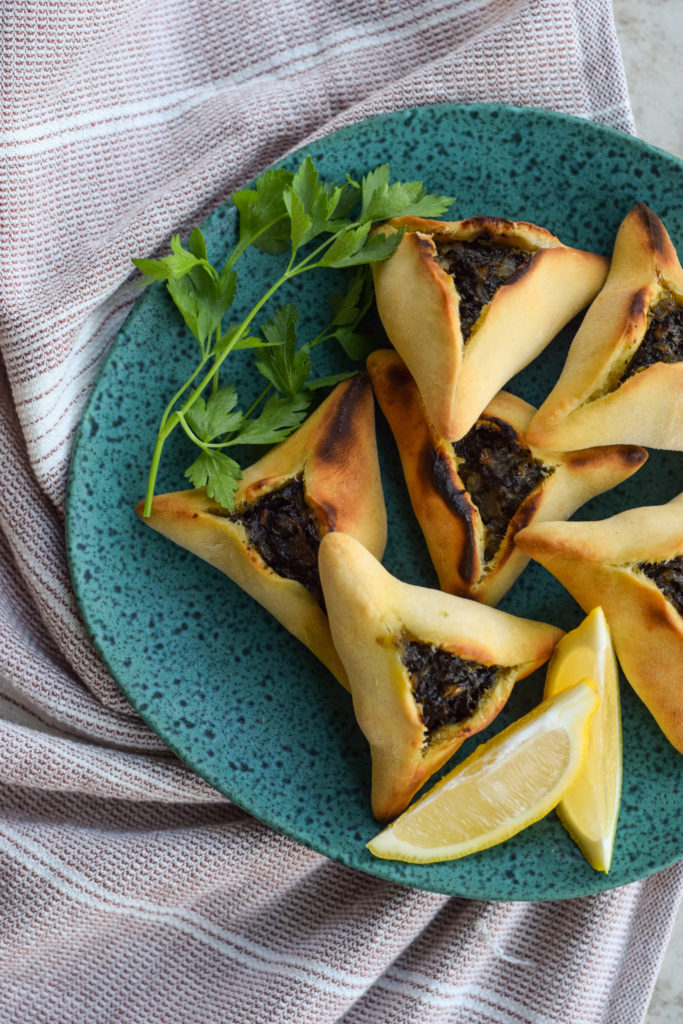
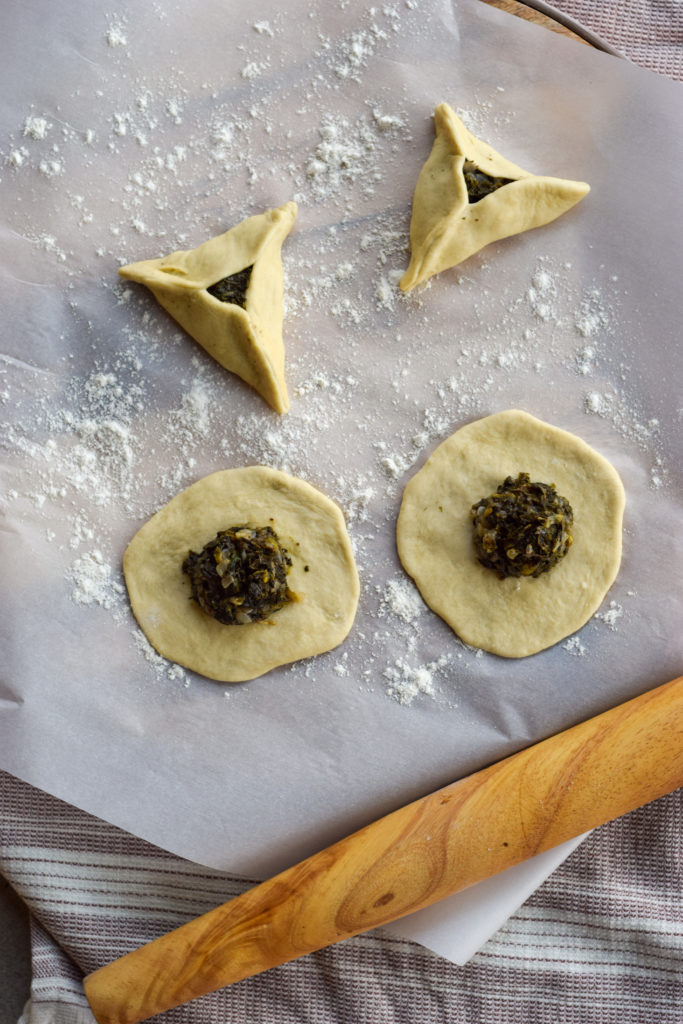
These small hand pies, otherwise known as Fatayer in Arabic, can be filled with ground beef, mixed cheeses, or spinach with assorted spices. They are usually a hit with all the kiddos in our family, plus would be super fun to get the little ones involved in making them!
It’s worth mentioning that the pies freeze amazingly well, so make a few extra and save them for later. If you’re not one for extensive cooking projects, you can swap store bought pizza dough or even crescent roll dough and still use the same spinach filling with a similar result.
The dough is very simple and similar to pizza dough, requiring yeast, flour, and water. It does require some time to rise, so you can work on preparing the filling while the dough rises. The filling is mostly spinach and onion. We opted to add in some fresh herbs like mint and parsley as well along with some lemon and sumac for freshness. Sumac is a common spice in Middle Eastern cooking that has a fresh lemony taste. Locally, it’s carried at Whole Foods and Central Market.
Ingredients:
Instructions:![]()
Author: The Migoni Kitchen
Makes 16 Pies
Total Time: Approx 70-90 minutes
For the full post, head to Summer's blog.
These small hand pies, otherwise known as Fatayer in Arabic, can be filled with ground beef, mixed cheeses, or spinach with assorted spices. They are usually a hit with all the kiddos in our family, plus would be super fun to get the little ones involved in making them!
It’s worth mentioning that the pies freeze amazingly well, so make a few extra and save them for later. If you’re not one for extensive cooking projects, you can swap store bought pizza dough or even crescent roll dough and still use the same spinach filling with a similar result.
The dough is very simple and similar to pizza dough, requiring yeast, flour, and water. It does require some time to rise, so you can work on preparing the filling while the dough rises. The filling is mostly spinach and onion. We opted to add in some fresh herbs like mint and parsley as well along with some lemon and sumac for freshness. Sumac is a common spice in Middle Eastern cooking that has a fresh lemony taste. Locally, it’s carried at Whole Foods and Central Market.
Ingredients:
Pie Dough
- 1 Packet Active Dry Yeast
- 1 Teaspoon Granulated Sugar
- 1 Cup Lukewarm Water
- 2½ Cups All Purpose Flour
- 3 Tablespoons Olive Oil
- 1 Teaspoon Kosher Salt
Spinach Filling
- 3 Tablespoons Olive Oil
- 6 Ounces Fresh Spinach Finely Chopped (can sub about 4 ounces frozen spinach)
- ½ Medium Yellow Onion Diced
- 1 Cup Fresh Parsley Chopped
- ¼ Cup Fresh Mint Chopped
- 1 Lemon Juiced
- 1 Teaspoon Kosher Salt
- 2 Teaspoons Sumac
- ½ Teaspoon Garlic Powder
Instructions:
Making the Dough
- Combine the yeast, sugar, and water into a large bowl and allow to sit for 3-5 minutes until the yeast has bubbled.
- Next, combine the flour, salt, and olive oil in a stand mixer or large mixing bowl. Add in the yeast mixture into the flour and knead until the dough is soft and no longer sticks to the bowl.
- Cover with plastic wrap and allow to rise for 30 minutes to 1 hour or until doubled in size.
The Spinach Filling
- Heat olive oil in a large saucepan over medium heat. Add in the onion and cook for 3-4 minutes until translucent.
- Add in the spinach and herbs and continue cooking for about 10 minutes, allowing the greens to wilt and most of the liquid to evaporate.
- Then, add in the remaining ingredients - lemon juice, salt, garlic powder, and sumac. Cook for another 5 minutes, then remove from heat and allow to cool.
Making the Pies
- Pre-heat the oven to 450-500F
- Once the dough has risen, take a golf-ball size piece of dough and roll out onto a floured surface into a flat disc about the size of the palm of your hand.
- Fill with approximately 2 tablespoons of the cooled spinach filling in the middle of the disc.
- Wet the edges of the dough slightly with water and pinch the edges of the dough together to sear the filling in. We make ours into triangles.
- Continue until you have used all of the filling.
- Bake on a baking sheet at 450-500F for 10 minutes or until the dough is golden brown.
TALES OF A NEW CSA MEMBER: SOME CSA HACKS FROM ONE NEWBIE TO ANOTHER
03/27/20 — Ada Broussard
 Emily's meal planning setup. Photo courtesy of her Instagram, seasonal.ish.
By Emily Laughlin (follow for more @seasonal.ish)
If you are new to CSA or recently restarted an old subscription the circumstances that brought you here are different and let’s all just pause for a moment to contemplate what the farmers and operations staff have done for years and now in this extreme time to feed us all and keep us healthy. Let’s extend huge thanks and a collective round of applause to our local farmers and operations staff for the ongoing and hard work they do. Wow!
By the time we decided to try CSA I had already tried my hand at growing vegetables in the backyard (too many squirrels), attempted to start a community garden (too much politics), and attended some farm tours before finally realizing that my best role in this may just be consistently supporting others who do that work. Would simply supporting the work of others in food production make a bigger dent in my life and the lives of others in the community? For someone searching for greater connection to food production, and cleaner healthy eating CSA was POSSIBLY the answer.
Having no idea what they were going to send me, nor any idea how to deal with all those new-to-me-veggies and what was going to do with them(?), signing up for a CSA membership has turned out to be one of the best decisions and one way I actually ENJOY SPENDING money. As an investment it multiplies and returns back in great dividends such as: healthier appetite, chance for creativity in cooking, and a greater connection to local community.
At the beginning it was a little stressful. The first few weeks went like this: “what IS this??!!?!?!!?”, “how am i going to store all this?”, oh darn I forgot to EAT THAT (stares down browning broccoli)”, And so on....it felt like the clock was ticking and the pressure was on to make use of and all this food and do what one is supposed to do…um… what is one supposed to do with an entire cardboard box full of veggies?
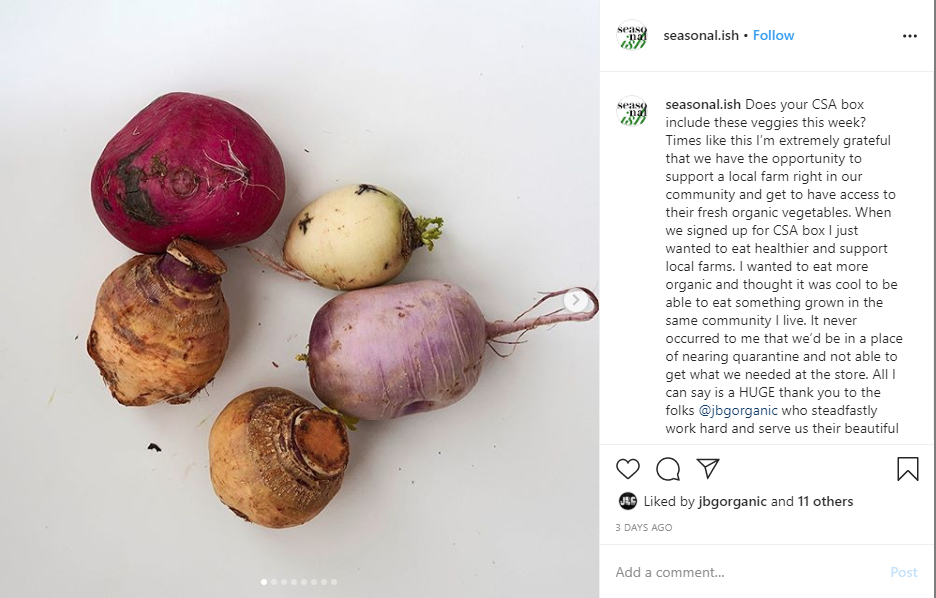 Photo courtesy of Emily's Instagram - seasnoal.ish.
Your list of CSA hacks from one semi-newbie to another:
1. Storage & Prep Upon receiving the box, set time aside immediately to store it all the right way, right away. That means mindfully clearing space in fridge the day before delivery, keeping plastic storage bags on hand and reusing them over and over. Do a little research on which veggies need to be cut or kept as-is (hint: leave cabbage alone, cut off carrot tops but save them for the recipe below) and then research which ones go in the fridge vs. what goes on the counter top vs. dark pantry shelf. If it feels overwhelming check the farm website to preview what is coming in your box and read up on the storage tips on the site too!
2. A little planning goes a long way Don’t go to any food store in the days leading up to the day you get your veggie-box-o-love. With a little planning you’ll have a better idea how you’re going to use the veg and won’t end up with doubles or extras, effectively keeping your bills lower and getting only what you need. Again, preview the selection but also know amounts can differ slightly so you might get extra of one thing and less of another sometimes and know that is just the exciting realities of living directly off the land. However, if you follow the next tip you may not need to go to any food store after all.
3. Keep key ingredients on hand and you’ll be ready to cook most things a few different ways. I’m talking things like garlic, ginger, big yellow and red onions, basic dry noodles, some key oils and sauces (soy/tamarin/coconut aminos/, sesame oil, olive oil, balsamic vinegar, white vinegar), tahini (for veggie hummus), Parmesan, a semi-soft cheese, some proteins (chicken, beef, tofu, red beans, black beans, eggs), sea salt of course, and a few favorite fresh herbs. Or better yet…..
4. Start an herb garden in the kitchen window, pots outside, in the ground… wherever it works for you to get some good light, and remember to water it. There are lots of options. Rosemary tends to grow well here as a landscape shrub for example. JBG has a transplant sale you can buy starter plants and they frequently send out dill, cilantro or parsley in the boxes. So I recommend starting with basil, oregano, and thyme.
5. Quick Pickling Get a couple wide mouth mason jars and try your hand at being a pioneer. Hah, no we have refrigeration so it’s much easier. It’s cheap and fun and so satisfying to realize how resourceful you really are. You basically heat up some water, white vinegar, sugar, and salt then poor over sliced radish, cucumbers, carrots and you’ll have a great mix for tacos, sandwiches, etc... (see below for recipe ideas)
6. When in doubt just FREEZE When something appears to be wilting I just buckle up and make something with it and share it with a friend, or have as leftovers the next couple days. If you have a busy week ahead figure out how to combine it all into one dish, make a bunch of something and then freeze half (casserole, soup, quiche for example). If they send you lots of dill for example you can cut off little bits and freeze in bags or ice trays for later use! Since becoming a CSA member I’ve gained a small sense of what living at the mercy of the seasons, weather, and land provide and thought a lot more about my ancestors. Of course we aren’t doing the heavy lifting, and day to day operational planning that comes with farming so there’s that and we also have a huge leg up with refrigeration. So use it to your advantage! Quick pickling and cooking and freezing extends the life of not only your fresh veggies but also the good intentions you’ve made by committing to a few boxes of CSA membership. It doesn’t have to be perfect but try something new before you are forced to let it go into the compost pile. And that brings me to…
7. Composting - in some parts of the delivery zone there is city compost collection. But why would you allow all that primo organic waste go away to the city when you could gather it up and create the most amazing and free fertilizer for your own landscaping needs? This topic may be worthy of a whole other post but believe me if we can do it you can do it and it’s soooo much easier and more simple than some how-tos make it sound. I’ve even heard of apartment dwellers that do it successfully. Note: If you see Live Oaks nearby they are shedding ALL their many leaves RIGHT NOW so grab a couple bags full and you can start the compost of your dreams and have a place to send all your CSA peelings, trimmings and leftovers at the end of the day.
Earlier I touched on the subtle shift I’ve experienced since becoming a CSA member. When we receive our veggies I see a person in a delivery truck I know lives in the area, and that the veggies they bring were packed recently and nearby. I see the pictures on the blog of the people and even met a few who work to make that happen. I am familiar with the ground and soil that these veggies grew in and know first hand how hard it is to grow things in the hot Texas sun and where it seems we are either experiencing a flood or drought. I know the temps we’ve had because I’ve experienced them too. And with that comes a deep appreciation for the hard work and expertise it must take and I gladly support the effort, creativity, and organization it takes to run such an operation. Being a customer allows me a part of keeping this process going and a chance to belong to a greater local community. All this reminds me to minimize my waste and not take more than I need.
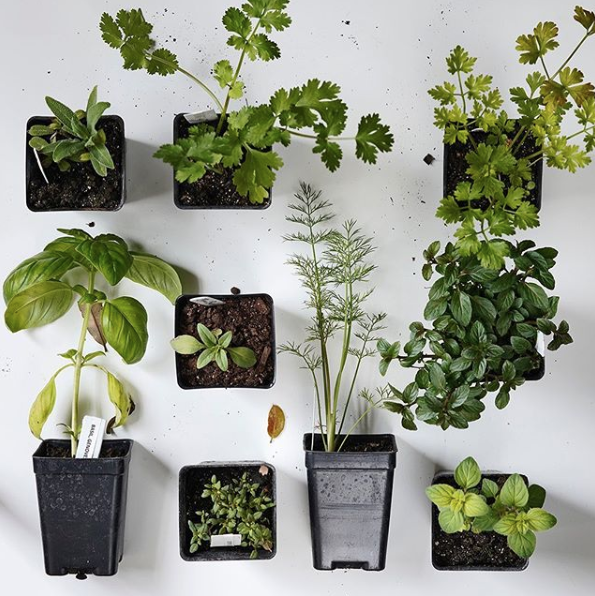 Emily's transplants that she scooped up at the JBG Transplant sale and Club Home Made gardening workshop. Photo from Instagram.
If we can learn to accept what is natural and raw from the ground in the area we live we can support a process of natural organic food creation. Being a CSA member is for good health, and also supports a healthy local food system in our community and beyond. I’m contributing just one part of that process and every time I receive my box I’m reminded of my place in that system and that’s why it’s been a great decision to become a CSA member. So I thank and applaud you too for taking a chance, supporting local farmers, and our local community. If you are looking for ideas what to cook each week, want more tips and share ideas with people who are getting the same veggies that you are follow us on Instagram @seasonal.ish and say hi!
Carrot Top Pesto
As a pesto lover it blew my prepackaged-carrot-buying mind wide open when I realized one can make PESTO with green carrot tops!!!! If you already knew this don’t judge, but if you didn’t join me this week in collective resourcefulness and creativity in making this not so exotic but delightfully new treat. The main thing here is that a lot of substitutions work with this dish. Don’t have pine nuts? Use Walnuts. I’ve even seen ingredients with cashews and macadamia nuts in them. I’ve added in mozzarella when i didn’t have enough Parmesan for example. I just hope you have garlic and olive oil.
- Ingredients
- 1 bunch of carrot tops
- 1/2 cup Olive Oil
- 1/3 cup of pine nuts or walnuts (sub other nuts)
- 1/2 cup cheese (parmesan usually but I’ve subbed in mozzarella and it worked out)
- 2 garlic cloves
- 1/2 tsp salt & pepper
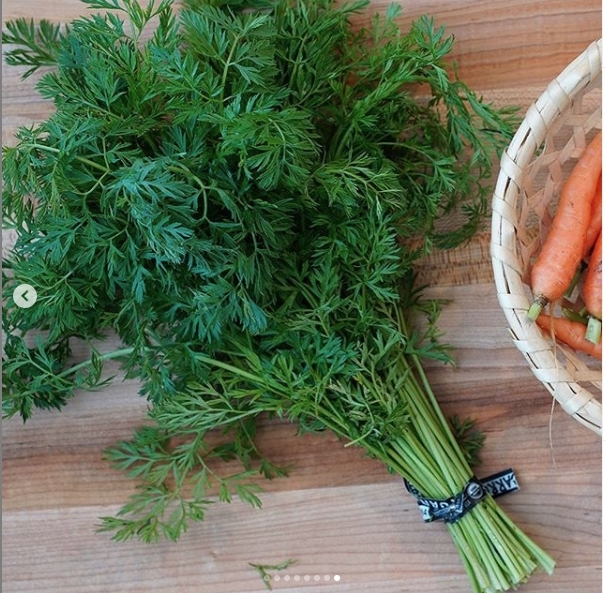 Emily's carrot tops, ready for pesto. Photo from the seasonal.ish Instagram.
PHOTOS FROM THE FARM: 3.27.20
03/27/20 — Ada Broussard
The farmers' markets in our community are important food access points and will remain open. Our booth and the way we operate, however, are very far from normal. No customers are allowed inside our booth, and designated staff are packing orders for customers on by one. Surfaces, hands, registers- they're all being sanitized on a strict schedule. The list goes on, and so do the vegetables.
![]() All of our staff are required to wear gloves and also sanitize their hands every hour. Dusty is taking up his protection to a new level with his very smart, and stealth looking mask. Photo by Scott David Gordon.
All of our staff are required to wear gloves and also sanitize their hands every hour. Dusty is taking up his protection to a new level with his very smart, and stealth looking mask. Photo by Scott David Gordon.
![]() Surprise! You're not allowed in our booths. During this time, no shoppers are allowed inside our booth and you will be greeted with a table blocking your entrance. We have designated staff to handle veggies and designated staff to handle cash, and never shall the two mix. Please come to our booth having an idea of what you would like to order - our staff will pack up a back for you. Photo by Scott David Gordon.
Surprise! You're not allowed in our booths. During this time, no shoppers are allowed inside our booth and you will be greeted with a table blocking your entrance. We have designated staff to handle veggies and designated staff to handle cash, and never shall the two mix. Please come to our booth having an idea of what you would like to order - our staff will pack up a back for you. Photo by Scott David Gordon.
![]() Ordering a CSA share is a wonderful way to facilitate quick , no contact pickup at market. Our CSA signup is temporarily closed, but feel free to enter your email when prompted on the signup page to get updates on the program. Photo by Scott David Gordon.
Ordering a CSA share is a wonderful way to facilitate quick , no contact pickup at market. Our CSA signup is temporarily closed, but feel free to enter your email when prompted on the signup page to get updates on the program. Photo by Scott David Gordon.
![]() Our golden beets are looking beautiful! Two vegetables, in one. Photo by Scott David Gordon.
Our golden beets are looking beautiful! Two vegetables, in one. Photo by Scott David Gordon.
![]() Thank a farmer, like Dusty, if you head to market. Maybe even give them an air-five. We sincerely appreciate the hard work of our market staff who are dedicated to providing the community with safe, organic, and fresh vegetables. Photo by Scott David Gordon.
Thank a farmer, like Dusty, if you head to market. Maybe even give them an air-five. We sincerely appreciate the hard work of our market staff who are dedicated to providing the community with safe, organic, and fresh vegetables. Photo by Scott David Gordon.
![]() Not only are market customers asked to social distance, but vendor booths are also spaced out from each other. We miss being huddled up next to our neighbors, but this breathing room is the way to go. Notice anything else missing from our booth? We're foregoing tablecloths right now to more easily sanitize the tables. Photo by Scott David Gordon.
Not only are market customers asked to social distance, but vendor booths are also spaced out from each other. We miss being huddled up next to our neighbors, but this breathing room is the way to go. Notice anything else missing from our booth? We're foregoing tablecloths right now to more easily sanitize the tables. Photo by Scott David Gordon.
![]() It's spring! And that means our crops aren't slowing down for anything. Photo by Scott David Gordon.
It's spring! And that means our crops aren't slowing down for anything. Photo by Scott David Gordon.
![]() This Saturday we're hosting a farmstand at our Garfield farm where you will also be able to grab Spring Transplants. If you need advice on what to plant, stand 6 feet away from Brenton and ask him yourself. Farm stand and transplant sale: 9am-2pm, 4008 River Road Garfield, 78612. Please make sure to use this address; google may lead you to our other location. Photo by Scott David Gordon.
This Saturday we're hosting a farmstand at our Garfield farm where you will also be able to grab Spring Transplants. If you need advice on what to plant, stand 6 feet away from Brenton and ask him yourself. Farm stand and transplant sale: 9am-2pm, 4008 River Road Garfield, 78612. Please make sure to use this address; google may lead you to our other location. Photo by Scott David Gordon.
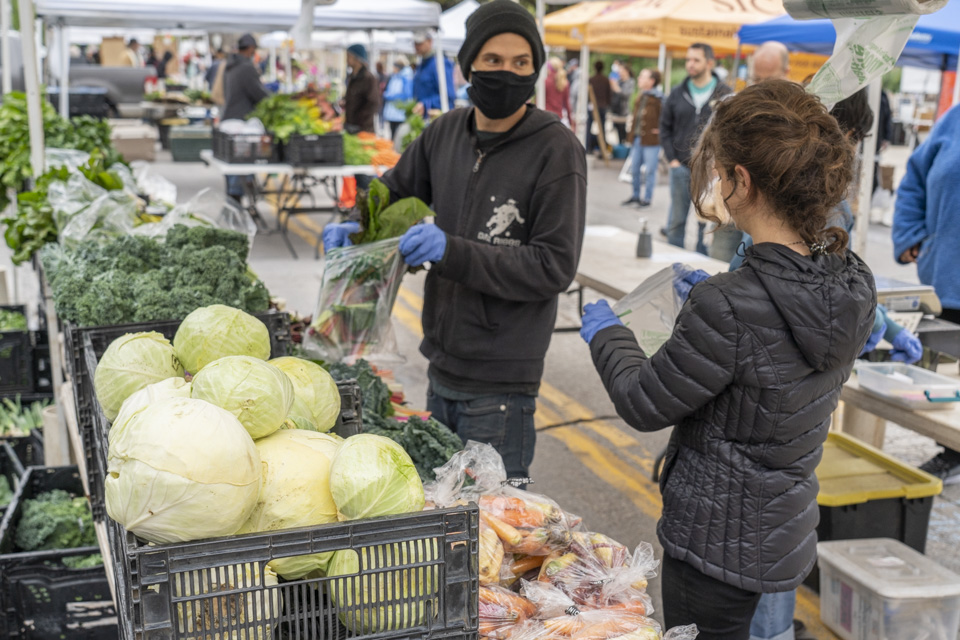 All of our staff are required to wear gloves and also sanitize their hands every hour. Dusty is taking up his protection to a new level with his very smart, and stealth looking mask. Photo by Scott David Gordon.
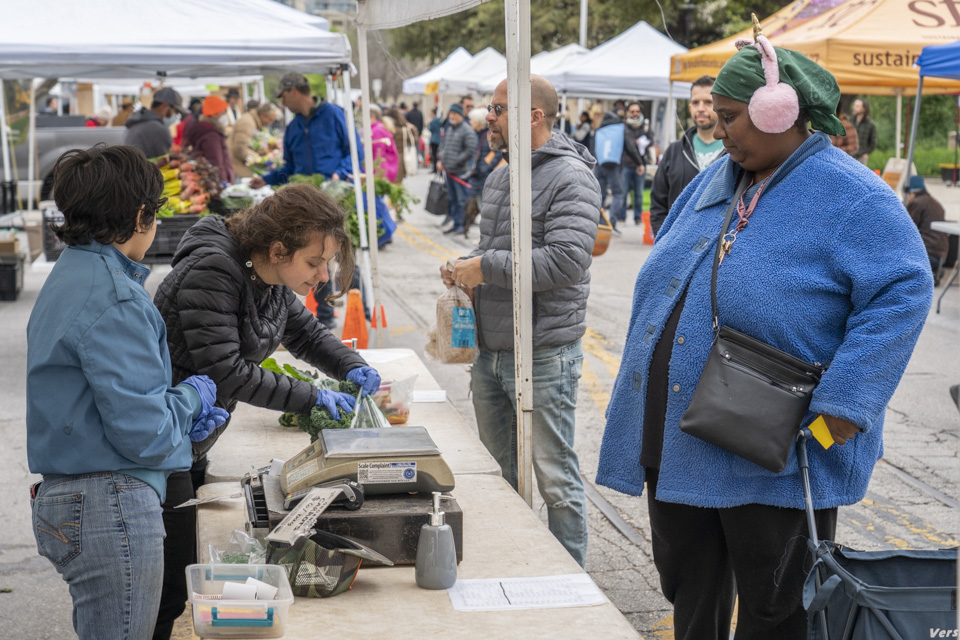 Surprise! You're not allowed in our booths. During this time, no shoppers are allowed inside our booth and you will be greeted with a table blocking your entrance. We have designated staff to handle veggies and designated staff to handle cash, and never shall the two mix. Please come to our booth having an idea of what you would like to order - our staff will pack up a back for you. Photo by Scott David Gordon.
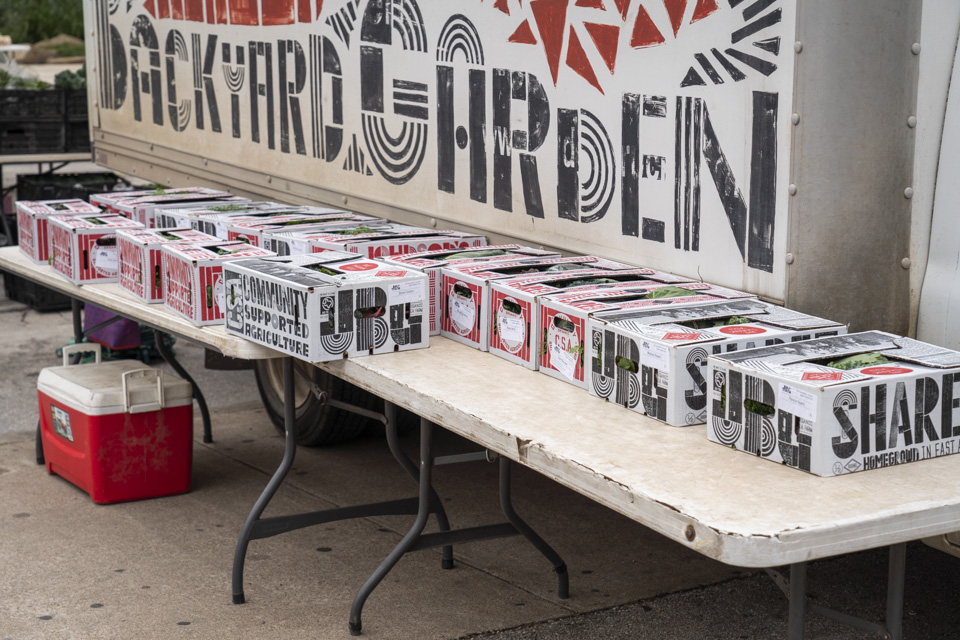 Ordering a CSA share is a wonderful way to facilitate quick , no contact pickup at market. Our CSA signup is temporarily closed, but feel free to enter your email when prompted on the signup page to get updates on the program. Photo by Scott David Gordon.
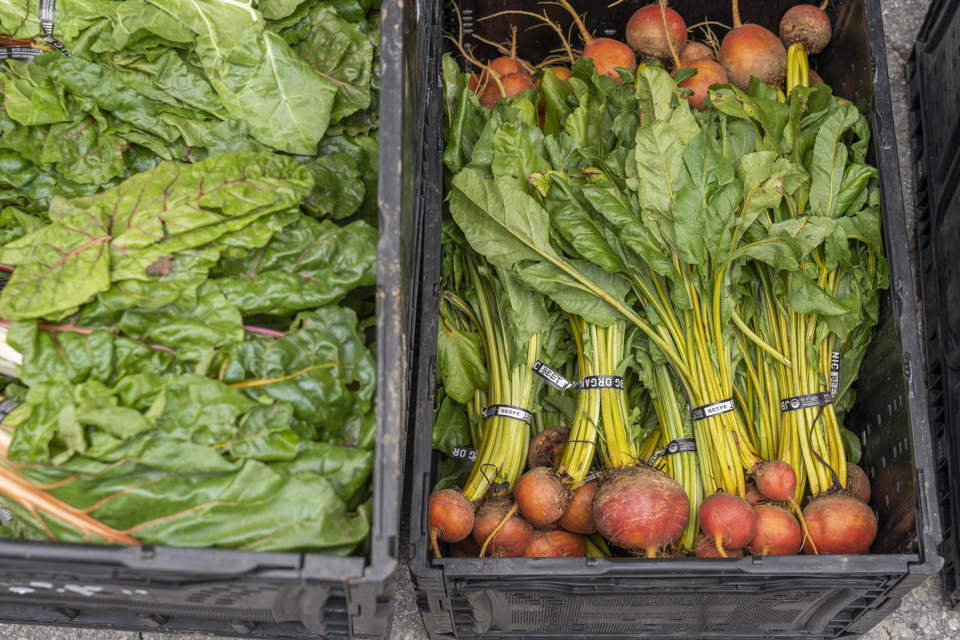 Our golden beets are looking beautiful! Two vegetables, in one. Photo by Scott David Gordon.
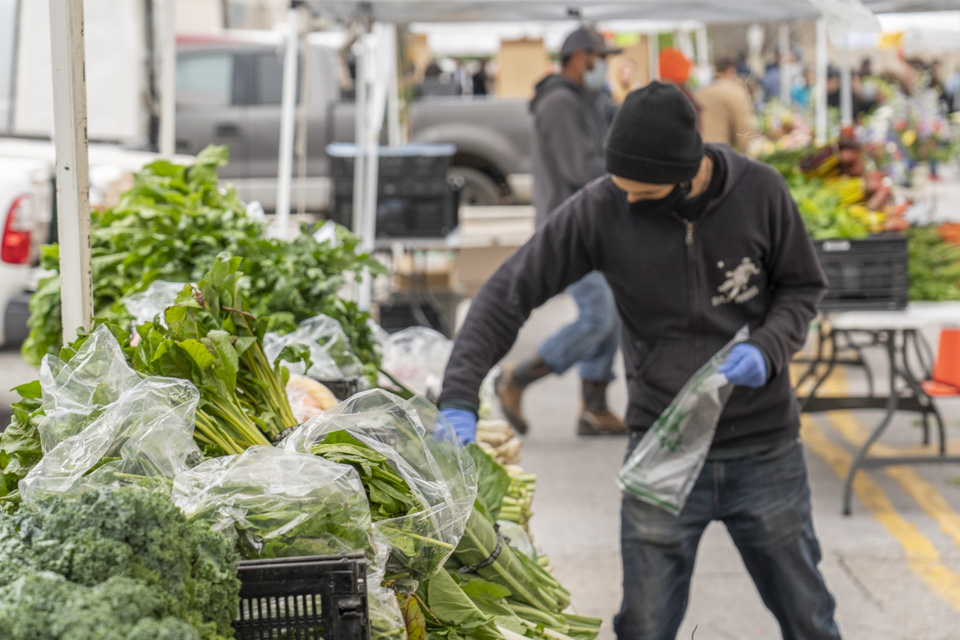 Thank a farmer, like Dusty, if you head to market. Maybe even give them an air-five. We sincerely appreciate the hard work of our market staff who are dedicated to providing the community with safe, organic, and fresh vegetables. Photo by Scott David Gordon.
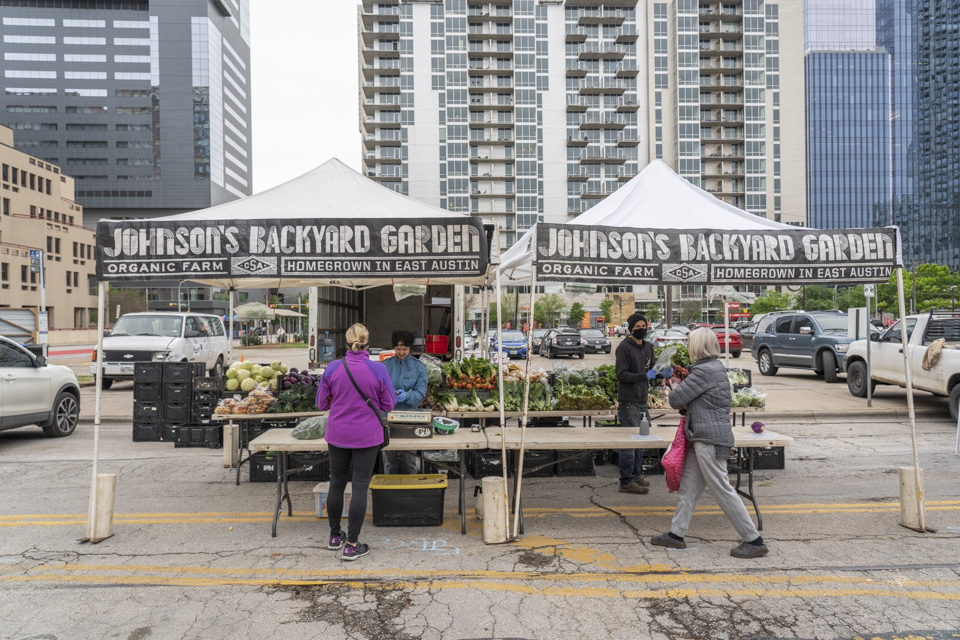 Not only are market customers asked to social distance, but vendor booths are also spaced out from each other. We miss being huddled up next to our neighbors, but this breathing room is the way to go. Notice anything else missing from our booth? We're foregoing tablecloths right now to more easily sanitize the tables. Photo by Scott David Gordon.
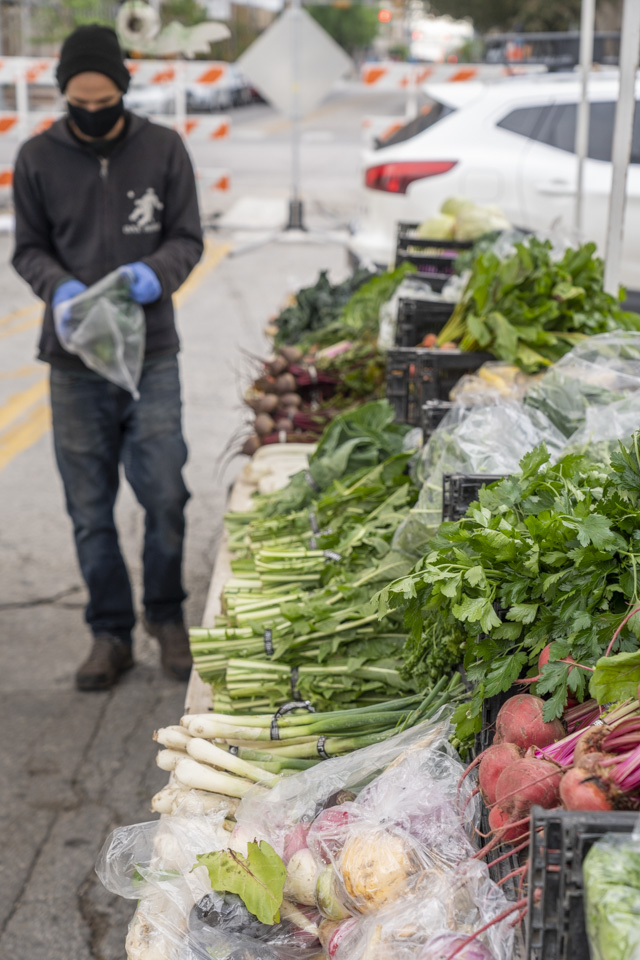 It's spring! And that means our crops aren't slowing down for anything. Photo by Scott David Gordon.
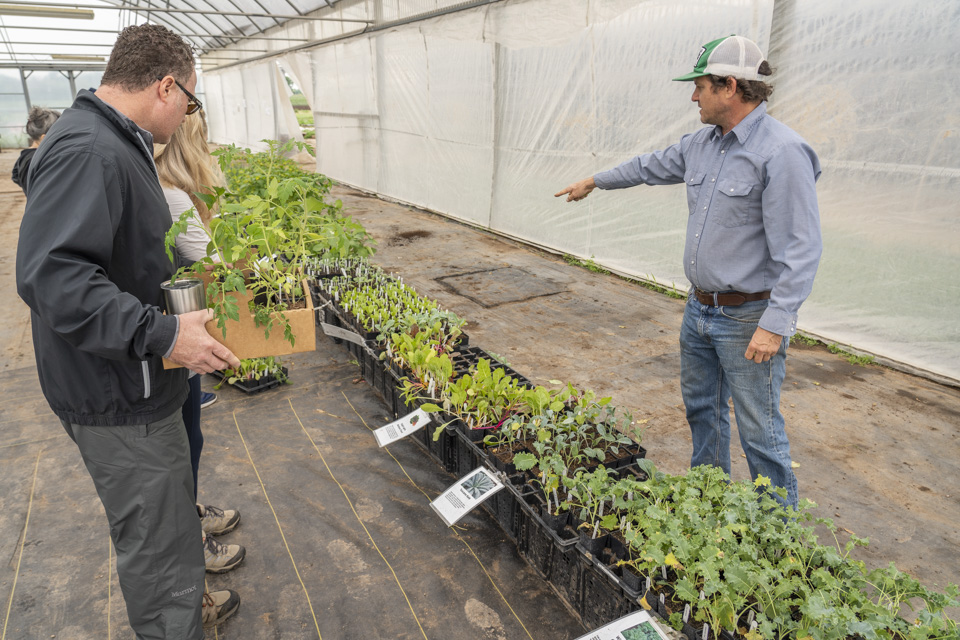 This Saturday we're hosting a farmstand at our Garfield farm where you will also be able to grab Spring Transplants. If you need advice on what to plant, stand 6 feet away from Brenton and ask him yourself. Farm stand and transplant sale: 9am-2pm, 4008 River Road Garfield, 78612. Please make sure to use this address; google may lead you to our other location. Photo by Scott David Gordon.


 0 ITEMS IN CART
