ROASTED SWEET POTATO PIE WITH SALTED MAPLE WHIPPED CREAM
11/16/17 — Heydon Hatcher
Recipe and Photos by Nadia Tamby
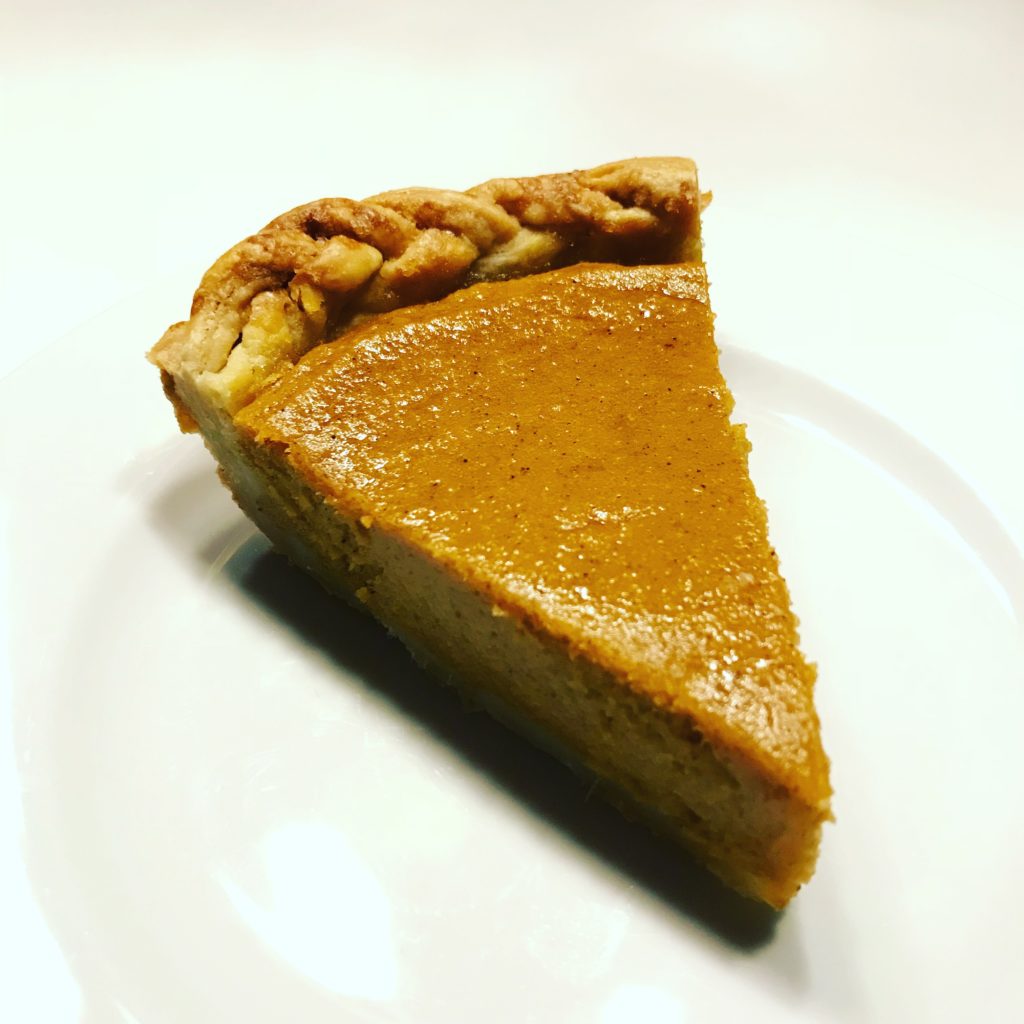
This classic Southern specialty tastes similar to pumpkin pie (or at least uses similar spices). Although, I actually prefer sweet potato pie for a couple reasons – I want to make it from scratch and somehow opening a can of pumpkin isn’t nearly as romantic as roasting the vegetable at home – but roasting and de-seeding a pumpkin is a little more of a mess than its worth. I love the smooth, dense custard filling. The nice thing about this pie is it tastes better cold (and is easier to cut into precise pieces that way), so you can make it up to two days ahead and have one thing out of the way if you plan on making this for Thanksgiving! You can easily double the dough recipe and can freeze or refrigerate the other half to use it in a pinch for another tart or pie. Of course you can skip the whole homemade dough thing if you want to save time (and a slight mess) and just buy a pre-made pie dough.
Roast more sweet potatoes than you think you need, because you can always use the leftovers for mashed sweet potatoes or an easy lunch, but having to roast more sweet potatoes will take another hour.
Sometimes sweet potatoes can get stringy on the ends after roasting. Don’t worry – this is why I use a blender for an ultra-smooth rather than a mixer for the filling. However, if you don’t want to mess with a blender, no big deal – just whip up your sweet potatoes first, then remove the strings which get caught on your paddle attachment.
![]()
Pie Ingredients:
Filling:
Crust:
Salted Maple Whipped Cream:
Extras/Tools to have on hand:
Instructions:
A day before (or up to a week before): Wrap your sweet potatoes whole in foil and roast at 425F for about 45 minutes until soft, then remove the skins (they should come off easily once cool).
Working quickly, cut your stick of butter into small cubes. I find the easiest way to do this is to cut the sticks lengthwise into thirds, then flip the stick over and cut into thirds again. Then you can slice them end to end. Put this into a large bowl with the flour and sugar and either use your hands to smash the butter into the flour, or use a pastry cutter to do this task. You’ll want all the pieces of butter to be smaller than peas but don’t overwork it. You want pieces of butter visible throughout because this is what makes that desirable flakey dough (the butter melts leaving very small air pockets between layers).
Add the ice-cold water a few tablespoons at a time until the dough can hold together. The less water you can add while forming the dough, the flakier it will be, and you will avoid having the crust shrink slightly while baking. Dump the dough onto a floured counter to prevent it from sticking.
Do not knead the dough! This is not bread, so just form it together in a ball, maybe fold it onto itself a couple times and then flatten it to a disk and wrap it in plastic wrap for at least 30 minutes. You can make the dough up to two days in advance.
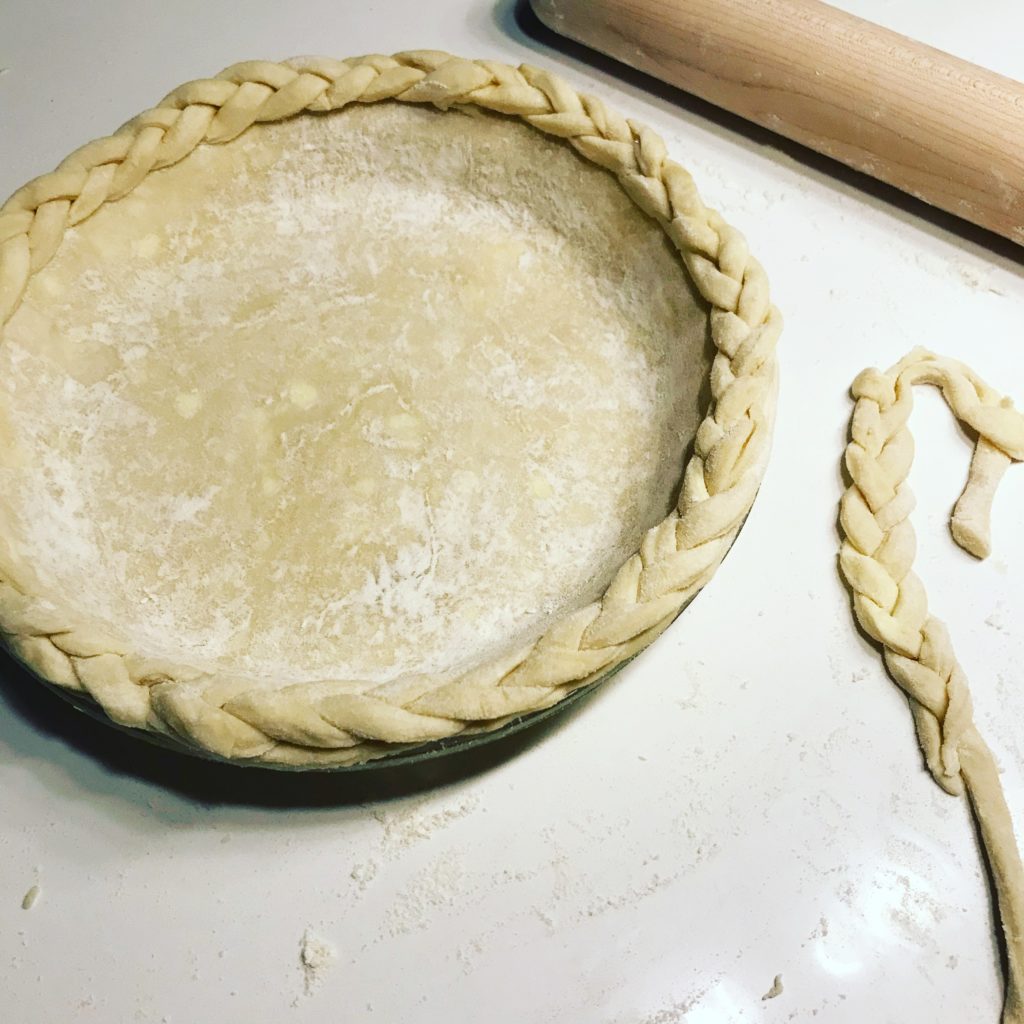
Roll the dough out to about ¼ inch thickness on a floured counter. Using your rolling pin (drape the dough over it to transfer it), place this on your pie dish, lightly press into dish, and use scissors to trim the edges. I like to use the extra trimmed dough to decorate the crust, so I rolled it into a long thing rectangle and cut it into long strips. Braid the strips and continually add strips of dough (use water to help it stick) until you have one long braid. Brush the edge of the pie crust with water and place the braided crust on top, tucking the end under to hide the seam.
![]()
Refrigerate the crust for another 10 minutes while you preheat your oven to 375F. Pre-bake your crust: Brush the edge of the curst with cream and sprinkle your decorative sugar on it. Place a sheet of aluminum foil on the bottom of the crust and fill it with pie weights or dried beans until it is slightly browned (about 15 minutes). This helps prevent the crust from getting soggy when you have a custard filling like this one.
Meanwhile, in your blender, combine all of the filling ingredients at the same time and blend until very smooth. You may add a bit more cream if needed to help your blender work, but it should be a very thick mixture (not a smoothie!) Alternately if you do this in a mixer, start with the sweet potatoes, then remove the strings from your attachment, then continue mixing on medium speed adding butter, sugar, then eggs, and then all the other ingredients.
Remove the pre-baked pie shell and reduce the oven to 350F. Pour in the filling, smooth the top and pop it back into the oven for about 35-40 minutes. When you shake the dish slightly, the filling will jiggle a bit but should be mostly set. Remove from the oven and let it cool completely before refrigerating.
To make the salted maple whipped cream, simple whip the cream and add the maple syrup and a bit of salt. Serve the pie cold with a dollop of the cream and an extra grating of nutmeg!
This classic Southern specialty tastes similar to pumpkin pie (or at least uses similar spices). Although, I actually prefer sweet potato pie for a couple reasons – I want to make it from scratch and somehow opening a can of pumpkin isn’t nearly as romantic as roasting the vegetable at home – but roasting and de-seeding a pumpkin is a little more of a mess than its worth. I love the smooth, dense custard filling. The nice thing about this pie is it tastes better cold (and is easier to cut into precise pieces that way), so you can make it up to two days ahead and have one thing out of the way if you plan on making this for Thanksgiving! You can easily double the dough recipe and can freeze or refrigerate the other half to use it in a pinch for another tart or pie. Of course you can skip the whole homemade dough thing if you want to save time (and a slight mess) and just buy a pre-made pie dough.
Roast more sweet potatoes than you think you need, because you can always use the leftovers for mashed sweet potatoes or an easy lunch, but having to roast more sweet potatoes will take another hour.
Sometimes sweet potatoes can get stringy on the ends after roasting. Don’t worry – this is why I use a blender for an ultra-smooth rather than a mixer for the filling. However, if you don’t want to mess with a blender, no big deal – just whip up your sweet potatoes first, then remove the strings which get caught on your paddle attachment.

Pie Ingredients:
Filling:
- 3 medium sweet potatoes (you’ll want about 2 cups of sweet potato puree)
- 2 large eggs, room temperature
- 1 cup sugar
- ½ teaspoon of each: cinnamon, allspice, freshly grated nutmeg
- 1 stick butter, room temperature
- 2 large eggs, room temperature
- ½ cup heavy cream
- 1 teaspoon vanilla extract
Crust:
- 1 stick butter, cold
- 1 ¼ cups flour, plus extra for dusting counter and rolling out dough
- ½ teaspoon kosher salt
- 1 tablespoon sugar
- ½ cup ice-cold water (you will not use all of it)
- 2 tablespoons heavy cream to brush the crust
- Raw sugar or sanding sugar to sprinkle on the crust
Salted Maple Whipped Cream:
- ½ pint whipped cream
- 2 or more tablespoons of good quality, real maple syrup
- Large pinch of salt
Extras/Tools to have on hand:
- Pie dish (glass or ceramic both work), rolling pin, pastry cutter (optional), blender for filling (mixer works too), electric mixer for whipping cream, pastry brush, pie weights or dried beans, aluminum foil, microplane for nutmeg (if using the whole spice)
Instructions:
A day before (or up to a week before): Wrap your sweet potatoes whole in foil and roast at 425F for about 45 minutes until soft, then remove the skins (they should come off easily once cool).
Working quickly, cut your stick of butter into small cubes. I find the easiest way to do this is to cut the sticks lengthwise into thirds, then flip the stick over and cut into thirds again. Then you can slice them end to end. Put this into a large bowl with the flour and sugar and either use your hands to smash the butter into the flour, or use a pastry cutter to do this task. You’ll want all the pieces of butter to be smaller than peas but don’t overwork it. You want pieces of butter visible throughout because this is what makes that desirable flakey dough (the butter melts leaving very small air pockets between layers).
Add the ice-cold water a few tablespoons at a time until the dough can hold together. The less water you can add while forming the dough, the flakier it will be, and you will avoid having the crust shrink slightly while baking. Dump the dough onto a floured counter to prevent it from sticking.
Do not knead the dough! This is not bread, so just form it together in a ball, maybe fold it onto itself a couple times and then flatten it to a disk and wrap it in plastic wrap for at least 30 minutes. You can make the dough up to two days in advance.
Roll the dough out to about ¼ inch thickness on a floured counter. Using your rolling pin (drape the dough over it to transfer it), place this on your pie dish, lightly press into dish, and use scissors to trim the edges. I like to use the extra trimmed dough to decorate the crust, so I rolled it into a long thing rectangle and cut it into long strips. Braid the strips and continually add strips of dough (use water to help it stick) until you have one long braid. Brush the edge of the pie crust with water and place the braided crust on top, tucking the end under to hide the seam.

Refrigerate the crust for another 10 minutes while you preheat your oven to 375F. Pre-bake your crust: Brush the edge of the curst with cream and sprinkle your decorative sugar on it. Place a sheet of aluminum foil on the bottom of the crust and fill it with pie weights or dried beans until it is slightly browned (about 15 minutes). This helps prevent the crust from getting soggy when you have a custard filling like this one.
Meanwhile, in your blender, combine all of the filling ingredients at the same time and blend until very smooth. You may add a bit more cream if needed to help your blender work, but it should be a very thick mixture (not a smoothie!) Alternately if you do this in a mixer, start with the sweet potatoes, then remove the strings from your attachment, then continue mixing on medium speed adding butter, sugar, then eggs, and then all the other ingredients.
Remove the pre-baked pie shell and reduce the oven to 350F. Pour in the filling, smooth the top and pop it back into the oven for about 35-40 minutes. When you shake the dish slightly, the filling will jiggle a bit but should be mostly set. Remove from the oven and let it cool completely before refrigerating.
To make the salted maple whipped cream, simple whip the cream and add the maple syrup and a bit of salt. Serve the pie cold with a dollop of the cream and an extra grating of nutmeg!


 0 ITEMS IN CART

